Author

Chloe Davis

Browsing

This Caramelized Banana Pudding Cheesecake concentrates the fruit on the stove first to guarantee a stable, crack-free filling. It eliminates the watery batter problem completely, leaving you with a dense, creamy center under a whipped vanilla mousse that holds its shape.

Slice of caramelized banana pudding cheesecake on a white plate showing creamy texture and fresh banana layer

Why the Stovetop Reduction Matters

Bananas hold excess water. That moisture ruins cheesecakes. By simmering the mashed fruit with dark brown sugar first, you evaporate the liquid and concentrate the flavor into a thick paste that blends seamlessly into the cream cheese. The topping is equally structural. You whip cold heavy cream directly with instant pudding mix. The fat in the cream stabilizes the starches, creating a fluffy crown that will not weep in the refrigerator.

Building and Baking the Cheesecake

Bake the crust. Press the wet sand mixture of wafer crumbs, melted butter, sugar, and salt into a lightly greased 9-inch springform pan. Bake at 350°F (175°C) for 10 minutes, then lower the oven temperature to 300°F (150°C).

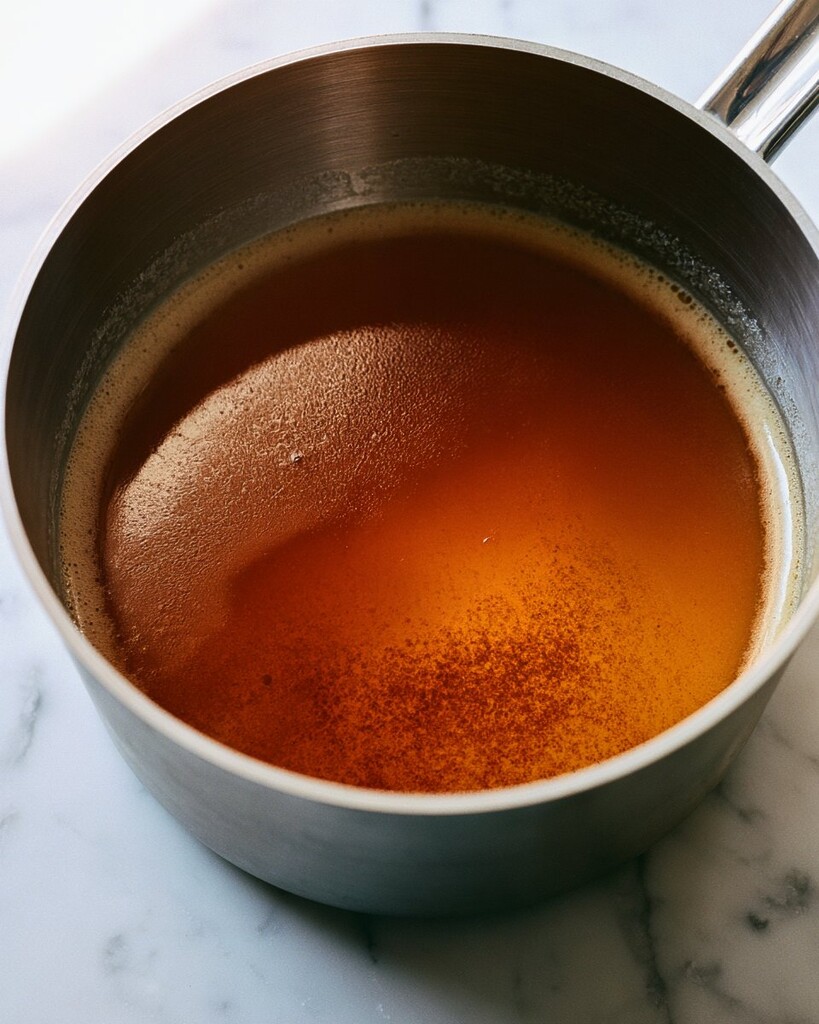
Reduce the fruit. Simmer the mashed overripe bananas, dark brown sugar, and butter in a small saucepan over medium heat. Watch the pan closely. Pull it off the heat after 5 to 7 minutes when the mixture darkens and thickens.

Mashed bananas simmering with dark brown sugar in a small stainless steel saucepan

Mix the batter. Start with room temperature cream cheese. Cold blocks leave lumps. Beat the cream cheese on medium speed for two full minutes before adding the granulated sugar to ensure a smooth base. Blend in the sour cream and the cooled banana reduction on low speed, then add the eggs one at a time just until the yolks disappear.

Layer the pan. Pour exactly half of the batter into the cooled crust. Arrange the firm-ripe banana coins in a single layer. Pour the remaining batter smoothly over the top.

Sliced banana coins arranged over cheesecake batter inside a springform pan

An even layer of firm bananas prevents the top half of the batter from sinking.

Manage the water bath. Wrap the springform pan tightly in heavy-duty aluminum foil. Set it in a large roasting pan. Pour boiling water halfway up the sides of the springform pan to insulate the batter from direct heat.

Bake and verify. Bake at 300°F. The edges will set. The center two inches must still jiggle like gelatin. For food safety and the correct structural set, I always use an instant-read thermometer; it must register exactly 155°F to 160°F (68°C to 71°C) in the center before you turn off the oven.

Cool gradually. Prop the oven door open with a wooden spoon handle for 30 minutes. Move the pan to a wire rack for 1 to 1 ½ hours. Chill in the refrigerator for at least 8 hours before proceeding.

Whip the mousse. Beat the dry instant vanilla pudding mix, cold whole milk, and cold heavy cream on medium-high speed. Stop mixing after 2 to 3 minutes when the topping becomes thick and billowy.

Vanilla pudding mousse being whipped with an electric mixer in a glass bowl

Top and serve. Spread the pudding mousse evenly over the chilled cheesecake. Toss the fresh banana slices with lemon juice to prevent browning, then arrange them on top with extra crushed vanilla wafers just before slicing.

Whole caramelized banana pudding cheesecake topped with mousse, fresh bananas, and wafer crumbs

Storage and Leftovers

  • Cover the pan loosely with plastic wrap and keep it refrigerated.
  • The stabilized mousse holds its shape for up to two days without separating.
  • Do not freeze the assembled cake, as freezing permanently alters the texture of the fresh banana coins baked inside.

Common Banana Pudding Cheesecake Questions

Can I use regular milk instead of heavy cream for the mousse?

Stick to the exact ratio of heavy cream and whole milk written in the recipe. The high fat content in the heavy cream is required to whip the instant pudding mix into a stable structure.

Why did my cheesecake crack despite the water bath?

Cracks usually form from overmixing the eggs or rapid temperature changes. Blend the eggs on low speed just until the yolks disappear, and do not skip the gradual 30-minute cooling period in the turned-off oven.

I serve this straight from the fridge while the mousse is still cold and structural. The contrast between that airy topping and the dense, caramelized center makes the overnight chill entirely worth the wait.

Print
clockclock iconcutlerycutlery iconflagflag iconfolderfolder iconinstagraminstagram iconpinterestpinterest iconfacebookfacebook iconprintprint iconsquaressquares iconheartheart iconheart solidheart solid icon
Whole caramelized banana pudding cheesecake topped with mousse, fresh bananas, and wafer crumbs

5 Stars 4 Stars 3 Stars 2 Stars 1 Star

No reviews

Caramelized Banana Pudding Cheesecake

Recipe by Chloe Davis

This version takes everything you love about classic banana pudding and bakes it into a rich, creamy centerpiece with significantly less fuss. By quickly caramelizing the bananas on the stovetop instead of roasting them in their skins, you concentrate their flavor and eliminate excess water for a silky, crack-free filling. The real star, though, is the one-bowl vanilla pudding mousse topping—it whips instant pudding mix directly with heavy cream for a stabilized, airy crown that won’t weep in the fridge.


  • Total Time12 hours 10 minutes
  • Yield1 9-inch cheesecake (serves 12) 1x

Find it on your board when it's time to cook

Ingredients

Scale

Vanilla Wafer Crust

  • 2 cups (200g) vanilla wafer crumbs (about 45 to 50 cookies)
  • 5 Tablespoons (70g) unsalted butter, melted
  • 2 Tablespoons (25g) granulated sugar
  • ¼ teaspoon kosher salt

Caramelized Banana Base

  • 3 large overripe bananas, mashed (about 1 ½ cups or 340g)
  • 2 Tablespoons (25g) dark brown sugar
  • 1 Tablespoon (14g) unsalted butter
  • 1 teaspoon vanilla extract

Cheesecake Filling

  • 32 ounces (900g) full-fat cream cheese, completely softened at room temperature
  • 1 cup (200g) granulated sugar
  • ¾ cup (170g) full-fat sour cream, at room temperature
  • 4 large eggs, at room temperature
  • 1 large firm-ripe banana, peeled and sliced into ¼-inch coins

One-Bowl Pudding Mousse

  • 1 box (3.4 ounces / 96g) instant vanilla pudding mix
  • 1 cup (240ml) whole milk, very cold
  • 1 cup (240ml) heavy cream, very cold

Garnish

  • Handful of lightly crushed vanilla wafers
  • 1 fresh banana, sliced
  • 1 teaspoon lemon juice


Instructions

  1. Bake the crust: Preheat the oven to 350°F (175°C). Lightly grease a 9-inch springform pan. In a medium bowl, stir together the vanilla wafer crumbs, melted butter, granulated sugar, and kosher salt until the mixture resembles wet sand. Press the crumbs firmly into the bottom and about 1 inch up the sides of the prepared pan. Bake for 10 minutes, then set aside on a wire rack to cool. Lower the oven temperature to 300°F (150°C).
  2. Caramelize the bananas: In a small saucepan over medium heat, combine the mashed overripe bananas, dark brown sugar, and 1 Tablespoon of butter. Simmer, stirring frequently, for 5 to 7 minutes until the mixture darkens, thickens slightly, and smells deeply caramelized. Remove from the heat, stir in the vanilla extract, and let the mixture cool to room temperature.
  3. Mix the cheesecake batter: In the bowl of a stand mixer fitted with the paddle attachment (or using a large bowl and a hand mixer), beat the softened cream cheese on medium speed for 2 minutes until entirely smooth. Add the granulated sugar and beat for 1 minute more. Scrape down the bottom and sides of the bowl.
  4. Add the flavorings and eggs: Reduce the mixer speed to low. Blend in the sour cream and the cooled caramelized banana mixture just until combined. With the mixer still on low, add the eggs one at a time, mixing just until the yolk disappears before adding the next. Do not overmix. Gently fold the batter once or twice with a silicone spatula to ensure there are no hidden pockets of cream cheese.
  5. Layer and prepare the water bath: Pour exactly half of the cheesecake batter into the cooled crust. Arrange the sliced firm-ripe banana coins in a single, even layer over the batter. Gently pour the remaining batter over the top, smoothing it into an even layer. Wrap the bottom and sides of your springform pan tightly in a double layer of heavy-duty aluminum foil, then place it inside a large roasting pan. Carefully pour boiling water into the roasting pan until it reaches halfway up the sides of the springform pan.
  6. Bake the cheesecake: Carefully transfer the roasting pan to the oven and bake at 300°F (150°C) for 1 hour 30 minutes to 1 hour 40 minutes. The edges should be perfectly set, but a 2-inch circle in the very center should still jiggle slightly like gelatin. For food safety and proper setting, an instant-read thermometer inserted into the center must register between 155°F and 160°F (68°C to 71°C).
  7. Cool safely: Turn the oven off completely. Leave the cheesecake in the oven and prop the oven door open slightly with the handle of a wooden spoon. Let it cool gently in the warm oven for exactly 30 minutes. Remove the springform pan from the water bath, discard the foil, and place the cheesecake on a wire rack. Let it cool on the counter for 1 to 1 ½ hours, just until it reaches around 70°F (21°C). Do not let it sit at room temperature for longer than 2 hours total after coming out of the oven.
  8. Chill immediately: Cover the cheesecake loosely with plastic wrap and transfer it to the refrigerator before it is completely cold to rapidly drop its internal temperature safely below 41°F. Chill for at least 8 hours (or up to 2 days) to fully set.
  9. Whip the pudding mousse: When ready to serve, remove the sides of the springform pan and transfer the cheesecake to a serving platter. In a large mixing bowl, combine the dry instant vanilla pudding mix, cold whole milk, and cold heavy cream. Beat on medium-high speed with an electric mixer for 2 to 3 minutes. The mixture will quickly transform into a thick, billowy, mousse-like topping.
  10. Top and serve: Spread or pipe the pudding mousse evenly over the chilled cheesecake. Toss the remaining sliced fresh banana with the lemon juice to prevent browning. Garnish the top of the cheesecake with the banana slices and extra crushed vanilla wafers immediately before slicing and serving.
Find it on your board when it's time to cook

Notes

  • Why it works: Reducing the mashed bananas in a saucepan cooks out their excess water. Bananas contain a lot of moisture, which is the primary culprit behind cracked cheesecakes and watery batters. Caramelizing them first guarantees a dense, rich texture with concentrated flavor.
  • The mousse shortcut: Using heavy cream as half of the liquid for the instant pudding mix eliminates the need to make a separate batch of whipped cream. The fat in the heavy cream whips up beautifully with the starches in the pudding, creating a fluffy topping that holds its shape for days without weeping.

Nutrition (per serving — estimates)

Calories: 660 | Total Carbs: 60g (Fiber: 2g, Sugar: 45g) | Fat: 44g (Saturated: 25g) | Protein: 9g

Nutritional values are approximate, based on standard reference data (USDA FoodData Central). Actual values vary by brand and exact measurements. For precision, use a tracker like MyFitnessPal or Cronometer.

  • Prep Time: 30 minutes
  • Cooling Time: 2 hours
  • Cook Time: 1 hour 40 minutes
  • Category: Dessert
  • Method: Baked
  • Cuisine: American

Nutrition

  • Serving Size: 1 slice
  • Calories: 660
  • Sugar: 45g
  • Fat: 44g
  • Saturated Fat: 25g
  • Carbohydrates: 60g
  • Fiber: 2g
  • Protein: 9g

This Mediterranean baked white fish uses a high-heat oven to collapse cherry tomatoes and olives into a rich pan sauce. I make it whenever I need a fast dinner that leaves the fillets flaking apart at the nudge of a fork.

A tender portion of baked white fish resting in a ceramic bowl, surrounded by blistered cherry tomatoes, Kalamata olives, and fresh dill

Why High-Heat Roasting Works

The oven runs hot. The prep takes minutes. Baking at 425°F forces the tomatoes to burst and release their juices into the oil while the fillets cook rapidly before they can dry out. We skip mincing the garlic and slice it thin instead. A fine mince burns at this temperature, but the thin slices gently confit in the pan and flavor the base without turning bitter.

Building the Mediterranean Baked White Fish

Dry the fillets completely. Moisture is the enemy of roasting. Pat your fish with paper towels until the surface feels entirely dry. Skipping this step means the fillets will steam in their own liquid instead of taking on the seasoned oil, leaving you with a mushy exterior.

Assemble the base layer. Dump the halved tomatoes, chopped Kalamata olives, and sliced garlic into a glass baking dish. Add the olive oil and herbs. Tossing everything ensures the vegetables are fully coated, and spreading them out in an even layer prevents anything from piling up in the center.

Halved cherry tomatoes, chopped Kalamata olives, and sliced garlic mixed with olive oil and oregano in a glass baking dish

Nestle and coat the fish. Press the seasoned portions right into the tomato mixture. Grab a spoon. Scooping a little of the herb-infused oil from the bottom of the dish and cascading it over the top of each piece keeps the surface moist in the hot oven.

Four seasoned raw white fish fillets resting on top of a tomato and olive mixture inside a glass baking dish

Watch for the opaque flake. Check the thickest portion. The center must turn completely white and flake easily, which usually takes 12 to 15 minutes. I always pull the dish exactly when an instant-read thermometer hits 145°F (62°C), ensuring the middle stays tender while the edges remain intact.

Finish with acid and herbs. Pull the dish from the oven. Grab your lemon. Grating the zest and squeezing the juice over the hot food immediately after baking keeps the citrus punchy without altering the raw protein beforehand. Scatter the fresh dill and a pinch of flaky sea salt across the top before portioning.

Fully baked white fish in a glass baking dish, topped with fresh dill and lemon zest, surrounded by soft tomatoes and olives

Storing and Reheating the Fish

  • Keep leftovers in an airtight container in the fridge for up to two days.
  • Reheat individual portions gently in a skillet over medium-low heat. Microwaving white fish ruins the texture, so add a splash of water to the pan and cover it to help steam the fillets back to a tender state.

Common Questions About Baking Fish

Can I use frozen fish fillets for this recipe?

Yes, but you must thaw them completely overnight in the fridge and pat them aggressively dry. Baking directly from frozen will flood the pan sauce with excess water and ruin the roasting effect.

Do I have to use cherry tomatoes?

Grape tomatoes work exactly the same way. Larger slicing tomatoes contain too much liquid and will water down the olive oil base during the short baking window.

I serve this straight from the baking dish, spooning the briny pan juices heavily over each piece so nothing goes to waste. If you find yourself reaching for this quick method on a busy weeknight, save the recipe for your regular rotation.

Print
clockclock iconcutlerycutlery iconflagflag iconfolderfolder iconinstagraminstagram iconpinterestpinterest iconfacebookfacebook iconprintprint iconsquaressquares iconheartheart iconheart solidheart solid icon
Fully baked white fish in a glass baking dish, topped with fresh dill and lemon zest, surrounded by soft tomatoes and olives

5 Stars 4 Stars 3 Stars 2 Stars 1 Star

No reviews

Mediterranean Baked White Fish with Lemon-Dill Finish

Recipe by Chloe Davis

This vibrant one-pan baked fish relies on a high-heat roasting method to quickly soften cherry tomatoes and olives into a rich, briny pan sauce. Finished with a bright shower of fresh dill, lemon zest, and flaky sea salt, the tender white fillets absorb all the aromatic flavors of the olive oil with minimal cleanup.


  • Total Time25 minutes
  • Yield4 portions (serves 4) 1x
  • DietMediterranean

Find it on your board when it's time to cook

Ingredients

Scale

Fish and Pan Sauce

  • 1 ½ lbs (680g) thick white fish fillets (such as cod, halibut, or grouper), cut into 4 equal portions
  • 1 pint (10.5 oz / 300g) cherry tomatoes, halved
  • ½ cup (65g) pitted Kalamata olives, roughly chopped
  • ¼ cup (60ml) extra-virgin olive oil
  • 3 large garlic cloves, thinly sliced
  • 1 teaspoon dried oregano
  • ¼ teaspoon crushed red pepper flakes (optional)
  • ¾ teaspoon kosher salt, divided
  • ½ teaspoon freshly ground black pepper, divided

Lemon-Dill Finish

  • 1 large lemon, zested and halved for juicing
  • ¼ cup (10g) loosely packed chopped fresh dill
  • Flaky sea salt, for finishing


Instructions

  1. Preheat and prep: Preheat the oven to 425°F (220°C). Pat the fish fillets completely dry with paper towels to ensure they roast rather than steam. Season the fillets evenly on both sides with ½ teaspoon of the kosher salt and ¼ teaspoon of the black pepper.
  2. Mix the tomato-olive base: In a 9×13-inch baking dish, combine the halved cherry tomatoes, chopped olives, sliced garlic, olive oil, dried oregano, red pepper flakes (if using), and the remaining ¼ teaspoon of kosher salt and ¼ teaspoon of black pepper. Toss well to coat everything in the oil, then spread the mixture into an even layer across the bottom of the dish.
  3. Nestle and bake: Nestle the seasoned fish fillets into the tomato and olive mixture. Using a spoon, scoop a little of the seasoned oil from the bottom of the dish and drizzle it over the top of each fillet. Bake uncovered for 12 to 15 minutes, or until the fish is entirely opaque, flakes easily with a fork, and registers an internal temperature of 145°F (62°C) on an instant-read thermometer.
  4. Garnish and serve: Remove the dish from the oven. Immediately grate the zest of the whole lemon directly over the hot fish and blistered vegetables, then squeeze the juice from one of the lemon halves (about 1 ½ tablespoons) over the top. Scatter the fresh dill over the dish, finish with a generous pinch of flaky sea salt, and serve warm with the pan juices spooned over each portion.
Find it on your board when it's time to cook

Notes

  • Why it works: Thinly slicing the garlic instead of mincing it prevents it from becoming harsh or burning during the quick, high-heat bake, allowing it to gently confit and infuse the olive oil while the tomatoes burst.
  • The pan sauce secret: Avoid squeezing lemon juice over the fish before baking. Raw citrus acid can chemically “cook” the surface of delicate fish fillets (similar to ceviche) and turn the exterior mushy in the oven. Adding the zest and juice to the hot dish right after baking keeps the flavors punchy and the fish perfectly tender.

Nutrition (per serving — estimates)

Calories: 302 | Sodium: 660mg | Total Carbs: 5g (Fiber: 1g, Sugar: 3g) | Fat: 18g (Saturated: 2.5g) | Protein: 30g

Nutritional values are approximate, based on standard reference data (USDA FoodData Central). Actual values vary by brand and exact measurements. For precision, use a tracker like MyFitnessPal or Cronometer.

  • Prep Time: 10 minutes
  • Cook Time: 15 minutes
  • Category: Main Course
  • Method: Baking
  • Cuisine: Mediterranean

Nutrition

  • Serving Size: 1 fillet with about ⅓ cup tomato-olive sauce
  • Calories: 302
  • Sugar: 3g
  • Sodium: 660mg
  • Fat: 18g
  • Saturated Fat: 2.5g
  • Carbohydrates: 5g
  • Fiber: 1g
  • Protein: 30g

These apple cinnamon cottage cheese bites rely on a fully blended wet base to create a smooth, rich custard center wrapped around tender oats. I keep a batch in the freezer because they reheat reliably for a fast morning routine.

Apple cinnamon cottage cheese bites served on a white plate showing browned edges and soft centers

How the Blended Base Changes the Texture

Blend the wet ingredients first. Curds disappear completely. This simple step transforms the liquid into a silky binder that hydrates the oats evenly without changing the familiar baked oat structure. Leaving the dairy intact creates unpredictable pockets of moisture throughout the muffin, while a puree guarantees a cohesive, uniform crumb in every single cup.

Mixing and Baking the Oatmeal Bites

Preheat your oven to 375°F. Grease a 24-cup mini muffin pan generously. A lumpy base leaves dry pockets in the final bake, so run your blender on high for 30 to 45 seconds until the liquid looks completely uniform. You want a smooth canvas before the dry ingredients enter the bowl.

Grab a medium mixing bowl. Whisk the rolled oats with the baking powder, cinnamon, and kosher salt. Pour the wet puree over your dry mixture and stir just until they meet, then gently incorporate the diced apple.

Thick oatmeal batter in a ceramic bowl mixed with diced apples using a silicone spatula

Leave the bowl at room temperature for 10 minutes. I always set a strict timer for this phase. The oats need that exact window to absorb the liquid so the bites bake up tall instead of flat.

Combine the raw sugar with the rest of the cinnamon in a separate ramekin. Scoop the thickened batter into your prepared pan. Fill every cup almost to the top, using about one and a half tablespoons for each, then finish with an even dusting of the spiced sugar.

Unbaked oatmeal batter portioned into a mini muffin pan and topped with coarse sugar and cinnamon

Bake for 14 to 16 minutes. Watch the edges closely. Pull them from the oven when the borders turn golden brown and the centers feel firm to a gentle touch.

Baked apple cinnamon oatmeal bites in a muffin pan with browned edges and golden tops

Cool the bites in the pan for 5 minutes. Do not rush this step. This brief rest lets the structure set so they pop out cleanly without crumbling in your hands.

Cottage cheese apple cinnamon bites stacked on a ceramic plate highlighting golden oat tops sprinkled with sugar

Freezing and Reheating Guidelines

  • Cool the mini muffins completely on a wire rack before packing them away. Trapped heat creates condensation that ruins the crunchy tops.
  • Keep the frozen portions inside a sealed plastic freezer bag for a maximum of 3 months.
  • Microwave straight from frozen for 20 to 30 seconds until warm.

Common Questions About the Recipe

Can I use low-fat cottage cheese?

You need 4 percent whole milk cottage cheese for this recipe. Lower fat versions contain too much water, and that excess liquid will make the centers gummy instead of rich.

Do I have to peel the apple?

Peeling is entirely up to you. Leaving the skin on adds a little extra texture, but peeling makes the fruit blend seamlessly into the soft oats.

Can I use paper liners instead of greasing the pan?

Yes, paper liners work well here. They make cleanup faster. Just give the inside of the liners a very light spray of oil so the warm oats release without sticking.

I prefer to serve these warm right out of the pan, when the coarse sugar topping is at its absolute crunchiest. They make a reliable, grab-and-go morning staple that actually holds up to a busy schedule.

Print
clockclock iconcutlerycutlery iconflagflag iconfolderfolder iconinstagraminstagram iconpinterestpinterest iconfacebookfacebook iconprintprint iconsquaressquares iconheartheart iconheart solidheart solid icon
Apple cinnamon cottage cheese bites served on a white plate showing browned edges and soft centers

5 Stars 4 Stars 3 Stars 2 Stars 1 Star

No reviews

Apple Cinnamon Cottage Cheese Bites with Crunchy Tops

Recipe by Chloe Davis

These mini baked oatmeal cups pair the comforting flavors of apple and cinnamon with a smooth, blended cottage cheese base. Blending the wet ingredients removes all the cheese curds for a perfectly uniform texture, while a quick sprinkle of raw sugar gives each bite a bakery-style crunch.


  • Total Time40 minutes
  • Yield24 mini bites (serves 12) 1x

Find it on your board when it's time to cook

Ingredients

Scale

Wet Base

  • 1 cup (225g) whole milk cottage cheese (4% milkfat)
  • ½ cup (115g) unsweetened applesauce
  • 3 tablespoons (45ml) maple syrup
  • 1 large egg
  • 1 teaspoon (5ml) vanilla extract

Dry Ingredients & Mix-Ins

  • 1 ½ cups (135g) old-fashioned rolled oats
  • 1 teaspoon baking powder
  • 1 teaspoon ground cinnamon
  • ½ teaspoon kosher salt
  • ½ cup (60g) finely diced apple (about ½ medium apple, peeled or unpeeled)

Crunchy Topping

  • 1 tablespoon turbinado sugar (or coarse raw sugar)
  • ¼ teaspoon ground cinnamon


Instructions

  1. Prep the oven and pan: Preheat your oven to 375°F (190°C). Generously grease a 24-cup mini muffin pan or line with paper liners.
  2. Blend the wet ingredients: In a blender or food processor, combine the cottage cheese, applesauce, maple syrup, egg, and vanilla extract. Blend on high for 30 to 45 seconds until the mixture is completely smooth and no curds remain.
  3. Combine the batter: In a medium mixing bowl, whisk together the rolled oats, baking powder, 1 teaspoon of ground cinnamon, and kosher salt. Pour the blended wet mixture over the dry ingredients and stir until just combined. Gently fold in the finely diced apple.
  4. Rest the mixture: Let the batter sit at room temperature for 10 minutes. This resting period allows the oats to absorb the liquids, thickening the batter so the bites bake up tall and tender.
  5. Portion and top: While the batter rests, mix the turbinado sugar and the remaining ¼ teaspoon of cinnamon in a small dish. Scoop the rested batter into the prepared mini muffin pan, filling each cup almost to the brim (about 1 ½ tablespoons per cup). Sprinkle the cinnamon-sugar mixture evenly over the tops.
  6. Bake and cool: Bake for 14 to 16 minutes, or until the edges are golden brown and the centers feel set to the touch. Allow the bites to cool in the pan for 5 minutes before gently removing them. Serve warm, or transfer to a wire rack to cool completely before storing.
Find it on your board when it's time to cook

Notes

  • Why it works: Blending the cottage cheese eliminates the curd texture entirely, creating a smooth, rich custard that binds the oats perfectly. It provides the moisture and structure of traditional dairy without altering the classic baked oatmeal feel.
  • Make-ahead and freezing: These bites are excellent for meal prep. Let them cool completely, then store in an airtight zip-top bag in the freezer for up to 3 months. Reheat straight from frozen in the microwave for 20 to 30 seconds for a quick, warm snack.

Nutrition (per serving — estimates)

Calories: 90 | Total Carbs: 14g (Fiber: 1g, Sugar: 6g) | Fat: 2g (Saturated: 1g) | Protein: 4g

Nutritional values are approximate, based on standard reference data (USDA FoodData Central). Actual values vary by brand and exact measurements. For precision, use a tracker like MyFitnessPal or Cronometer.

  • Prep Time: 10 minutes
  • Resting Time: 10 minutes
  • Cook Time: 15 minutes
  • Category: Breakfast
  • Method: Baked
  • Cuisine: American

Nutrition

  • Serving Size: 2 mini bites
  • Calories: 90
  • Sugar: 6g
  • Fat: 2g
  • Saturated Fat: 1g
  • Carbohydrates: 14g
  • Fiber: 1g
  • Protein: 4g

This spiced Biscoff layer cake delivers incredibly tender crumb and a dark, molasses-rich spice under a balanced cookie butter frosting. Lowering the oven temperature guarantees flat layers, while a hit of flaky sea salt cuts the sweetness of the dramatic drip.

A two layer Biscoff cake with a glossy salted drip and cookie crown on a white serving plate

Why This Layer Cake Works

Skip the light brown sugar. Use the dark stuff. Swapping in dark brown sugar amplifies the deep molasses and ginger notes of the speculoos cookies.

Drop the heat. Bake at 325°F. I bake these layers at 325°F instead of the standard 350°F, which stops the centers from doming rapidly and gives you perfectly flat cakes that require zero trimming.

How to Make Biscoff Layer Cake

Prep the dry ingredients. Don’t skip the whisking. Mixing the flour, cinnamon, baking powder, baking soda, ginger, and kosher salt thoroughly now prevents bitter pockets of baking soda in the finished sponge.

Cream the butter and sugar. Beat the dark brown sugar, softened butter, and oil on medium speed for 3 minutes. Do not rush this step. The mixture should look visibly lighter and perfectly fluffy before you add the liquids.

Add the eggs and flavorings. Beat in the room-temperature eggs one at a time. Scrape the sides of the bowl between each addition. Blend in a half cup of cookie butter and the vanilla extract until the batter is completely smooth.

Fold in the dry ingredients. Turn the mixer to its lowest speed. Add a third of the flour, half the buttermilk, more flour, the rest of the buttermilk, and the final flour. Stop the moment the last streaks of flour disappear. Fold the chopped Biscoff cookies in by hand with a silicone spatula.

Folding chopped Biscoff cookies into thick brown cake batter with a silicone spatula

Bake the layers. Divide the batter evenly between two greased and parchment-lined 8-inch pans. Bake at 325°F for 40 to 45 minutes. A wooden skewer inserted in the center should come out clean or with just a few moist crumbs attached. Let the cakes cool in their pans for 15 minutes before inverting them onto a wire rack.

Two round golden cake layers cooling on a wire rack

Mix the frosting. Beat the softened butter on medium-high for 2 minutes. Add the powdered sugar, fine cookie dust, a third-cup of cookie butter, heavy cream, vanilla, and salt. Start the mixer on low to prevent a massive sugar cloud, then whip on medium-high for 3 to 4 minutes until perfectly smooth.

Fill the center. Level the cake layers with a serrated knife if they developed slight domes. Spread a thin layer of frosting on the first cake and pipe a thick dam around the outer edge. Fill the center with a quarter-cup of cookie butter, warming it in the microwave for 5 seconds if it fights your spatula.

A single cake layer topped with a piped frosting border and filled with glossy cookie butter

Frost the exterior. Place the second layer on top. Cover the top and sides smoothly with the remaining frosting, using a bench scraper for a clean finish. I always chill the frosted cake in the refrigerator for a full 15 minutes before pouring the drip. If you skip this chill, the warm cookie butter melts the buttercream and drags it down the sides in a messy streak.

A two layer cake fully covered in smooth brown frosting with horizontal texture lines

Create the salted drip. Warm a half-cup of cookie butter in the microwave for 10 to 15 seconds until fluid but not hot. Pour it onto the center of the chilled cake and push it gently over the edges with an offset spatula. Instantly sprinkle the edge with flaky sea salt and arrange whole cookies on top.

A glossy cookie butter drip falling down the sides of a cake decorated with flaky salt and whole cookies

Planning and Storage

  • Make ahead: The baked and cooled cake layers freeze beautifully for up to one month when wrapped tightly in plastic wrap. Thaw them at room temperature before assembling.
  • Frosting prep: You can make the frosting up to 3 days in advance and keep it in the refrigerator. Let it come to room temperature and briefly re-whip it to restore the fluffy texture.

Slicing the Cake

Get a clean cut. Wipe your blade. A warm knife cuts directly through the chilled buttercream and sticky drip without dragging stray crumbs across your smooth frosting.

A sliced layer cake showing a cookie butter filling and a glossy salted drip

Biscoff Layer Cake FAQs

Can I use crunchy cookie butter?

Stick to the smooth variety for the frosting and the drip. Crunchy cookie butter will clog your piping tip and create a lumpy, uneven finish on the top of the cake.

Why did my cookie butter drip seize?

It got too hot in the microwave. Warm it in short 5-second bursts until it is just fluid, because overheating causes the oils to separate and the spread to stiffen.

The flaky salt melts just slightly into the warm drip, hitting your tongue right before the sweet buttercream. Take your time with the chilling steps, and you will slice into a neat, bakery-quality cake on the very first try.

Print
clockclock iconcutlerycutlery iconflagflag iconfolderfolder iconinstagraminstagram iconpinterestpinterest iconfacebookfacebook iconprintprint iconsquaressquares iconheartheart iconheart solidheart solid icon
A sliced layer cake showing a cookie butter filling and a glossy salted drip

5 Stars 4 Stars 3 Stars 2 Stars 1 Star

No reviews

Cookie Butter Cake with Salted Biscoff Drip

Recipe by Chloe Davis

Finished with a dramatic cookie butter drip and a hit of flaky sea salt, this impressive layer cake is a must-make for speculoos fans. The cake layers are incredibly tender and deeply flavored with dark brown sugar, cinnamon, and ginger, while the fluffy cookie butter frosting stays perfectly balanced without veering into overly sweet territory.


  • Total Time2 hours 25 minutes
  • Yield1 (8-inch) two-layer cake (serves 12) 1x

Find it on your board when it's time to cook

Ingredients

Scale

Spiced Biscoff Cake Layers

  • 2 ⅓ cups (295 g) all-purpose flour
  • 1 ½ teaspoons ground cinnamon
  • 1 ½ teaspoons baking powder
  • ½ teaspoon baking soda
  • ½ teaspoon ground ginger
  • ½ teaspoon kosher salt
  • 1 ¼ cups (265 g) dark brown sugar, packed
  • ½ cup (113 g) unsalted butter, softened
  • ⅓ cup (80 ml) neutral oil (such as canola or grapeseed)
  • 3 large eggs, room temperature
  • ½ cup (130 g) smooth cookie butter (such as Biscoff)
  • 2 teaspoons vanilla extract
  • 1 cup (240 ml) buttermilk, room temperature
  • 1 cup (about 1012 cookies) roughly chopped Biscoff cookies

Cookie Butter Frosting

  • 1 ¼ cups (283 g) unsalted butter, softened
  • 3 cups (360 g) powdered sugar
  • ½ cup (about 68 cookies) Biscoff cookies, blended to a fine dust
  • ⅓ cup (85 g) smooth cookie butter
  • 2 tablespoons heavy cream
  • 1 teaspoon vanilla extract
  • ¼ teaspoon kosher salt

Filling, Drip & Decor

  • ¾ cup (195 g) smooth cookie butter, divided
  • Flaky sea salt (such as Maldon)
  • Whole or halved Biscoff cookies, for the crown


Instructions

  1. Preheat and prep: Preheat the oven to 325°F (165°C). Grease two 8-inch round cake pans and line the bottoms with parchment paper.
  2. Whisk the dry ingredients: In a medium bowl, whisk together the flour, cinnamon, baking powder, baking soda, ginger, and kosher salt. Set aside.
  3. Cream the fats and sugar: In a large bowl or the bowl of a stand mixer fitted with the paddle attachment, beat the dark brown sugar, softened butter, and oil on medium speed for 3 minutes, until visibly lighter and fluffy.
  4. Add the eggs and flavorings: Beat in the eggs one at a time, mixing well after each addition and scraping down the sides of the bowl. Add the ½ cup of cookie butter and the vanilla extract, blending until completely smooth.
  5. Alternate wet and dry: Turn the mixer to its lowest speed. Add one-third of the flour mixture, followed by half of the buttermilk. Repeat, ending with the final third of the flour mixture. Mix only until the last streaks of flour disappear. Using a silicone spatula, gently fold in the chopped Biscoff cookies by hand.
  6. Bake: Divide the batter evenly between the prepared pans, smoothing the tops. Bake for 40 to 45 minutes, or until a wooden skewer inserted into the center comes out clean or with a few moist crumbs.
  7. Cool the cakes: Let the cakes cool in their pans for 15 minutes before inverting them onto a wire rack. Allow them to cool completely before frosting.
  8. Make the frosting: In a large bowl with an electric mixer, beat the softened butter on medium-high for 2 minutes until creamy. Add the powdered sugar, cookie dust, ⅓ cup cookie butter, heavy cream, vanilla, and salt. Start mixing on low to prevent a sugar cloud, then increase the speed to medium-high and whip for 3 to 4 minutes until perfectly light, fluffy, and smooth.
  9. Layer and fill: If your cake layers have slight domes, use a serrated knife to level them. Place the first layer on a serving platter. Spread a thin layer of frosting over the top, then pipe a thick “dam” or border of frosting around the outer edge. Fill the center with ¼ cup of the cookie butter (warm it in the microwave for 5 seconds if it is too stiff to spread).
  10. Frost the exterior: Place the second cake layer on top. Use the remaining frosting to cover the top and sides of the cake smoothly. (A bench scraper works beautifully for smooth sides). Chill the cake in the refrigerator for 15 minutes to set the frosting.
  11. Create the drip and finish: Gently warm the remaining ½ cup of cookie butter in the microwave for 10 to 15 seconds until it is fluid but not hot. Pour it onto the center of the chilled cake, using an offset spatula to gently push it over the edges to create drips. Immediately sprinkle the outer edge with flaky sea salt and arrange the whole cookies on top. Slice and serve!
Find it on your board when it's time to cook

Notes

  • Why it works: Swapping standard light brown sugar for dark brown sugar amplifies the deep, molasses-rich spices of the speculoos cookies. Dropping the oven temperature to 325°F prevents steep doming, giving you flat layers that require little to no trimming.
  • Make-Ahead: The baked and cooled cake layers can be tightly wrapped in plastic wrap and frozen for up to 1 month. Thaw at room temperature before assembling. The frosting can also be made up to 3 days in advance and kept in the refrigerator; let it come to room temperature and briefly re-whip it to restore its fluffy texture.

Nutrition (per serving — estimates)

Calories: 901 | Total Carbs: 100g (Fiber: 1g, Sugar: 78g) | Fat: 53g (Saturated: 25g) | Protein: 6g

Nutritional values are approximate, based on standard reference data (USDA FoodData Central). Actual values vary by brand and exact measurements. For precision, use a tracker like MyFitnessPal or Cronometer.

  • Prep Time: 25 minutes
  • Cooling Time: 1 hour
  • Cook Time: 45 minutes
  • Category: Dessert
  • Method: Baking
  • Cuisine: American

Nutrition

  • Serving Size: 1 slice
  • Calories: 901
  • Sugar: 78g
  • Fat: 53g
  • Saturated Fat: 25g
  • Carbohydrates: 100g
  • Fiber: 1g
  • Protein: 6g

Grab your skillet. Heat the oven. This ground turkey and sweet potato bake pairs savory browned meat with a golden, crunchy panko cheese crown that protects the tender vegetables underneath.

Cast iron skillet filled with ground turkey, sweet potatoes, and zucchini under a toasted parmesan panko crust

Why Roasting the Sweet Potatoes First Matters

Moisture is the enemy of a good skillet dinner. Zucchini holds water. Sweet potatoes need intense heat to soften. If you throw them all in the pan together, they just steam and turn mushy. By roasting the sweet potatoes on a separate baking sheet at 425°F, we guarantee caramelized, fork-tender edges while the zucchini releases its excess water on the stovetop.

Building the Skillet

Roast the sweet potatoes. Toss the half-inch cubes with olive oil, salt, and pepper, then spread them onto a rimmed baking sheet. Roast at 425°F (220°C) for 20 minutes. I know they are ready when the edges shrink slightly and a fork slides through the center without any resistance.

Glossy orange diced sweet potatoes roasting on a metal baking sheet with lightly browned edges

Spread the sweet potatoes evenly so they roast rather than steam.

Brown the turkey and aromatics. Heat a tablespoon of olive oil in a large cast iron skillet over medium-high heat. Break the ground turkey apart alongside the diced yellow onion. Cook for 6 to 8 minutes until the meat is fully browned and cooked through.

Sauté the zucchini. Lower the heat to medium before stirring in the zucchini half-moons, minced garlic, Italian seasoning, and spices. Cook for 4 to 5 minutes, stopping exactly when the zucchini begins to soften and release moisture. Overcooking here leads to a watery base, so pull the skillet off the heat immediately once the squash turns tender.

Combine the filling. Scrape the roasted sweet potatoes directly into the turkey and zucchini mixture. Toss everything together so the flavors distribute evenly across the pan.

Ground turkey, sweet potato cubes, and zucchini slices mixed together in a black skillet

Add the crispy crown. Rub the grated Parmesan, panko, and olive oil between your fingers until the breadcrumbs look evenly moistened. Sprinkle this mixture in a flat, even layer over the entire skillet.

Unbaked ground turkey and vegetable filling in a skillet covered with a light crumbly layer of panko and parmesan

Bake to a crunch. Transfer the skillet back into the oven. Bake for 10 to 12 minutes, watching for the panko to toast and the edges of the skillet to bubble.

Baked skillet dinner with a deeply browned parmesan crust and bubbling edges

Baking in a Casserole Dish

If you do not own an oven-safe skillet, this recipe easily adapts to a standard 9×13-inch baking dish. Cook the turkey and zucchini in a regular frying pan, then fold in the roasted sweet potatoes. Transfer the entire mixture into a lightly greased baking dish, top with the panko, and bake exactly as written.

Ground turkey and sweet potato bake finished with a golden panko crust in a white ceramic baking dish

Make-Ahead and Storage Rules

  • Prep ahead: You can assemble the entire filling in a baking dish up to two days in advance and keep it tightly covered in the fridge. Wait to add the panko topping until right before the oven.
  • Adjust the bake time: If baking from cold, increase the oven time to 25 to 30 minutes. Tent the dish loosely with foil if the panko browns before the center reaches 165°F (74°C).
  • Leftovers: Store remaining portions in an airtight container in the refrigerator for up to four days. Reheat individual bowls in the microwave, though the panko will lose its initial crunch.

Quick Answers for This Bake

Do I need to peel the sweet potatoes?

Yes, peeling ensures a consistent, tender bite that blends nicely with the ground turkey and zucchini. If you leave the skins on, they can become tough and papery during the high-heat roasting.

Can I use ground chicken or beef instead?

Ground chicken works as a seamless one-to-one swap without changing the method. If you use ground beef, you may need to drain the skillet before adding the zucchini to keep the filling from becoming greasy.

My favorite part of this dinner is the contrast. You get the soft, sweet vegetables underneath and that satisfying crunch of toasted Parmesan right on top. Let the skillet rest for five minutes after it leaves the oven so the juices settle, then scoop it straight into bowls.

Print
clockclock iconcutlerycutlery iconflagflag iconfolderfolder iconinstagraminstagram iconpinterestpinterest iconfacebookfacebook iconprintprint iconsquaressquares iconheartheart iconheart solidheart solid icon
Ground turkey and sweet potato bake finished with a golden panko crust in a white ceramic baking dish

5 Stars 4 Stars 3 Stars 2 Stars 1 Star

No reviews

Crispy Parmesan Ground Turkey and Sweet Potato Bake

Recipe by Chloe Davis

Finished with a golden, crunchy panko-cheese crown, this ground turkey and sweet potato bake takes a classic combination to the next level. Sweet roasted potatoes, tender zucchini, and savory browned turkey come together in a single oven-safe skillet for a deeply flavorful dinner that skips the soggy vegetables and maximizes texture.


  • Total Time50 minutes
  • Yield4 servings 1x

Find it on your board when it's time to cook

Ingredients

Scale

The Filling

  • 1 lb (450g) sweet potatoes, peeled and diced into ½-inch cubes
  • 2 tbsp (30ml) olive oil, divided
  • 1 lb (450g) ground turkey (93% lean)
  • 1 medium yellow onion, diced
  • 2 medium zucchini (about 12 oz / 340g total), sliced into ½-inch half-moons
  • 3 large cloves garlic, minced
  • 1 tbsp dried Italian seasoning
  • 1 tsp kosher salt, plus extra for roasting
  • ½ tsp freshly ground black pepper
  • ¼ tsp crushed red pepper flakes (optional)

The Crispy Parmesan Crown


Instructions

  1. Roast the sweet potatoes: Preheat your oven to 425°F (220°C). On a large rimmed baking sheet, toss the diced sweet potatoes with 1 tablespoon of olive oil and a generous pinch of kosher salt and pepper. Spread into an even layer and roast for 20 minutes, or until fork-tender and slightly caramelized at the edges.
  2. Brown the turkey: While the potatoes roast, heat the remaining 1 tablespoon of olive oil in a large oven-safe skillet (like cast iron) over medium-high heat. Add the ground turkey and diced onion. Cook for 6 to 8 minutes, breaking the meat apart with a wooden spoon, until the turkey is fully browned and cooked through.
  3. Sauté the vegetables: Lower the heat to medium. Stir the zucchini, minced garlic, Italian seasoning, 1 teaspoon kosher salt, black pepper, and red pepper flakes into the turkey mixture. Cook for 4 to 5 minutes, just until the zucchini begins to soften and release some of its moisture. Remove the skillet from the heat.
  4. Combine the filling: Once the sweet potatoes are done roasting, scrape them directly into the skillet with the turkey and zucchini mixture. Toss well to combine everything evenly. (If you don’t have an oven-safe skillet, transfer the turkey mixture and roasted potatoes into a lightly greased 9×13-inch baking dish instead.)
  5. Mix the topping: In a small bowl, combine the grated Parmesan, panko breadcrumbs, and 1 tablespoon of olive oil. Rub the mixture together with your fingers until the breadcrumbs are evenly moistened and crumbly. Sprinkle this topping in an even layer over the skillet.
  6. Bake and serve: Transfer the skillet to the oven and bake for 10 to 12 minutes at 425°F (220°C), until the panko is toasted, the cheese is melted and golden, and the edges are bubbling. Let rest for 5 minutes before serving.
Find it on your board when it's time to cook

Notes

  • Why it works: Roasting the sweet potatoes on a separate pan while cooking the turkey and zucchini on the stovetop is the secret to this dish’s great texture. It guarantees the potatoes get sweet and tender, while allowing the zucchini’s excess water to cook off in the pan so your bake never turns out mushy.
  • Make-ahead friendly: You can prepare and combine the entire filling in a baking dish up to 2 days in advance and store it tightly covered in the refrigerator. Add the panko-Parmesan topping just before baking. Because the filling will be cold, increase the bake time to 25 to 30 minutes, or until the center reaches a safe 165°F (74°C) on an instant-read thermometer. If the panko begins to brown too quickly before the center is hot, tent the dish loosely with aluminum foil.

Nutrition (per serving — estimates)

Calories: 495 | Total Carbs: 33g (Fiber: 5g, Sugar: 8g) | Fat: 25g (Saturated: 8g) | Protein: 34g

Nutritional values are approximate, based on standard reference data (USDA FoodData Central). Actual values vary by brand and exact measurements. For precision, use a tracker like MyFitnessPal or Cronometer.

  • Prep Time: 15 minutes
  • Cook Time: 35 minutes
  • Category: Main Course
  • Method: Baked
  • Cuisine: American

Nutrition

  • Serving Size: 1 generous bowl (about 1½ cups)
  • Calories: 495
  • Sugar: 8g
  • Fat: 25g
  • Saturated Fat: 8g
  • Carbohydrates: 33g
  • Fiber: 5g
  • Protein: 34g

Savory seasoned beef and melted pepper jack cheese wrapped in pillowy pizza dough make these cheesy taco sticks a reliable appetizer. I brush them with a spiced garlic butter before baking, creating a warm, deeply browned crust that flakes slightly in your hands.

Golden brown cheesy taco sticks garnished with fresh cilantro on a white plate, showing melted cheese and beef filling at the ends.

The Strategy Behind the Dough

Drop your oven to 400°F. Do not use the standard pizza temperature. Baking these stuffed sticks at 400°F (200°C) allows the thick dough rolls to bake all the way through without scorching the bottoms. I prefer pulling them right at the 13-minute mark, just as the dough puffs up and the pepper jack begins to bubble at the edges. Cooling the filling is equally important. Warm taco meat will immediately melt the raw dough, making it impossible to roll and causing tears before they even hit the pan.

How to Make Cheesy Taco Sticks

Prep the Pan and Beef

Preheat your oven to 400°F (200°C). Line a large baking sheet with parchment paper to prevent sticking. Cook the ground beef in a medium skillet over medium-high heat, breaking it apart with a wooden spoon until nicely browned and no pink remains. This takes about 5 to 7 minutes, and you must drain any excess grease before moving on.

Season and Cool

Measure out 1½ teaspoons of the taco seasoning. Set it aside for the butter topping later. Add the remaining 1½ tablespoons of seasoning and the ¼ cup water to the beef, simmering for 2 to 3 minutes until the liquid thickens and coats the meat. Remove the skillet from the heat entirely. You must let the beef cool for at least 10 minutes so the warm filling does not melt the raw dough.

Portion the Dough

Unroll the pizza dough on a clean work surface. Stretch it gently into a roughly 10×15-inch rectangle. Using a pizza cutter or a sharp knife, cut the dough into ten smaller rectangles that measure about 3×5 inches each.

Ten equal rectangles of raw pizza dough cut on a floured surface.

Stuff and Seal

Spoon about 1½ tablespoons of the cooled taco meat onto the center of each dough rectangle. Place a halved cheese stick directly on top of the meat.

Ground beef and half a pepper jack cheese stick placed in the center of raw dough rectangles.

Fold the long edges of the dough over the filling. Fold in the ends next. I always run my fingers over every seam a second time before flipping them, because even a drop of beef grease will cause the dough to unroll in the oven. Place them seam-side down on the prepared baking sheet so the weight of the stick holds it shut.

Raw pizza dough being folded over the taco meat and cheese filling into a cylinder.

Glaze and Bake

Whisk together the melted butter, garlic powder, fresh cilantro, and the reserved 1½ teaspoons of taco seasoning. Brush this spiced butter generously over the tops and sides of the dough sticks.

A pastry brush spreading spiced garlic butter and cilantro over raw stuffed dough sticks on a baking sheet.

Bake for 12 to 15 minutes. Watch for the dough to puff and turn deep golden brown. Let them cool for 3 to 5 minutes on the pan before serving so the cheese has a moment to set.

A stack of baked golden brown taco sticks on a light plate, showing browned edges and melted cheese.

Storing and Reheating

  • Fridge storage: Keep any leftover sticks in an airtight container in the refrigerator for up to three days.
  • Restoring the crunch: Reheat leftovers in a 350°F oven or an air fryer for 4 to 5 minutes. Microwaving will heat the center but leaves the pizza dough soft and rubbery.

Cheesy Taco Stick FAQs

Can I assemble these taco sticks ahead of time?

You can stuff and roll the dough up to two hours before baking. Keep them loosely covered in the refrigerator, and wait to brush on the spiced garlic butter until just before they go into the oven.

What if I do not have pepper jack string cheese?

Standard mozzarella string cheese works perfectly well if you prefer a milder flavor. Slice them in half crosswise the exact same way so they fit neatly inside the dough rectangles.

I like to set the whole sheet pan on the table alongside a bowl of warm queso or your favorite salsa. Serve them while the crust is crisp and the cheese is still wonderfully stretchy.

Print
clockclock iconcutlerycutlery iconflagflag iconfolderfolder iconinstagraminstagram iconpinterestpinterest iconfacebookfacebook iconprintprint iconsquaressquares iconheartheart iconheart solidheart solid icon
A stack of baked golden brown taco sticks on a light plate, showing browned edges and melted cheese.

5 Stars 4 Stars 3 Stars 2 Stars 1 Star

No reviews

Cheesy Taco Sticks with Spiced Garlic Butter

Recipe by Chloe Davis

These handheld taco bites wrap savory seasoned beef and melted pepper jack cheese inside golden, pillowy pizza dough, finished with a standout taco-spiced garlic butter crust. They bake up quickly on a single sheet pan and are practically built for dipping into warm queso, sour cream, or your favorite salsa.


  • Total Time42 minutes
  • Yield10 sticks (serves 5) 1x

Find it on your board when it's time to cook

Ingredients

Scale

Taco Filling

  • 8 oz (225 g) lean ground beef
  • 2 tbsp taco seasoning (from a standard packet or homemade), divided
  • ¼ cup (60 ml) water

Dough & Cheese

  • 1 can (13.8 oz / 391 g) refrigerated classic pizza dough
  • 5 pepper jack string cheese sticks, halved crosswise to make 10 short sticks

Spiced Garlic Butter Finish

  • 2 tbsp (28 g) unsalted butter, melted
  • ½ tsp garlic powder
  • 1 tbsp finely chopped fresh cilantro (plus more for garnish)


Instructions

  1. Prep the oven and pan: Preheat your oven to 400°F (200°C). Line a large baking sheet with parchment paper to prevent sticking.
  2. Cook the filling: In a medium skillet over medium-high heat, cook the ground beef, breaking it apart with a wooden spoon, until nicely browned and no pink remains, about 5 to 7 minutes. Drain any excess grease.
  3. Season and cool: Measure out 1½ teaspoons of the taco seasoning and set it aside for the butter topping. Add the remaining 1½ tablespoons of seasoning and the water to the beef. Simmer for 2 to 3 minutes until the liquid thickens and coats the meat. Crucial step: Remove from heat and let the beef cool for at least 10 minutes (warm filling will melt the raw dough and make it tear).
  4. Portion the dough: Unroll the pizza dough on a clean work surface, gently stretching it into a roughly 10×15-inch rectangle. Using a pizza cutter or sharp knife, cut the dough into 10 smaller rectangles (about 3×5 inches each).
  5. Stuff and roll: Spoon about 1½ tablespoons of the cooled taco meat onto the center of each dough rectangle. Place a halved cheese stick directly on top of the meat. Fold the long edges of the dough over the filling, then fold in the ends. Pinch all seams tightly to seal, and place them seam-side down on the prepared baking sheet.
  6. Glaze the sticks: In a small bowl, whisk together the melted butter, garlic powder, fresh cilantro, and the reserved 1½ teaspoons of taco seasoning. Generously brush this spiced butter over the tops and sides of the dough sticks.
  7. Bake: Bake for 12 to 15 minutes, or until the dough is puffed, deep golden brown, and the cheese is bubbly inside. Let cool for 3 to 5 minutes on the pan before serving warm.
Find it on your board when it's time to cook

Notes

  • Why it works: Dropping the oven temperature to 400°F (compared to the standard 425°F for flat pizza dough) allows the thick, stuffed dough rolls to bake all the way through without scorching the bottoms, ensuring a fully melted cheese center.
  • Pinch like you mean it: Refrigerated dough loves to unroll as it expands in the oven. To prevent a “blowout” where the cheese escapes, make sure your dough isn’t greasy from the meat, pinch the seams firmly together, and always bake them seam-side down so the weight of the stick holds it shut.

Calories: 410 | Total Carbs: 41g (Fiber: 1g, Sugar: 5g) | Fat: 18g (Saturated: 9g) | Protein: 21g

Nutritional values are approximate, based on standard reference data (USDA FoodData Central). Actual values vary by brand and exact measurements. For precision, use a tracker like MyFitnessPal or Cronometer.

  • Prep Time: 20 minutes
  • Cook Time: 22 minutes
  • Category: Appetizer
  • Method: Baked
  • Cuisine: Mexican-American

Nutrition

  • Serving Size: 2 sticks
  • Calories: 410
  • Sugar: 5g
  • Fat: 18g
  • Saturated Fat: 9g
  • Carbohydrates: 41g
  • Fiber: 1g
  • Protein: 21g

This one-pot sausage and shrimp rice builds incredible depth directly on the stovetop. Deeply browned sausage edges and bursting cherry tomatoes create a spiced, separated-grain dinner that finishes with a glossy lemon-butter swirl.

Skillet filled with spiced sliced sausage, pink shrimp, and fluffy white rice, garnished with green scallions

The Method Behind the Texture

You need distinct grains. Clumpy rice ruins a skillet dinner. I rely on the fat rendered from the smoked sausage to toast the raw rice before adding any liquid, creating a protective barrier around each grain that ensures a light texture rather than a heavy porridge. We also use slightly less broth than standard rice recipes call for because the cherry tomatoes release their own natural juices as they burst in the pan.

Building the Skillet Rice

Heat the olive oil. Drop in the sliced sausage. Let it cook over medium-high heat for 4 to 5 minutes until the fat renders and the edges turn dark and crisp.

Sliced smoked sausage browning in a light-colored pot

Add the aromatics. Drop in the chopped onion, bell pepper, and cherry tomatoes. Cook them for 5 to 6 minutes so the moisture escaping the bursting tomatoes helps you scrape up the flavorful browned bits stuck to the bottom of the pan.

Toast the spices. Turn the heat down to medium. Stir in the minced garlic, smoked paprika, thyme, kosher salt, onion powder, and cayenne for 1 minute until fragrant. Add the rinsed white rice, stirring constantly for 1 to 2 minutes so the spiced oil coats the grains.

White rice stirred together with browned sausage, bell peppers, and tomatoes in a pot

Coating the rinsed rice in the rendered sausage fat prevents the grains from sticking together later.

Pour in the broth. Give the pot one final scrape along the bottom. Bring the liquid to a rolling boil, cover tightly, and drop the heat to low for exactly 15 minutes.

Take off the lid. Check the liquid. Most of the broth should be absorbed into the tender rice. I arrange the raw shrimp in a single layer right on top of the cooked rice, then scatter the butter cubes over them.

Raw shrimp and small cubes of butter arranged over cooked sausage and rice

Keep the shrimp on top of the rice to steam gently rather than burying them in the hot liquid.

Replace the lid immediately. Let the residual heat and low flame steam the shrimp for 5 to 7 minutes. They are done when they feel firm and turn fully opaque and pink.

Pink, fully cooked shrimp resting on top of the spiced rice and tomatoes

Pull the pot off the heat. Drizzle the fresh lemon juice over the top. Use a fork to gently fold the melted butter, citrus, scallions, and shrimp into the rice below.

Storing Leftover Skillet Rice

  • Keep leftovers in a sealed container in the refrigerator for up to three days.
  • Reheat individual portions in the microwave with a splash of water to rehydrate the grains.
  • Avoid freezing this dish, as the cooked shrimp will become rubbery and the rice texture will degrade upon thawing.

Common Sausage and Shrimp Rice Questions

Can I use brown rice instead of white?

Brown rice requires a longer cooking time and a higher liquid ratio. If you make this swap, the tomatoes will break down completely and the timing for the shrimp step will change significantly.

Do I have to use raw shrimp?

Yes, raw shrimp is required for the final steaming step. Pre-cooked shrimp will turn tough and chewy if left in the covered pot for 5 to 7 minutes.

I always taste for salt one last time after folding in the lemon juice, because the bright acidity changes how the rich sausage fat lands on the palate. Serve this straight from the skillet while the grains are still slick with the melted butter.

Print
clockclock iconcutlerycutlery iconflagflag iconfolderfolder iconinstagraminstagram iconpinterestpinterest iconfacebookfacebook iconprintprint iconsquaressquares iconheartheart iconheart solidheart solid icon
Skillet filled with spiced sliced sausage, pink shrimp, and fluffy white rice, garnished with green scallions

5 Stars 4 Stars 3 Stars 2 Stars 1 Star

No reviews

One-Pot Sausage, Shrimp, and Rice with a Butter-Lemon Finish

Recipe by Chloe Davis

This vibrant, Jambalaya-inspired skillet dinner builds incredible depth in a single pan, finishing with a glossy lemon-butter swirl that coats every grain of rice. By blistering the tomatoes and toasting the rice in the rendered sausage fat before adding the broth, you get a richly spiced, separate-grain texture that never turns mushy.


  • Total Time50 minutes
  • Yield6 servings 1x

Find it on your board when it's time to cook

Ingredients

Scale

Base & Aromatics

  • 1 tablespoon olive oil
  • 14 ounces (400g) smoked sausage (such as Andouille or Kielbasa), sliced into ¼-inch rounds
  • 1 medium yellow onion, chopped
  • 1 large red bell pepper, chopped
  • 1 pint (10 oz / 280g) cherry tomatoes, whole or halved
  • 3 large cloves garlic, minced

Rice & Spices

  • 1 ½ cups (300g) long-grain white rice, rinsed and drained
  • 1 ½ teaspoons smoked paprika
  • 1 teaspoon dried thyme
  • 1 teaspoon kosher salt
  • ½ teaspoon onion powder
  • ¼ teaspoon cayenne pepper (adjust for heat preference)
  • 2 ½ cups (600ml) low-sodium chicken broth

Seafood & Finishing Touch

  • 1 pound (450g) large shrimp, peeled and deveined
  • 2 tablespoons unsalted butter, cut into small cubes
  • ½ lemon, juiced (about 1 ½ tablespoons)
  • 4 scallions, thinly sliced


Instructions

  1. Sear the sausage: Heat the olive oil in a large Dutch oven or heavy-bottomed pot over medium-high heat. Add the sliced sausage in an even layer and cook for 4 to 5 minutes, stirring occasionally, until the edges are deeply browned and the fat has rendered.
  2. Sauté the vegetables: Add the chopped onion, red bell pepper, and cherry tomatoes to the pot. Sauté for 5 to 6 minutes. Let the natural moisture from the vegetables help you scrape up any browned bits from the bottom of the pot. Cook until the onions are translucent and the tomatoes just begin to soften and burst.
  3. Toast the rice: Reduce the heat to medium. Stir in the minced garlic, smoked paprika, thyme, kosher salt, onion powder, and cayenne pepper, cooking for 1 minute until highly fragrant. Add the rinsed rice, stirring constantly for 1 to 2 minutes to lightly toast the grains and coat them in the spiced oil.
  4. Simmer: Pour in the chicken broth and give the mixture one final stir to ensure nothing is sticking to the bottom. Bring the liquid to a rolling boil, then cover the pot tightly with a lid and reduce the heat to low. Let it simmer undisturbed for 15 minutes.
  5. Steam the shrimp: Remove the lid (most of the liquid should be absorbed, and the rice tender). Quickly arrange the raw shrimp in an even layer over the top of the rice and scatter the cubed butter over the shrimp. Replace the lid immediately and let it continue to cook on low for 5 to 7 minutes, or until the shrimp are firm, pink, and fully opaque.
  6. Fluff and finish: Remove the pot from the heat. Drizzle the fresh lemon juice over the top and add the sliced scallions. Gently fluff the rice with a fork, folding the melted butter, lemon juice, and shrimp into the rice. Taste and adjust seasoning if needed, then serve hot.
Find it on your board when it's time to cook

Notes

  • Why it works: Toasting the raw rice in the rendered sausage fat and spices creates a protective barrier on the grains, ensuring a fluffy, distinct texture rather than a heavy, mushy porridge.
  • The liquid ratio: We use slightly less broth than standard rice-cooking instructions call for because the fresh bell pepper and bursting cherry tomatoes release their own natural juices into the pot as it simmers.
  • Shrimp timing: Layering the shrimp on top of the cooked rice at the very end gently steams them. Stirring them in too early or burying them in the boiling broth will result in tough, overcooked seafood.

Calories: 495 | Total Carbs: 42g (Fiber: 3g, Sugar: 5g) | Fat: 25g (Saturated: 9g) | Protein: 26g

Nutritional values are approximate, based on standard reference data (USDA FoodData Central). Actual values vary by brand and exact measurements. For precision, use a tracker like MyFitnessPal or Cronometer.

  • Prep Time: 15 minutes
  • Cook Time: 35 minutes
  • Category: Main Course
  • Method: Stovetop
  • Cuisine: American

Nutrition

  • Serving Size: About 1 ½ cups
  • Calories: 495
  • Sugar: 5g
  • Fat: 25g
  • Saturated Fat: 9g
  • Carbohydrates: 42g
  • Fiber: 3g
  • Protein: 26g

This Italian lentil soup relies on pantry staples. It builds serious depth fast. Dropping a hard parmesan rind straight into the simmering pot gives the fire-roasted tomato broth a salty, complex richness that plain vegetable stock cannot match.

Italian lentil soup served in a black bowl and garnished with grated cheese and drops of oil

Why This Method Works

This soup requires no homemade stock to taste finished. It leans on two specific ingredients instead. Fire-roasted tomatoes provide a sweet, charred baseline, while the parmesan rind acts as a savory anchor that seasons the lentils from the inside out. Finishing the bowls with fresh lemon juice and a final drizzle of olive oil cuts through the heavy, cooked notes and brightens the entire dish.

How to Make Italian Lentil Soup

Sauté the aromatics. Heat two tablespoons of olive oil over medium heat in a large heavy-bottomed pot. Add the chopped onion and carrots. Season them with a half teaspoon of kosher salt and cook for 6 to 8 minutes until the onions turn translucent.

Bloom the spices. Stir in the minced garlic, dried Italian seasoning, and crushed red pepper flakes. Cook this mixture for 1 minute. The garlic will smell highly fragrant and the spices will release their raw bite into the oil.

Brown lentils, a parmesan rind, and crushed tomatoes cooking in a heavy pot

Simmer the base. Pour in the vegetable broth and the crushed fire-roasted tomatoes. Scrape the bottom of the pot to release any browned bits. Stir in the dried lentils, drop in the parmesan rind, and season the broth with the remaining teaspoon of salt and the black pepper. Bring the liquid to a boil over medium-high heat, then reduce the heat to medium-low, cover the pot with the lid slightly ajar, and simmer gently for 30 minutes.

Thick Italian lentil soup boiling in a heavy cooking pot

Cook the greens. Stir in the diced zucchini and chopped kale. Leave the pot uncovered. Continue to simmer for about 15 minutes until the kale melts into the broth and the zucchini is cooked through. I test the lentils at this stage by pressing one against the roof of my mouth; they should yield completely without turning to mush.

Adding diced zucchini and chopped kale to a pot of lentil soup with a wooden spoon

Stir the chopped kale into the pot in batches if it threatens to overflow; the stiff leaves wilt quickly in the hot broth.

Diced zucchini, carrots, and kale leaves simmering in a thick lentil soup

Finish the broth. Remove the pot from the heat. Discard the spent cheese rind. Stir in the fresh lemon juice and the final tablespoon of olive oil, then adjust the salt and pepper to your taste.

Storing and Reheating

  • Cool the soup quickly and store it in an airtight container in the refrigerator for 3 to 4 days.
  • Freeze any portions you will not eat within that window.
  • The lentils will continue to absorb liquid overnight. When reheating leftovers on the stove, I always stir in a heavy splash of water or extra vegetable broth to loosen the texture back to a proper soup.

Common Questions About Italian Lentil Soup

Can I use red lentils instead of brown or green?

Red lentils break down completely and will turn this soup into a thick puree. Stick to brown or green lentils so they hold their shape during the long simmer.

What if I do not have a parmesan rind?

You can skip the rind and stir in a tablespoon of white miso paste at the end of cooking. The broth will lack the specific cheese flavor but will still gain the necessary savory weight.

Thick Italian lentil soup in a black bowl with grated parmesan and oil

Top each warm bowl with a generous dusting of grated cheese and a light drizzle of extra-virgin olive oil. This simple finish brings the bright, fresh flavors forward right before you eat. Save this recipe for the next time your pantry looks bare but you need a bowl of something substantial.

Print
clockclock iconcutlerycutlery iconflagflag iconfolderfolder iconinstagraminstagram iconpinterestpinterest iconfacebookfacebook iconprintprint iconsquaressquares iconheartheart iconheart solidheart solid icon
Italian lentil soup served in a black bowl and garnished with grated cheese and drops of oil

5 Stars 4 Stars 3 Stars 2 Stars 1 Star

No reviews

Italian Lentil Soup with Parmesan Broth

Recipe by Chloe Davis

A rich, hearty soup built on a foundation of fire-roasted tomatoes and a savory, cheese-infused broth. Finishing each bowl with a splash of fresh lemon, grated cheese, and a drizzle of olive oil transforms this pantry-friendly meal into a vibrant, restaurant-quality dinner.


  • Total Time1 hour 10 minutes
  • Yield6 servings 1x

Find it on your board when it's time to cook

Ingredients

Scale

Soup Base

  • 3 Tbsp extra-virgin olive oil, divided, plus more for serving
  • 1 large yellow onion, chopped
  • 3 medium carrots, peeled and chopped
  • 1 1/2 tsp kosher salt, divided
  • 5 large garlic cloves, minced
  • 1 Tbsp dried Italian seasoning
  • 1/2 tsp crushed red pepper flakes (optional)

Broth & Lentils

Vegetables & Finish

  • 1 medium zucchini, diced
  • 1 small bunch Lacinato (Tuscan) kale, stemmed and chopped
  • 1 Tbsp fresh lemon juice
  • Grated Parmesan cheese, for serving


Instructions

  1. Sauté the aromatics: Heat 2 tablespoons of the olive oil in a large Dutch oven or heavy-bottomed pot over medium heat. Add the onion and carrots; season with 1/2 teaspoon of the salt. Cook, stirring occasionally, until the vegetables are softened and the onion is translucent, 6 to 8 minutes.
  2. Bloom the spices: Stir in the garlic, Italian seasoning, and crushed red pepper flakes. Cook for 1 minute, stirring constantly, until highly fragrant.
  3. Simmer the soup: Pour in the crushed tomatoes and broth, scraping up any browned bits on the bottom of the pot. Stir in the lentils, drop in the Parmesan rind, and season with the remaining 1 teaspoon of kosher salt and the black pepper. Bring to a boil over medium-high heat, then reduce the heat to medium-low. Cover the pot with the lid slightly ajar and simmer gently for 30 minutes.
  4. Cook the greens: Stir in the diced zucchini and chopped kale. Continue to simmer, uncovered, until the lentils are completely tender, the zucchini is cooked through, and the kale has melted into the broth, about 15 minutes.
  5. Finish and serve: Remove the pot from the heat and discard the Parmesan rind. Stir in the fresh lemon juice and the remaining 1 tablespoon of olive oil. Taste the broth and adjust the seasoning with more salt or pepper if needed. Ladle the hot soup into bowls and serve immediately, topped with a dusting of grated Parmesan and a light drizzle of extra-virgin olive oil.
Find it on your board when it's time to cook

Notes

  • Why it works: Simmering a hard Parmesan rind directly in the broth infuses the soup with an incredible, savory umami depth that plain vegetable broth cannot replicate.
  • Storage and reheating: This soup improves as the flavors meld. Cool leftovers quickly and store in an airtight container in the refrigerator for 3 to 4 days (per USDA food safety guidelines for cooked leftovers). Freeze any portions that will not be consumed within this timeframe. The lentils will continue to absorb liquid as they sit, so stir in a splash of water or broth when reheating over the stove.

Calories: 260 | Total Carbs: 35g (Fiber: 12g, Sugar: 8g) | Fat: 9g (Saturated: 2g) | Protein: 12g | Sodium: 560mg (based on low-sodium broth and tomatoes)

Nutritional values are approximate, based on standard reference data (USDA FoodData Central). Actual values vary by brand and exact measurements. For precision, use a tracker like MyFitnessPal or Cronometer.

  • Prep Time: 15 minutes
  • Cook Time: 55 minutes
  • Category: Soup

Nutrition

  • Serving Size: About 1 1/2 cups
  • Calories: 260
  • Sugar: 8g
  • Sodium: 560mg (based on low-sodium broth and tomatoes)
  • Fat: 9g
  • Saturated Fat: 2g
  • Carbohydrates: 35g
  • Fiber: 12g
  • Protein: 12g

Most miso glazed eggplant hides a spongy center beneath a scorched top. This method fixes the problem by roasting the halves naked until they collapse. You save the sweet glaze for a fast, vigorously bubbling caramelization at the end, finishing with chili crisp to cut the richness.

Miso glazed eggplant halves topped with chili crisp, scallions, and sesame seeds on a white plate

How to Avoid a Spongy Center

Roasting the eggplants cut-side down against the foil traps steam. This cooks the flesh rapidly and evenly. I’ve pulled too many scorched eggplants out of the oven to trust the traditional method, so holding the glaze back ensures the sugars caramelize beautifully without burning.

How to Make Miso Glazed Eggplant

Prep the pan. Preheat your oven to 400°F (200°C). Line a large, rimmed baking sheet with heavy-duty aluminum foil. Do not use parchment paper, because it will easily catch fire under the broiler during the final step.

Score and oil. Score the flesh deeply in a diagonal crosshatch pattern. Cut about ½-inch deep. Take care not to pierce the outer skin, or the halves will fall apart when you move them. Brush the cut sides evenly with two tablespoons of neutral oil and sprinkle with ¼ teaspoon of kosher salt.

Raw eggplant halves scored in a crosshatch pattern on a foil-lined baking sheet

Roast cut-side down. Place the halves cut-side down on the foil. Roast for 25 to 30 minutes. The skins should look slightly shriveled, and the flesh must collapse effortlessly. I always press them gently with a pair of tongs; if the flesh bounces back or feels firm, they need more time in the oven.

Roasted eggplant halves looking shriveled and soft on a baking sheet

Whisk the glaze. While the oven does the work, combine the glaze ingredients. Stir them in a small bowl. The mixture should be completely smooth so it melts evenly under the broiler.

Apply the glaze. Remove the pan from the oven. Carefully flip the eggplants so they sit cut-side up. Switch your oven to Broil on High. Slather the miso glaze generously over the tops, using a brush to push a bit of it down into the scored cuts.

Brushing creamy miso glaze onto the scored and roasted eggplant halves

Broil to caramelize. Return the pan to the oven. Broil for 3 to 5 minutes. Watch the pan constantly. The high sugar content in the mirin and brown sugar will catch quickly, so pull them out as soon as the edges are deeply browned and the surface is bubbling.

Broiled eggplant halves with a shiny, browned, and bubbling miso glaze

The glaze should look deeply browned at the edges but not blackened.

A Second Way to Make It: The Air Fryer

Brush the scored halves with oil. Place them cut-side up in the basket. Air fry at 380°F for 15 to 18 minutes until completely soft. Spoon on the glaze and air fry for 2 to 3 more minutes until bubbly. You may need to work in batches depending on your basket size.

Storing and Reheating Leftovers

  • Keep leftover glazed eggplant in an airtight container in the refrigerator for up to three days.
  • Reheat the halves in a 350°F oven for about 10 minutes, or until warmed through.
  • Avoid microwaving them, because the rapid heat turns the delicate flesh mushy.

Quick Planning Questions

Do I need to salt and drain the eggplants before roasting?

No. Roasting them cut-side down traps enough steam to collapse the flesh quickly, bypassing the need to draw out moisture beforehand.

Can I make the miso glaze ahead of time?

Yes. You can whisk the glaze ingredients together and store the mixture in a covered container in the refrigerator for up to three days before using it.

Spoon the chili crisp directly over the hot glaze. Scatter the sliced scallion and toasted sesame seeds on top. I prefer to dress them right before serving so the crunchy bits keep their texture and the sharp heat immediately cuts through the sweet miso.

Print
clockclock iconcutlerycutlery iconflagflag iconfolderfolder iconinstagraminstagram iconpinterestpinterest iconfacebookfacebook iconprintprint iconsquaressquares iconheartheart iconheart solidheart solid icon

5 Stars 4 Stars 3 Stars 2 Stars 1 Star

No reviews

Miso Glazed Eggplant with Chili Crisp

Recipe by Chloe Davis

This version solves the biggest pitfall of miso-glazed eggplant: a burnt top hiding an undercooked, spongy center. By roasting the scored eggplants naked until they collapse into meltingly tender perfection, and only applying the sweet-and-savory glaze for a quick final broil, you get a beautifully caramelized crown every time. A finishing drizzle of spicy chili crisp cuts the richness of the miso and adds a highly addictive crunch.


  • Total Time38–45 minutes
  • Yield4 halves (serves 4) 1x

Find it on your board when it's time to cook

Ingredients

Scale

The Eggplant

  • 2 medium globe or Italian eggplants (about 1 lb / 450g each), halved lengthwise
  • 2 tablespoons neutral oil (such as avocado or canola)
  • ¼ teaspoon kosher salt

The Miso Glaze

  • ¼ cup white miso paste (60g)
  • 1 tablespoon mirin (15ml)
  • 1 tablespoon rice vinegar (15ml)
  • 1 tablespoon packed light brown sugar (12g)
  • 2 teaspoons soy sauce (10ml)
  • 1 teaspoon toasted sesame oil (5ml)
  • 1 teaspoon grated fresh ginger
  • 1 large garlic clove, finely grated

The Finish

  • 2 tablespoons spicy chili crisp
  • 1 scallion, thinly sliced
  • 1 teaspoon toasted sesame seeds


Instructions

  1. Prep the oven and pan: Preheat your oven to 400°F (200°C). Line a large, rimmed baking sheet with heavy-duty aluminum foil. (Do not use parchment paper, as it can easily burn or catch fire under the broiler in step 5).
  2. Score the eggplants: Using a sharp paring knife, deeply score the flesh of each eggplant half in a diagonal crosshatch pattern. Cut about ½-inch deep, taking care not to pierce through the outer skin. Brush the cut sides evenly with the neutral oil and sprinkle with kosher salt.
  3. Roast until tender: Place the eggplant halves cut-side down on the prepared baking sheet. Roast for 25 to 30 minutes. You’ll know they are ready when the skins look slightly shriveled and the flesh collapses effortlessly when gently pressed with a pair of tongs.
  4. Mix the glaze: While the eggplants roast, whisk together the miso paste, mirin, rice vinegar, brown sugar, soy sauce, sesame oil, ginger, and garlic in a small bowl until completely smooth.
  5. Glaze and broil: Remove the pan from the oven and carefully flip the eggplants so they are cut-side up. Switch your oven to Broil (High). Slather the miso glaze generously over the tops of the eggplants, pushing a bit of it down into the scored cuts. Broil for 3 to 5 minutes, watching very closely, until the glaze is vigorously bubbling and deeply browned at the edges.
  6. Garnish and serve: Transfer the warm eggplants to a serving platter. Spoon the chili crisp directly over the hot glaze, then scatter the sliced scallion and toasted sesame seeds on top. Serve immediately.
Find it on your board when it's time to cook

Notes

  • Why it works: Roasting the eggplants cut-side down traps steam against the pan, cooking the flesh rapidly and evenly without drying it out. Holding the glaze back until the final step ensures the sugars in the miso and mirin caramelize beautifully under the broiler without turning bitter or burning.
  • Air Fryer Variation: To use an air fryer, brush the scored halves with oil and air fry cut-side up at 380°F for 15 to 18 minutes until completely soft. Spoon on the glaze and air fry for 2 to 3 more minutes until bubbly. (You may need to work in batches depending on basket size.)

Nutrition (per serving — estimates)

Calories: 240 | Total Carbs: 24g (Fiber: 7g, Sugar: 13g) | Fat: 14g (Saturated: 1.5g) | Protein: 4g

Nutritional values are approximate, based on standard reference data (USDA FoodData Central). Actual values vary by brand and exact measurements. For precision, use a tracker like MyFitnessPal or Cronometer.

  • Prep Time: 10 minutes
  • Cook Time: 28–35 minutes
  • Category: Side Dish
  • Method: Roasting
  • Cuisine: Japanese-Inspired

Nutrition

  • Serving Size: 1 glazed half
  • Calories: 240
  • Sugar: 13g
  • Fat: 14g
  • Saturated Fat: 1.5g
  • Carbohydrates: 24g
  • Fiber: 7g
  • Protein: 4g

This skillet dinner moves fast. It finishes entirely under the broiler. By blooming the spices directly in hot oil first, you build a rich and smoky flavor base that completely coats the ground turkey and vegetables.

Cast iron skillet filled with sweet potatoes, ground turkey, and melted pepper jack cheese

The Key to Skillet Flavor

Most quick skillets suffer from flat seasoning. This method fixes that completely. Stirring the chili powder, cumin, and smoked paprika into hot oil before adding any liquid wakes up their fat-soluble flavor compounds. I rely on this technique for almost every fast dinner because it entirely eliminates the powdery, raw taste of dry spices.

How to Make the Turkey and Sweet Potato Skillet

Brown the meat. Position an oven rack about six inches from your broiler and preheat the element to high. Heat one tablespoon of oil in a large oven-safe skillet over medium-high heat. Add the ground turkey and cook for five to seven minutes until browned and cooked through to 165°F. Break the meat into bite-sized crumbles with a spatula as it cooks. Use a slotted spoon to transfer the meat to a bowl so the savory juices stay in the pan.

Ground turkey browning in a black cast iron skillet

Sauté and bloom. Lower the heat to medium. Add the remaining tablespoon of oil followed by the diced onion and red bell pepper. Sauté the vegetables for four to five minutes until they begin to soften. Stir in the minced garlic, chili powder, cumin, smoked paprika, oregano, kosher salt, and black pepper. Cook for exactly one minute while stirring constantly until the spices darken and smell highly fragrant.

Steam the sweet potatoes. Toss the cubed sweet potatoes into the skillet. Stir them well to coat in the dark spice mixture. Pour in a quarter cup of chicken broth and immediately cover the pan with a tight-fitting lid. Cook for 10 to 12 minutes. I look for the sweet potatoes to yield to a fork, but I always pull the lid before they begin falling apart.

Cubed sweet potatoes cooking with peppers and onions in a skillet

Wilt the greens. Remove the lid. Stir in the chopped Tuscan kale. Cook for two to three minutes until the leaves wilt down and any lingering liquid completely evaporates. Return the cooked turkey to the pan and stir everything together evenly. Taste the mixture and add a pinch of salt if it needs it.

Ground turkey, sweet potatoes, and wilted kale mixed together in a pan

Melt the cheese. Remove the skillet from the stovetop heat. Scatter the shredded pepper jack in an even layer over the top of the turkey and vegetables. Transfer the skillet to the oven and broil for two to three minutes. Pull it out as soon as the cheese is melted, bubbling, and golden brown in spots.

Melted pepper jack cheese bubbling over ground turkey and sweet potatoes in a skillet

Make-Ahead Storage

If I plan to eat this for lunches throughout the week, I leave the cheese off the main pan. The turkey mixture stores well in an airtight container in the fridge for up to four days. Sprinkle a small handful of cheese over individual portions just before microwaving so the pepper jack stays gooey instead of turning rubbery.

Serving the Skillet

Serve this meal hot straight from the oven. Set the cast iron directly on a sturdy trivet. Scoop generous portions onto plates and finish them with a squeeze of fresh lime juice and fresh cilantro leaves to cut through the rich cheese.

A serving of ground turkey and sweet potato skillet plated in a white ceramic dish

Common Skillet Questions

Can I prep the sweet potatoes ahead of time?

Yes, you can peel and cube the sweet potatoes a day in advance. Store them submerged in a container of cold water in the fridge so they do not turn brown, then drain and pat them completely dry before adding them to the hot pan.

Do I have to use pepper jack cheese?

Any good melting cheese works well here. Sharp cheddar or Monterey Jack offer excellent alternatives if you want to avoid the mild heat of pepper jack.

I make this exactly as written when I want a fast dinner that still feels completely satisfying. The prep work is minimal. Getting that cheese bubbling under the broiler takes only minutes but it transforms a simple pan of meat and vegetables into something worth repeating.

Print
clockclock iconcutlerycutlery iconflagflag iconfolderfolder iconinstagraminstagram iconpinterestpinterest iconfacebookfacebook iconprintprint iconsquaressquares iconheartheart iconheart solidheart solid icon
Cast iron skillet filled with sweet potatoes, ground turkey, and melted pepper jack cheese

5 Stars 4 Stars 3 Stars 2 Stars 1 Star

No reviews

Ground Turkey and Sweet Potato Skillet with Broiled Pepper Jack

Recipe by Chloe Davis

This vibrant, one-pan dinner turns simple ground turkey and sweet potatoes into a deeply flavorful meal with a gorgeous, bubbly crust. By blooming the spices in the hot oil and finishing the whole skillet under the broiler, you get rich, smoky vegetables and deeply golden, melted cheese instead of just a steamed layer.


  • Total Time40 minutes
  • Yield4 servings 1x

Find it on your board when it's time to cook

Ingredients

Scale

Base and Aromatics

  • 2 tablespoons avocado oil or olive oil, divided
  • 1 pound ground turkey (93% lean)
  • 1 medium yellow onion, diced (about 1 cup)
  • 1 large red bell pepper, chopped
  • 3 cloves garlic, minced

Spices

  • 1 tablespoon chili powder
  • 1 teaspoon ground cumin
  • 1 teaspoon smoked paprika
  • 1/2 teaspoon dried oregano
  • 1/2 teaspoon kosher salt, plus more to taste
  • 1/4 teaspoon freshly ground black pepper

Vegetables and Finish

  • 1.25 pounds sweet potatoes (about 4 cups), peeled and cut into 1/2-inch cubes
  • 1/4 cup low-sodium chicken broth
  • 4 cups roughly chopped Tuscan kale (tough stems removed)
  • 1 1/2 cups (6 ounces) shredded pepper jack cheese
  • Optional toppings: fresh cilantro leaves, lime wedges, sliced jalapeños


Instructions

  1. Preheat and brown the turkey: Position an oven rack about 6 inches from your broiler and preheat the broiler to high. Heat 1 tablespoon of the oil in a large, oven-safe skillet (cast iron works well) over medium-high heat. Add the ground turkey, season lightly with salt and pepper, and cook for 5 to 7 minutes. Use a spatula to break the meat into bite-sized crumbles until it is nicely browned and cooked through to 165°F internally. Use a slotted spoon to transfer the turkey and its juices to a bowl.
  2. Sauté the aromatics and bloom the spices: Lower the heat to medium. Add the remaining 1 tablespoon of oil to the skillet, followed by the diced onion and red bell pepper. Sauté for 4 to 5 minutes, scraping up any browned turkey bits from the bottom of the pan, until the vegetables begin to soften. Stir in the minced garlic, chili powder, cumin, smoked paprika, oregano, kosher salt, and black pepper. Cook for 1 minute, stirring constantly, until the spices are highly fragrant and darkened in color.
  3. Steam-fry the sweet potatoes: Add the cubed sweet potatoes to the skillet, tossing them well to coat in the spice mixture. Pour in the chicken broth, immediately cover the skillet with a tight-fitting lid, and cook for 10 to 12 minutes. Lift the lid to stir occasionally. The sweet potatoes are ready when they are easily pierced with a fork but not falling apart.
  4. Wilt the kale: Remove the lid and stir in the chopped kale. Cook for 2 to 3 minutes, tossing frequently, until the kale has wilted down and any lingering liquid in the pan has evaporated. Return the cooked turkey to the skillet and stir to combine everything evenly. Taste the mixture and add another pinch of salt or pepper if needed.
  5. Broil to finish: Remove the skillet from the stovetop heat. Scatter the shredded pepper jack cheese in an even layer over the top of the turkey and vegetables. Transfer the skillet to the oven and broil for 2 to 3 minutes. Watch it very closely—pull it out as soon as the cheese is melted, bubbling, and golden brown in spots. Serve hot with fresh cilantro, lime wedges, and jalapeños.
Find it on your board when it's time to cook

Notes

  • Why it works: Blooming the chili powder, cumin, and smoked paprika in the hot oil before adding the liquid wakes up their fat-soluble flavor compounds. This builds a rich, deep flavor base and prevents the powdery, raw-spice taste that occurs when seasonings are just stirred in at the very end.
  • Make-ahead and storage: This skillet reheats wonderfully for meal prep. However, if you plan to store it for lunches throughout the week, leave the cheese off the main pan. Sprinkle the cheese over individual portions just before reheating in the microwave to keep it from separating or turning rubbery.

Calories: 530 | Total Carbs: 35g (Fiber: 6g, Sugar: 9g) | Fat: 28g (Saturated: 10g) | Protein: 36g

Nutritional values are approximate, based on standard reference data (USDA FoodData Central). Actual values vary by brand and exact measurements. For precision, use a tracker like MyFitnessPal or Cronometer.

  • Prep Time: 15 minutes
  • Cook Time: 25 minutes
  • Category: Main Course
  • Method: Stovetop to Broiler

Nutrition

  • Serving Size: About 2 cups
  • Calories: 530
  • Sugar: 9g
  • Fat: 28g
  • Saturated Fat: 10g
  • Carbohydrates: 35g
  • Fiber: 6g
  • Protein: 36g