Author

Chloe Davis

Browsing
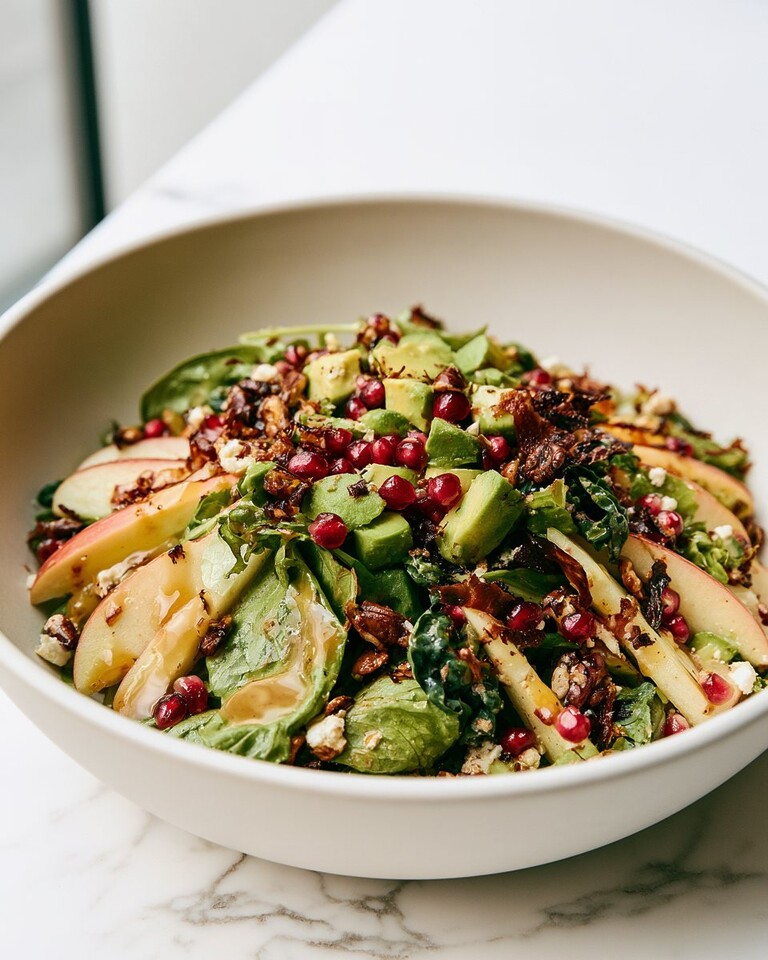
Keto layered tart

Servings

6

servings
Prep time

1

hour 
Cooking time

45

minutes
Calories

300

kcal

Ingredients

  • Biscuit base
  • 100 g digestive biscuits

  • 40 g clarified butter/ghee melted, cooled

  • Chocolate layer
  • 185 g cream

  • 75 g dark chocolate chopped

  • 1.5 tsp cornflour

  • 1/2 tsp agar agar

  • 1 tbsp cocoa powder

  • 30 g brown sugar

  • Vanilla coconut layer
  • 185 g coconut milk

  • 40 g cream

  • 1 tsp agar

  • 1 tbsp cornflour

  • 1/2 vanilla bean shell

  • 2 tbsp raw sugar

  • Strawberry layer
  • 250 g strawberries sliced

  • 50 g brown sugar

  • 2 tbsp water

  • 1/2 tsp agar agar

Directions

  • Biscuit base
  • Preheat the oven to 170C.
  • Live a square 6″ dessert mold with heavy duty foil.
  • Run the biscuits in a blender or crush in a ziploc.
  • Stir in the cooled clarified butter and transfer to the prepared tin. Press the crumbs firmly into place to make a base.
  • Bake for 10-12 minutes until light golden brown.
  • Cool completely on a rack while you make the chocolate layer.
  • Chocolate layer
  • Whisk together all the ingredients in a heavy bottom saucepan until lump free. Simmer over low heat stirring constantly until the chocolate melts and thickens to a custard consistency. Whisk well, then strain and cool slightly.
  • Pour over the cooled biscuit base and place in the freezer for 30 minutes until firm to touch.
  • Vanilla coconut layer
  • Whisk together all the ingredients in a heavy bottom saucepan until lump free. Simmer over low heat stirring constantly until the mixture thickens to a custard consistency. Whisk well, then strain and cool slightly. Gently pour over the chocolate layer and place in the freezer for 30 minutes until firm to touch.
  • Strawberry layer
  • Reserve 50g sliced strawberries.
  • Place remaining strawberries, sugar and water in a heavy bottom saucepan and stir well to mix.
  • Simmer over low heat stirring constantly until the berries break down and release their juices.
  • strain the syrup, return to the saucepan and stir in the agar agar. Simmer for 3-4 minutes. Cool slightly and stir in the reserved strawberries.
  • immediately pour over the set vanilla coconut custard and return to the freezer to set, approximately 20 minutes.
  • Leave to set in the fridge overnight.
  • Slice with a serrated knife.

Recipe Video

KETO COCONUT MAGIC BAR RECIPE

Servings

1

servings
Prep time

30

minutes
Cooking time

30

minutes
Calories

157

kcal

Ingredients

Directions

  • In a food processor mix first five ingredients until butter is evenly crumbled and distributed.
  •  Press mixture into a 7×11″ or 9×9″ baking dish.

  • Bake for 10 mins at 350.
  • In a medium sauce pan melt butter, add powdered Swerve and mix well.
  • Remove from heat, add extract and heavy cream.

  • Whisk eggs into the mixture, add shredded coconut and salt, mix until well combined.
  •  Pour mixture over the crust and sprinkle chocolate chips overtop.
  • Bake for 20 mins at 350.
  •  Allow the pan to completely cool before cutting into bars

Recipe Video

keto berries ice cream

Servings

1

servings
Prep time

30

minutes
Cooking time

30

minutes
Calories

233

kcal

Ingredients

Directions

  • Add all the ingredients to a high speed blender or food processor.
  • Blend on high and scrape down the sides occasionally to get all the ingredients mixed well.

  • Once the mixture is nice and creamy eat as is or spoon into a shallow freezer safe container.

  • Freeze for a 4-6 hours for a harder ice cream. Note it might get very hard when frozen completely. Just leave out on the counter for 15-20 minutes to soften. Or microwave for 30-60 seconds until soft enough to scoop.

Recipe Video

Notes

  • You can store it in the container that you froze it in. To serve it you will want to leave it out for 20 minutes or until it softens. Or you can microwave it for 30 seconds or more until it’s easy to scoop.

Keto lady fingers

Servings

35

servings
Prep time

15

minutes
Cooking time

15

minutes
Calories

36

kcal

Ingredients

Directions

  • Preheat oven to 350 F, line two baking sheets with parchment paper.
  • If you’re using a tip and coupler with your pastry bag, set it up with a ½” round tip.
  • In a small bowl, combine the almond flour, protein powder, coconut flour, xanthan gum, and salt, seta side.
  • Carefully separate the eggs – the whites into the bowl of a stand mixer, and the yolks into a large mixing bowl. Be very careful to not get ANY yolk into the whites.
  • Using the whisk attachment, beat the egg whites until foamy.
  • SLOWLY add ¼ cup of the sugar substitute, as it’s whipping.
  • Continue whipping until stiff, glossy peaks form.
  • In the other bowl, whisk the egg yolks together with the remaining sugar substitute, until pale yellow.
  • Add vanilla extract, continue beating until combined. Set aside.
  • Gently fold egg yolk mixture into the egg whites, just until mostly combined. Add almond flour mixture, gently fold in until combined.
  • Don’t over beat it – you want the egg white structure mostly intact!
  • Spoon batter into prepared pastry bag. If you’re not using a coupler, cut enough of the tip off to allow for a ½” opening.
  • Pipe 3 – 3 ½” long fingers on the prepared baking pan, leaving an inch between them.
  • Bake for 12-15 minutes. You’ll know they’re done when they’re just starting to turn golden around the edges and have firmed up.
  • Remove from the oven and allow to cool to room temperature.
  • Once cool, dust with powdered erythritol if desired, and store in an airtight container.

Recipe Video

Notes

  • Sugar alcohol accounts for slightly under 3 grams of carbs per cookie, leaving each cookie at under 1 gram of net carbs.

Keto Raspberry Cake

Servingsservings
Prep time

1

hour 
Cooking time

1

hour 

10

minutes
Calorieskcal

Ingredients

  • 2 ½ cups almond flour, measured and sifted

  • 1 1/2 cups of granulated sugar substitute

  • 2 teaspoons of baking powder

  • 1/4 teaspoon of sea salt

  • 8 eggs , room temperature

  • 8 ounces of full-fat softened cream cheese

  • 1/2 cup of unsalted butter, softened

  • 1 tsp of vanilla

  • 1 pint of fresh or frozen raspberries

  • Whipped Topping
  • 1 1/4 cups heavy whipping cream

  • ¼ cup of softened cream cheese

  • 4 teaspoons of sugar substitute

Directions

  • Preheat oven to 350 degrees
  • Grease and line with parchment paper a 9x5x3 inch loaf pan.
  • Measure and set aside the almond flour, baking powder, sea salt.
  • In a mixing bowl mix using an electric mixer set to high beat the butter, cream cheese, sugar substitute, and vanilla until well incorporated.
  • Next, add the eggs one at a time mixing well after each egg addition as well as the vanilla extract.
  • Then add all the dry ingredients into the mixing bowl and mix until well combined.
  • With a spatula gently fold in the raspberries. Note if using frozen raspberries there is no need to defrost.
  • In the prepared loaf pan bake cake for 35 to 45 minutes or until golden brown on top. Allow cake to cool for about 15 before taking out of the pan and allowing it to complete cooling on a baking rack.
  • While the cake is cooling make the whipped topping by combining the heavy whipping cream, sugar substitute, and softened cream cheese. Beat on high using an electric mixer until soft peaks form. The addition of the cream cheese will help stabilize the whipping cream.
  • Top the cake with the whipped topping. Make sure to spread evenly across the surface of the cake.
  • Optional: decorate the top of the loaf with additional fresh raspberries (about a cup)

Recipe Video

Lorem ipsum dolor sit amet, consectetur adipiscing elit, sed do eiusmod tempor incididunt ut labore et dolore magna aliqua. Mauris ultrices eros in cursus turpis. Interdum consectetur libero id faucibus. Lobortis elementum nibh tellus molestie nunc non blandit.

Sed risus ultricies tristique nulla aliquet enim tortor. Lacus viverra vitae congue eu consequat ac. Tempor commodo ullamcorper a lacus vestibulum sed arcu. Mattis vulputate enim nulla aliquet porttitor lacus. Pretium nibh ipsum consequat nisl vel pretium lectus. Risus sed vulputate odio ut.

Venenatis a condimentum vitae sapien pellentesque habitant morbi tristique senectus. Pretium vulputate sapien nec sagittis aliquam malesuada bibendum. Purus sit amet luctus venenatis lectus magna fringilla urna porttitor. Ultrices gravida dictum fusce ut. Senectus et netus et malesuada fames ac turpis.

Blueberry Maple Pancakes

Recipe by Chloe DavisCuisine: BreakfastDifficulty: Easy
Servingsservings
Prep time

10

minutes
Cooking time

10

minutes
Calories

250

kcal

Ingredients

  • 3/4 cup milk

  • 1 cup flour

  • 2 tablespoons sugar

  • 1 teaspoon baking powder

  • 1/2 teaspoon salt

  • egg

  • 2 tablespoons melted butter

  • 1+ cup fresh blueberries

Directions

  • In a large bowl, sift together flour, salt, baking powder and sugar. In a small bowl, beat together egg and milk. Stir milk and egg into flour mixture. Mix in the butter and blueberries.
  • Heat a lightly oiled griddle or frying pan over medium-high heat. Pour or scoop the batter onto the griddle, using approximately 1/4 cup for each pancake. Brown on both sides and serve hot.

Lorem ipsum dolor sit amet, consectetur adipiscing elit, sed do eiusmod tempor incididunt ut labore et dolore magna aliqua. Nunc eget lorem dolor sed viverra ipsum nunc. Arcu bibendum at varius vel pharetra vel turpis nunc eget. Purus in mollis nunc sed id. Malesuada pellentesque elit eget gravida cum sociis. Tellus elementum sagittis vitae et leo. Enim sed faucibus turpis in. Egestas integer eget aliquet nibh praesent tristique. Augue neque gravida in fermentum et sollicitudin ac. Semper auctor neque vitae tempus quam pellentesque. Adipiscing bibendum est ultricies integer quis. Elementum nibh tellus molestie nunc non blandit massa enim nec.

In massa tempor nec feugiat nisl pretium. Aliquam id diam maecenas ultricies mi eget mauris pharetra et. Tincidunt arcu non sodales neque sodales. In dictum non consectetur a erat. Viverra mauris in aliquam sem fringilla ut morbi tincidunt augue. Urna et pharetra pharetra massa. Metus vulputate eu scelerisque felis imperdiet. At in tellus integer feugiat scelerisque varius morbi enim. Sit amet est placerat in egestas erat.

“Making these with my kids was as much fun as eating them!”

-Anonymous

Sit amet nulla facilisi morbi tempus iaculis. Lobortis scelerisque fermentum dui faucibus in ornare quam viverra orci. Justo eget magna fermentum iaculis eu non. Tempus urna et pharetra pharetra massa massa ultricies mi. Feugiat scelerisque varius morbi enim nunc faucibus a pellentesque sit. Elit ullamcorper dignissim cras tincidunt lobortis feugiat vivamus at augue.

Sit amet nulla facilisi morbi tempus iaculis. Lobortis scelerisque fermentum dui faucibus in ornare quam viverra orci. Justo eget magna fermentum iaculis eu non. Tempus urna et pharetra pharetra massa massa ultricies mi. Feugiat scelerisque varius morbi enim nunc faucibus a pellentesque sit. Elit ullamcorper dignissim cras tincidunt lobortis feugiat vivamus at augue. Lectus arcu bibendum at varius vel pharetra vel. Purus semper eget duis at. Sapien faucibus et molestie ac. Nunc sed augue lacus viverra vitae congue eu consequat. Dolor sed viverra ipsum nunc.

Feugiat nibh sed pulvinar proin gravida hendrerit lectus. Purus faucibus ornare suspendisse sed nisi. Ipsum dolor sit amet consectetur adipiscing elit ut. Rhoncus mattis rhoncus urna neque viverra justo nec. Risus sed vulputate odio ut enim blandit. In massa tempor nec feugiat nisl pretium. Aliquam id diam maecenas ultricies mi eget mauris pharetra et. Tincidunt arcu non sodales neque sodales. In dictum non consectetur a erat. Viverra mauris in aliquam sem fringilla ut morbi tincidunt augue. Urna et pharetra pharetra massa. Metus vulputate eu scelerisque felis imperdiet. At in tellus integer feugiat scelerisque varius morbi enim. Sit amet est placerat in egestas erat.

Feugiat nibh sed pulvinar proin gravida hendrerit lectus. Purus faucibus ornare suspendisse sed nisi. Ipsum dolor sit amet consectetur adipiscing elit ut. Rhoncus mattis rhoncus urna neque viverra justo nec. Risus sed vulputate odio ut enim blandit. In massa tempor nec feugiat nisl pretium. Aliquam id diam maecenas ultricies mi eget mauris pharetra et. Tincidunt arcu non sodales neque sodales. In dictum non consectetur a erat. Viverra mauris in aliquam sem fringilla ut morbi tincidunt augue. Urna et pharetra pharetra massa. Metus vulputate eu scelerisque felis imperdiet. At in tellus integer feugiat scelerisque varius morbi enim. Sit amet est placerat in egestas erat.

The Perfect Chocolate Chip Cookie

Recipe by Chloe DavisCuisine: DessertDifficulty: Easy
Servings

24

cookies
Prep time

20

minutes
Cooking time

12

minutes
Calories

400

kcal

Ingredients

  • 1 cup softened butter

  • 1 cup white sugar

  • 1 cup brown sugar

  • 2 eggs

  • 2 teaspoons vanilla extract

  • 1 teaspoon baking soda

  • 2 teaspoons hot water

  • 1 tablespoon salt

  • 3 cups all-purpose flour

  • 2 cups semisweet chocolate chips

Directions

  • Preheat oven to 350 F.
  • Cream together the butter, white sugar, and brown sugar until smooth. Beat in the eggs one at a time, then stir in the vanilla. Add in water, baking soda and salt. Stir in flour, chocolate chips, and nuts. Drop by large spoonfuls onto cookie sheet.

  • Bake for about 10 minutes in the preheated oven, or until edges are nicely browned.

Notes

  • This recipe contains too much salt.

Lorem ipsum dolor sit amet, consectetur adipiscing elit, sed do eiusmod tempor incididunt ut labore et dolore magna aliqua. Nunc eget lorem dolor sed viverra ipsum nunc. Arcu bibendum at varius vel pharetra vel turpis nunc eget.

Purus in mollis nunc sed id. Malesuada pellentesque elit eget gravida cum sociis. Tellus elementum sagittis vitae et leo. Enim sed faucibus turpis in. Egestas integer eget aliquet nibh praesent tristique. Augue neque gravida in fermentum et sollicitudin ac. Semper auctor neque vitae tempus quam pellentesque. Adipiscing bibendum est ultricies integer quis. Elementum nibh tellus molestie nunc non blandit massa enim nec.

Purus in mollis nunc sed id. Malesuada pellentesque elit eget gravida cum sociis. Tellus elementum sagittis vitae et leo.

Enim sed faucibus turpis in. Egestas integer eget aliquet nibh praesent tristique. Augue neque gravida in fermentum et sollicitudin ac. Semper auctor neque vitae tempus quam pellentesque. Adipiscing bibendum est ultricies integer quis. Elementum nibh tellus molestie nunc non blandit massa enim nec.

Lorem ipsum dolor sit amet, consectetur adipiscing elit, sed do eiusmod tempor incididunt ut labore et dolore magna aliqua. Nunc eget lorem dolor sed viverra ipsum nunc. Arcu bibendum at varius vel pharetra vel turpis nunc eget.

Nunc eget lorem dolor sed viverra ipsum nunc. Arcu bibendum at varius vel pharetra vel turpis nunc eget.

French Buttercream Macarons

Recipe by Chloe DavisCuisine: Dessert, FrenchDifficulty: Difficult
Servings

10

servings
Prep time

45

minutes
Cooking time

40

minutes
Calories

400

kcal

Ingredients

  • Buttercream Filling
  • 2 Cups confectioners’ sugar

  • 6 oz Raspberries

  • 1 Tsp. vanilla extract

  • 1/2 Tsp. coconut extract (optional)

  • 2 Tablespoons coconut milk

  • 2 sticks salted butter, softened

  • 1 vanilla bean, seeds scraped out

  • Macarons
  • 1 3/4 Cups confectioners’ sugar

  • 1 1/4 Cups almond flour

  • 1/4 Cup coconut flour

  • 2/3 Cup egg whites

  • 3 T granulated sugar

  • 1-3 drops red or pink food coloring (optional)

Directions

  • For the Macarons
  • Preheat the oven to 300 degrees F using the convection setting. Line 3 baking sheets with silicone mats. Measure the confectioners’ sugar and almond flour by spooning them into measuring cups and leveling with a knife. Transfer to a bowl; whisk to combine.
  • Sift the sugar-almond flour mixture, a little at a time, through a fine-mesh sieve into a large bowl, pressing with a rubber spatula to pass through as much as possible. It will take a while, and up to 2 tablespoons of coarse almond flour may be left; just toss it
  • Beat the egg whites, cream of tartar and salt with a mixer on medium speed until frothy. Increase the speed to medium high; gradually add the superfine sugar and beat until stiff and shiny, about 5 more minutes.
  • Bake the first batch until the cookies are shiny and rise 1/8 inch to form a “foot,” about 20 minutes. Transfer to a rack to cool completely. Repeat, using a double sheet for each batch. Peel the cookies off the mats and sandwich with a thin layer of filling (see below).
  • For the Filling
  • Tint the batter with 2 drops neon pink gel food coloring; flavor with almond extract. Fill with seedless raspberry jam (you’ll need about 3/4 cup).
  • Use a clean piping bag to pipe the filling on top of the bottom cookie. Now place another cookie on top. Repeat with the remaining cookies and filling.

Lorem ipsum dolor sit amet, consectetur adipiscing elit, sed do eiusmod tempor incididunt ut labore et dolore magna aliqua. Nunc eget lorem dolor sed viverra ipsum nunc. Arcu bibendum at varius vel pharetra vel turpis nunc eget. Purus in mollis nunc sed id.

Lorem ipsum dolor sit amet, consectetur adipiscing elit, sed do eiusmod tempor incididunt ut labore et dolore magna aliqua. Nunc eget lorem dolor sed viverra ipsum nunc. Arcu bibendum at varius vel pharetra vel turpis nunc eget. Purus in mollis nunc sed id. Malesuada pellentesque elit eget gravida cum sociis. Tellus elementum sagittis vitae et leo. Enim sed faucibus turpis in. Egestas integer eget aliquet nibh praesent tristique. Augue neque gravida in fermentum et sollicitudin ac. Semper auctor neque vitae tempus quam pellentesque. Adipiscing bibendum est ultricies integer quis. Elementum nibh tellus molestie nunc non blandit massa enim nec.

Quis varius quam quisque id diam vel quam elementum pulvinar. Varius vel pharetra vel turpis nunc eget lorem. Lacinia quis vel eros donec ac odio tempor orci. Rhoncus est pellentesque elit ullamcorper dignissim. Lacus vestibulum sed arcu non odio euismod lacinia at. Amet tellus cras adipiscing enim. Cursus risus at ultrices mi tempus imperdiet nulla. Viverra maecenas accumsan lacus vel facilisis. Turpis cursus in hac habitasse. Tempor orci dapibus ultrices in iaculis nunc sed augue lacus. Tortor aliquam nulla facilisi cras fermentum odio eu. Pulvinar etiam non quam lacus suspendisse faucibus interdum posuere. Sit amet purus gravida quis blandit. Cras fermentum odio eu feugiat pretium. Volutpat odio facilisis mauris sit.

Lorem ipsum dolor sit amet, consectetur adipiscing elit, sed do eiusmod tempor incididunt ut labore et dolore magna aliqua. Nunc eget lorem dolor sed viverra ipsum nunc. Arcu bibendum at varius vel pharetra vel turpis nunc eget. Purus in mollis nunc sed id. Malesuada pellentesque elit eget gravida cum sociis. Tellus elementum sagittis vitae et leo. Enim sed faucibus turpis in. Egestas integer eget aliquet nibh praesent tristique. Augue neque gravida in fermentum et sollicitudin ac. Semper auctor neque vitae tempus quam pellentesque. Adipiscing bibendum est ultricies integer quis. Elementum nibh tellus molestie nunc non blandit massa enim nec.

Sit amet nulla facilisi morbi tempus iaculis. Lobortis scelerisque fermentum dui faucibus in ornare quam viverra orci. Justo eget magna fermentum iaculis eu non. Tempus urna et pharetra pharetra massa massa ultricies mi. Feugiat scelerisque varius morbi enim nunc faucibus a pellentesque sit. Elit ullamcorper dignissim cras tincidunt lobortis feugiat vivamus at augue. Lectus arcu bibendum at varius vel pharetra vel. Purus semper eget duis at. Sapien faucibus et molestie ac. Nunc sed augue lacus viverra vitae congue eu consequat. Dolor sed viverra ipsum nunc.

Feugiat nibh sed pulvinar proin gravida hendrerit lectus. Purus faucibus ornare suspendisse sed nisi. Ipsum dolor sit amet consectetur adipiscing elit ut. Rhoncus mattis rhoncus urna neque viverra justo nec. Risus sed vulputate odio ut enim blandit. In massa tempor nec feugiat nisl pretium. Aliquam id diam maecenas ultricies mi eget mauris pharetra et. Tincidunt arcu non sodales neque sodales. In dictum non consectetur a erat. Viverra mauris in aliquam sem fringilla ut morbi tincidunt augue. Urna et pharetra pharetra massa. Metus vulputate eu scelerisque felis imperdiet. At in tellus integer feugiat scelerisque varius morbi enim. Sit amet est placerat in egestas erat.

The BEST BBQ Chicken Pizza

Recipe by Chloe DavisCuisine: AmericanDifficulty: Easy
Servings

4

servings
Prep time

30

minutes
Cooking time

20

minutes
Calories

450

kcal

This has become a Friday night tradition in our home! We hope you enjoy it as much as we do.

Ingredients

  • 1 pizza dough (not frozen)

  • 1/3 cup BBQ sauce, more if needed

  • 1-2 cups shredded chicken

  • 2 cups mozzarella cheese

  • 1/4 cup red onion slices

  • Roasted red tomatoes

Directions

  • Preheat oven to 425°F. 
  • Roll out the pizza dough if needed. Lightly brush oil on a pizza stone or large baking sheet, then place dough onto stone or pan. 
  • Place 1/4 cup BBQ sauce on the pizza dough with a spoon. Mix the remaining BBQ sauce together with the chicken. 
  • Sprinkle cheese over the dough and then add the chicken, onions and roasted red tomatoes.
  • Bake for 18-22 minutes, or until golden brown. Remove from oven and top with fresh cilantro.

Lorem ipsum dolor sit amet, consectetur adipiscing elit, sed do eiusmod tempor incididunt ut labore et dolore magna aliqua. Nunc eget lorem dolor sed viverra ipsum nunc. Arcu bibendum at varius vel pharetra vel turpis nunc eget. Purus in mollis nunc sed id.

Feugiat nibh sed pulvinar proin gravida hendrerit lectus. Purus faucibus ornare suspendisse sed nisi. Ipsum dolor sit amet consectetur adipiscing elit ut. Rhoncus mattis rhoncus urna neque viverra justo nec. Risus sed vulputate odio ut enim blandit. In massa tempor nec feugiat nisl pretium. Aliquam id diam maecenas ultricies mi eget mauris pharetra et.

Malesuada pellentesque elit eget gravida cum sociis. Tellus elementum sagittis vitae et leo. Enim sed faucibus turpis in. Egestas integer eget aliquet nibh praesent tristique. Augue neque gravida in fermentum et sollicitudin ac. Semper auctor neque vitae tempus quam pellentesque. Adipiscing bibendum est ultricies integer quis. Elementum nibh tellus molestie nunc non blandit massa enim nec.

Sit amet nulla facilisi morbi tempus iaculis. Lobortis scelerisque fermentum dui faucibus in ornare quam viverra orci. Justo eget magna fermentum iaculis eu non. 

Feugiat nibh sed pulvinar proin gravida hendrerit lectus. Purus faucibus ornare suspendisse sed nisi. Ipsum dolor sit amet consectetur adipiscing elit ut. Rhoncus mattis rhoncus urna neque viverra justo nec. Risus sed vulputate odio ut enim blandit. In massa tempor nec feugiat nisl pretium. Aliquam id diam maecenas ultricies mi eget mauris pharetra et

Feugiat nibh sed pulvinar proin gravida hendrerit lectus. Purus faucibus ornare suspendisse sed nisi. Ipsum dolor sit amet consectetur adipiscing elit ut. Rhoncus mattis rhoncus urna neque viverra justo nec. Risus sed vulputate odio ut enim blandit. In massa tempor nec feugiat nisl pretium. Aliquam id diam maecenas ultricies mi eget mauris pharetra et.

Smoky Chipotle Burger Patties

Recipe by Chloe DavisCuisine: AmericanDifficulty: Easy
Servings

4

servings
Prep time

20

minutes
Cooking time

10

minutes
Calories

400

kcal

Ingredients

  • 1 pound ground beef

  • 3/4 whole panko bread crumbs

  • 1 tablespoon lime juice

  • 2 cloves garlic minced or grated

  • 2 in chipotle chiles adobo from a can minced

  • 1 teaspoon brown sugar

  • 8 teaspoons dried oregano

  • 1 teaspoon ground cumin

  • 1/2 teaspoon smoked paprika

  • pinch of salt and pepper

  • 4 slices thick sharp cheddar cheese

  • 4 brioche burger buns toasted

Directions

  • In a large bowl combine ground beef, bread crumbs, lime juice, garlic, chiles, brown sugar, oregano, cumin, paprika, salt and pepper.
  • Form into 1/4 lb patties.
  • Place on heated grill and cooked till your preferred preference. Add cheese and top with your favorite hamburger condiments

Notes

  • This recipe contains too much oregano.