Author

Chloe Davis

Browsing

Confession time: I have a serious sweet tooth. And caramel? It’s my ultimate weakness. But when I embarked on my health journey, I thought those caramel-filled days were behind me. Turns out, I was wrong! This sugar-free caramel syrup recipe is my saving grace, my little secret weapon for satisfying those cravings without derailing my goals. It’s so good, I could (and often do) eat it straight from the spoon. Ready to dive into this guilt-free indulgence with me? Let’s whip up some caramel magic together!

Why This Recipe is a Game Changer

This isn’t your average caramel syrup. It’s a guilt-free indulgence that’s actually good for you! Unlike store-bought options packed with artificial sweeteners and questionable ingredients, this recipe uses allulose, a natural sweetener that won’t spike your blood sugar. It’s perfect for anyone watching their sugar intake or following a keto diet.

But it’s not just about the health benefits. This syrup tastes incredible. We’re talking rich, buttery caramel flavor that rivals any sugary version. It’s thick, smooth, and oh-so-satisfying. Trust me, you won’t even miss the sugar!

Here’s what makes this recipe a true game changer:

  • All-Natural Goodness: Made with just butter, allulose, and heavy cream, this syrup is free of artificial ingredients and preservatives. You know exactly what’s going into your body.
  • Flavor Explosion: The combination of creamy butter, caramelized allulose, and rich cream creates a symphony of flavors that will dance on your taste buds.
  • Guilt-Free Indulgence: Whether you’re drizzling it over pancakes, stirring it into coffee, or using it in your favorite desserts, you can enjoy this caramel syrup without any guilt.
  • Keto-Friendly: This recipe is low in carbs and sugar, making it a perfect addition to your keto lifestyle.
  • Versatile and Delicious: The possibilities are endless! Use it to elevate your morning coffee, add a touch of decadence to your keto desserts, or simply enjoy it by the spoonful.

This sugar-free caramel syrup isn’t just a recipe; it’s a lifestyle upgrade. It’s about enjoying the sweet things in life without sacrificing your health or taste.

Just Three Little Ingredients

Can you believe that caramel heaven is just three simple ingredients away? Yes, you read that right! This recipe is so easy, it’s almost magical.

  1. Butter: The star of the show! Use unsalted butter for the best results. It adds a rich, creamy base to the caramel and helps create that silky smooth texture.
  2. Allulose: The secret weapon for sugar-free sweetness. Allulose is a natural sweetener that tastes and behaves like sugar but without the calories or blood sugar spikes. It’s the key to making this caramel guilt-free and keto-friendly.
  3. Heavy Cream: The magic ingredient that brings it all together. Heavy cream adds richness, depth of flavor, and that luscious caramel color we all love.

It’s that simple! No fancy ingredients, no complicated steps. Just pure, unadulterated caramel goodness made with ingredients you probably already have in your kitchen. So, are you ready to transform these three little ingredients into a jar of liquid gold? Let’s get started!

Whipping Up Caramel Magic

Alright, let’s dive into the fun part – transforming those three simple ingredients into liquid gold! Don’t worry, it’s easier than you might think.

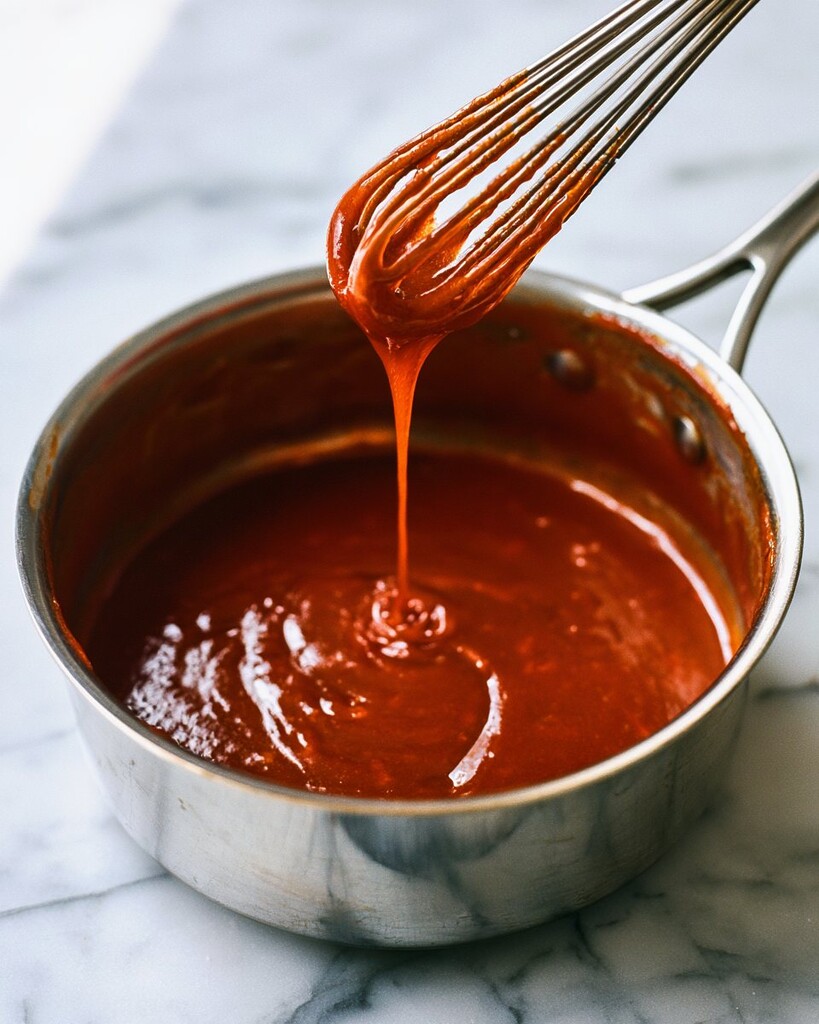
  1. Melt and Mingle: Start by melting the butter and allulose together in a small saucepan over medium heat. As the butter melts, it will start to mingle with the allulose, creating a bubbling, fragrant mixture. Keep stirring to ensure everything melts evenly and doesn’t burn.
  2. Creamy Transformation: Once the butter and allulose have become best friends, it’s time to introduce the heavy cream. Reduce the heat to low and slowly pour in the cream, stirring continuously. Watch as the mixture thickens and transforms into a luscious caramel sauce.
  3. Simmer and Stir: Let the caramel simmer gently for a few minutes, stirring occasionally. This is where the magic happens! The heat will caramelize the allulose, deepening the flavor and creating that gorgeous amber hue. Be patient and keep a close eye on the saucepan – you don’t want the caramel to burn.
  4. Cool Down and Thicken Up: Once the caramel has reached your desired consistency, remove it from the heat. It will continue to thicken as it cools. You can stir it occasionally to help it cool down faster.

Remember: Don’t overcook the caramel! It will thicken more as it cools, so it’s better to err on the side of slightly thinner than too thick. You can always reheat it gently if needed.

Pro Tips for Perfect Caramel

Hey there, fellow caramel enthusiasts! I’ve learned a few tricks over the years to ensure your sugar-free caramel syrup turns out absolutely perfect every time. So, put on your chef’s hat and let’s dive into my pro tips:

  1. Stir, Stir, Stir! This is the golden rule of caramel making. You need to be constantly stirring the mixture throughout the entire cooking process. Why? Because butter and allulose are both prone to burning, and we don’t want any scorched caramel in our lives, right? So, grab your trusty whisk or spoon and keep that caramel moving!

  2. Don’t Overcook It: I know, I know, it’s tempting to leave it on the heat until it thickens up, but trust me, patience is key here. The caramel will continue to thicken as it cools, so it’s better to err on the side of slightly thinner than too thick. Remember, you can always reheat it gently if needed.

  3. The Microwave is Your Friend: If your caramel syrup ends up thicker than you’d like, don’t panic! Pop it in the microwave for 20-30 seconds, and it should become more pourable.

  4. Salted Caramel Twist: If you’re a fan of salted caramel (who isn’t?), simply add a pinch of salt to the mixture while it’s simmering. You can also use salted butter instead of unsalted for a subtle salty kick.

  5. Experiment and Have Fun: This recipe is a great base for all sorts of caramel creations. Feel free to add a splash of vanilla extract, a dash of cinnamon, or even a hint of chili powder for a spicy twist. Get creative and make it your own!

With these tips in your back pocket, you’re well on your way to becoming a caramel maestro. So go forth and create some sweet, sticky magic!

Storing Your Liquid Gold

Now that you’ve whipped up a batch of this heavenly caramel syrup, let’s talk about how to keep it fresh and delicious for as long as possible. Here are a few options for storing your liquid gold:

  • Room Temperature: If you plan on using the caramel syrup within a few weeks, you can simply store it at room temperature in an airtight container. A mason jar or a glass bottle with a tight-fitting lid works perfectly. Just make sure to keep it away from direct sunlight and heat.

  • Refrigerator: For longer storage, you can refrigerate the caramel syrup for up to two months. The cold temperature will help preserve its flavor and freshness. However, the syrup will thicken considerably in the fridge, so you’ll need to let it come to room temperature or gently reheat it before using.

  • Freezer: If you want to keep your caramel syrup for an even longer period, you can freeze it for up to six months. Simply pour it into a freezer-safe container, leaving some headspace for expansion, and pop it in the freezer. When you’re ready to use it, thaw it overnight in the refrigerator or gently reheat it in a saucepan over low heat.

A few extra tips for storing your caramel syrup:

  • Don’t be alarmed if the syrup thickens or solidifies in the fridge or freezer. This is completely normal! Just let it thaw or gently reheat it until it reaches your desired consistency.
  • If you notice any separation, just give it a good stir before using. The butter and cream might separate slightly, but this won’t affect the flavor or quality of the syrup.
  • Always use a clean spoon or utensil when scooping out the syrup to avoid introducing any contaminants.

With these simple storage tips, you can enjoy your homemade caramel syrup for weeks or even months to come. So go ahead, make a big batch and indulge in this guilt-free treat whenever your sweet tooth calls!

Ways to Unleash Your Inner Caramel Artist

Hold onto your hats, folks, because it’s time to unleash your inner caramel artist! This sugar-free caramel syrup isn’t just a topping; it’s a blank canvas for your culinary creativity. Let’s explore some delectable ways to use this liquid gold:

  • Coffee Connoisseur: Elevate your morning brew with a generous swirl of caramel syrup. It’s the perfect way to add a touch of sweetness and indulgence to your coffee, latte, or cappuccino.
  • Ice Cream Extravaganza: Drizzle it over your favorite keto ice cream for a decadent sundae experience. Top it off with chopped nuts, whipped cream, and a sprinkle of sea salt for a truly heavenly treat.
  • Pancake Perfection: Forget maple syrup! This caramel syrup is the ultimate pancake topping. It’s so good, you might even want to skip the butter.
  • Baking Bliss: Incorporate it into your keto baking creations. Use it as a filling for brownies, a glaze for cakes, or a sweet drizzle for muffins. The possibilities are endless!
  • Fruity Fusion: Pair it with fresh berries or sliced apples for a healthy and satisfying snack. The caramel’s sweetness complements the fruit’s natural tartness perfectly.
  • Smoothie Sensation: Add a spoonful to your morning smoothie for a boost of flavor and natural sweetness.
  • Frozen Yogurt Fun: Swirl it into your sugar-free frozen yogurt for a delightful frozen treat.
  • Cocktail Hour: Get creative and add a splash to your favorite cocktails or mocktails. A caramel drizzle can elevate a simple drink to a sophisticated creation.

These are just a few ideas to get you started. The truth is, the only limit is your imagination! So don’t be afraid to experiment and discover your own unique ways to enjoy this versatile and delicious caramel syrup.

Bonus Tip: If you’re feeling adventurous, try making your own salted caramel frappuccino. It’s a heavenly blend of coffee, caramel, and a hint of salt that will transport you to coffee shop bliss without the sugar overload.

Indulge Your Sweet Tooth…Guilt-Free!

This sugar-free caramel syrup is proof that you can have your cake (or ice cream) and eat it too! It’s a versatile treat that satisfies your cravings without compromising your health goals. So go ahead, drizzle, dip, and savor every delicious drop!

Ready to try this recipe? Share your caramel creations in the comments below! We can’t wait to see what sweet masterpieces you whip up.

Sugar Free Caramel Syrup

Prep Time 1 minute
Cook Time 15 minutes
Total Time 16 minutes
Servings 24
Calories 49
This sugar-free caramel syrup is rich, smooth, and made with just 3 simple ingredients! It's perfect for adding to coffee, drizzling over ice cream, or creating a delicious salted caramel treat.

Ingredients

  • 1/2 cup butter (cubed)
  • 1 cup allulose (granulated)
  • 1 cup heavy cream

Instructions 

  • In a small saucepan, combine the butter and allulose over medium heat. Once it starts to bubble, stir regularly for 5 minutes.
  • Reduce the heat to low and add the heavy cream. Stir gently and continue stirring until the mixture thickens, about 5 minutes.
  • Once slightly thickened, remove the syrup from heat and continue stirring until it cools to room temperature.
  • Transfer the syrup to a jar or bowl and cover until ready to use.

Notes

Notes:
  • One serving equals two tablespoons.
  • For salted caramel syrup, add 1/2 teaspoon of salt.
Storage Instructions:
  • TO STORE: Keep the syrup at room temperature in a sealable jar or bowl for up to 4 weeks. For longer storage, refrigerate for up to 2 months.
  • TO FREEZE: Store in the freezer for up to 6 months.
  • TO THAW: Allow the caramel syrup to thaw completely to room temperature.
Nutrition (per serving):
  • Calories: 49 kcal
  • Carbohydrates: 1g
  • Protein: 1g
  • Fat: 8g
  • Sodium: 38mg
  • Potassium: 9mg
  • Vitamin A: 264 IU
  • Vitamin C: 1mg
  • Calcium: 8mg
  • Iron: 1mg
  • Net Carbs: 1g
Calories: 49kcal

Picture this: It’s a chilly morning, and all you can think about is a warm, comforting bowl of oatmeal. But wait, you’re on keto! Despair sets in as you realize your carb-laden dreams are dashed. Or are they?

Well, friends, let me tell you a little secret. I used to be that person, mourning the loss of my beloved oatmeal every morning. I tried all the keto breakfast alternatives, but nothing quite hit the spot. That is, until I stumbled upon this life-changing recipe.

This isn’t your average keto breakfast hack. This is a culinary masterpiece that will make you forget all about those carb-filled oats. It’s so creamy, so satisfying, and so darn delicious, you’ll be pinching yourself to make sure you’re not dreaming.

Get ready to have your keto socks knocked off because breakfast is about to get a whole lot more exciting!

Why You’ll Fall Head Over Heels for This Recipe

Get ready to have your keto socks knocked off because this recipe is a total game-changer!

  • Crave-Worthy Taste & Texture: Ever miss the comforting warmth and creaminess of oatmeal? Well, miss no more! This keto oatmeal nails that perfect porridge-like consistency and delivers a taste that’s both hearty and satisfying. Trust me, you’ll be shocked at how close it comes to the real deal.

  • Nutrient Powerhouse: Who says healthy can’t be delicious? This keto oatmeal is packed with good-for-you ingredients like fiber-rich flaxseeds, protein-packed hemp hearts, and omega-3 loaded chia seeds. It’s a breakfast that fuels your body with the nutrients it needs to thrive.

  • Fast & Foolproof: Let’s face it, mornings can be hectic. That’s why I love how quick and easy this recipe is. Just mix, chill, and enjoy! You can even prep a whole week’s worth in advance so you have a grab-and-go breakfast ready to rock.

  • Endless Flavor Possibilities: Get ready to let your creativity run wild! This keto oatmeal is like a blank canvas, just waiting for you to add your favorite flavors and toppings. Whether you’re craving sweet, savory, fruity, or nutty, the possibilities are endless.

  • No Weird Ingredients: I’m not about that complicated life. This recipe uses simple, wholesome ingredients that you can easily find at your local grocery store or online. No need to hunt down obscure items or break the bank.

  • Keto-Approved, Of Course: The best part? Each serving of this keto oatmeal has just 1 gram of net carbs! So you can enjoy a hearty breakfast without derailing your diet. Winning!

  • Bonus Points: This keto oatmeal isn’t just for breakfast. You can enjoy it warm or cold, as a snack, or even as a dessert. It’s so versatile, you’ll wonder how you ever lived without it.

Keto Oatmeal Ingredients: Simplicity at Its Finest

One of the things I love most about this recipe is how simple it is. We’re talking just a handful of ingredients that you can easily find at most grocery stores. Let’s break them down:

  • Ground Flaxseed: Also known as flax meal, this is the magical ingredient that gives our keto oatmeal its hearty texture. It’s packed with fiber and omega-3 fatty acids, so it’s a nutritional powerhouse.

  • Chia Seeds: These tiny little seeds are the secret to the oatmeal’s thick, creamy consistency. They absorb liquid like a sponge and are bursting with antioxidants, fiber, and omega-3s.

  • Hemp Hearts: These shelled hemp seeds add a subtle nutty flavor and a hefty dose of plant-based protein and healthy fats to the mix. They’re also a great source of magnesium and iron.

  • Milk of Choice: I usually use unsweetened coconut milk because it adds a hint of tropical sweetness, but you can use any keto-friendly milk you like. Unsweetened almond milk, cashew milk, or even heavy cream would all work well.

  • Optional Sweetener: If you like your oatmeal a little sweet, you can add a touch of your favorite keto-friendly sweetener. I’ve used everything from erythritol to monk fruit to stevia, and they all work great. Just be mindful of the amount you use to keep the carbs in check.

Tips and Tricks:

  • Don’t have ground flaxseed? No problem! Just grab some whole flaxseeds and grind them up in a coffee grinder or high-speed blender.
  • Want to switch things up? You can totally swap out the hemp hearts for another nut or seed, like chopped almonds or sunflower seeds.
  • Don’t be afraid to experiment! This recipe is super forgiving, so feel free to play around with the ingredients and find your perfect combination.

Remember, these are just the base ingredients. You can customize your keto oatmeal with all sorts of delicious toppings and mix-ins. Think berries, nuts, seeds, spices, and even a dollop of nut butter. The possibilities are endless!

How to Make Keto Oatmeal: Easy as 1, 2, 3!

Alright, friends, get your mixing bowls ready because we’re about to whip up some keto oatmeal magic! This recipe is so easy, it’ll make you wonder why you ever bothered with the sugary, carb-laden stuff.

Step 1: Mix It Up

Grab a bowl and toss in your ground flaxseed, chia seeds, hemp hearts, milk, and sweetener (if using). Don’t overthink it, just dump everything in and give it a good stir until it’s well combined.

Step 2: Chill Out

Pop that bowl in the fridge and let it chill for at least 4 hours, or even better, overnight. This is where the magic happens! The chia seeds will work their thickening power, turning the mixture into a creamy, dreamy oatmeal-like consistency.

Step 3: Heat & Eat (or Don’t!)

Now comes the fun part! You can enjoy your keto oatmeal cold, straight from the fridge, for a refreshing and filling breakfast. Or, if you prefer it warm, simply pop it in the microwave for 30-40 seconds and give it a stir.

Pro Tip: If your oatmeal is too thick, just add a splash of milk until you reach your desired consistency. It’s totally customizable!

Ready to Take It Up a Notch?

Now that you’ve mastered the basic recipe, it’s time to unleash your inner chef! Here are a few extra tips and tricks to take your keto oatmeal to the next level:

  • Spice It Up: Add a pinch of cinnamon, nutmeg, or ginger for a warm, cozy flavor.
  • Get Fruity: Toss in some fresh or frozen berries for a burst of sweetness and antioxidants.
  • Go Nuts: Top with chopped nuts, seeds, or a drizzle of nut butter for extra protein and healthy fats.
  • Make It Savory: Add a pinch of salt and pepper, some chopped veggies, and a fried egg for a savory breakfast bowl.

Remember, this is your keto oatmeal, so have fun with it and make it your own! There are endless possibilities, so don’t be afraid to experiment and find your favorite flavor combinations.

Spice Up Your Keto Oatmeal: Flavor Burst Ideas

Alright, my fellow foodies, it’s time to unleash our creativity and take this keto oatmeal to flavor town! While the basic recipe is delicious on its own, why settle for plain when you can have extraordinary? Here are some of my favorite flavor combinations that will make your taste buds sing:

  • Berries & Cream: This classic combo is always a winner. Stir in a handful of fresh or frozen berries (raspberries, blueberries, strawberries, you name it!) and top with a dollop of whipped cream or coconut cream. It’s like a guilt-free dessert for breakfast!

  • Chocolate Peanut Butter: This one’s for all my fellow chocoholics. Mix in a tablespoon of unsweetened cocoa powder and a spoonful of peanut butter (or any nut butter you love). Top with chopped nuts for extra crunch and a drizzle of sugar-free chocolate syrup for an indulgent treat.

  • Cinnamon Roll: If you’re craving those warm, gooey cinnamon rolls, this one’s for you. Stir in a generous amount of cinnamon, a pinch of vanilla extract, and a drizzle of keto maple syrup. Top with chopped pecans for a delightful crunch.

  • Apple Pie: This fall-inspired flavor is perfect for cozy mornings. Mix in some diced apples, a sprinkle of cinnamon, and a pinch of nutmeg. Top with a dollop of whipped cream and a few chopped walnuts for extra warmth and flavor.

  • Tropical Paradise: Transport yourself to a tropical island with this exotic flavor combo. Mix in some shredded coconut, chopped mango, and a squeeze of lime juice. Top with a sprinkle of chia seeds for an extra nutritional boost.

  • Pumpkin Spice: This one’s a must-try during the fall season. Stir in some pumpkin puree, pumpkin pie spice, and a drizzle of keto maple syrup. Top with chopped pecans and a sprinkle of cinnamon for a cozy, comforting breakfast.

These are just a few ideas to get you started. The possibilities are truly endless! Feel free to experiment with different flavors and toppings to create your own signature keto oatmeal. Don’t be afraid to get creative and have fun with it. After all, breakfast should be an adventure, not a chore!

Your Burning Keto Oatmeal Questions, Answered!

I know you’re probably brimming with questions about this keto oatmeal wonder, so let’s tackle some of the most common ones:

  • Can I really eat this on keto? Absolutely! Each serving has just 1 gram of net carbs, making it a perfectly acceptable breakfast option for those following a ketogenic diet. The combination of flaxseeds, chia seeds, and hemp hearts keeps the carb count low while providing a good amount of healthy fats and fiber.

  • Will this kick me out of ketosis? Nope! As long as you stick to the recipe and use keto-approved ingredients, this oatmeal shouldn’t affect your state of ketosis. Remember, the key is to watch your portion size and avoid adding high-carb toppings like honey or maple syrup.

  • Can I make this ahead of time? You bet! In fact, this recipe is perfect for meal prepping. You can make a big batch on Sunday and have breakfast ready to go for the entire week. Just store it in the fridge in individual containers and heat it up when you’re ready to eat.

  • What if I don’t have hemp hearts? No worries! You can easily substitute them with chopped almonds, walnuts, or any other nut or seed you like. Just be sure to adjust the macros accordingly if you’re tracking your intake.

  • Can I use a different milk? Absolutely! While I prefer unsweetened coconut milk for its subtle sweetness, you can use any keto-friendly milk you like. Unsweetened almond milk, cashew milk, or even heavy cream are all great options.

  • How do I store leftovers? Keto oatmeal will keep well in the fridge for up to a week. Just make sure to store it in an airtight container to prevent it from drying out.

  • Can I freeze it? Yes, you can freeze individual portions for up to 6 months. When you’re ready to eat, thaw it overnight in the fridge and reheat it in the microwave or on the stovetop.

Got more questions? Feel free to ask! I’m always happy to help fellow keto enthusiasts navigate the delicious world of low-carb cooking.

A New Dawn for Keto Breakfast Lovers

Let’s be honest, sticking to a keto diet can sometimes feel like a culinary adventure with limited options. But fear not, fellow breakfast enthusiasts, because this keto oatmeal is here to revolutionize your mornings!

No More Boring Breakfasts: Say goodbye to the days of eggs and bacon on repeat. This recipe opens up a whole new world of breakfast possibilities for those following a keto lifestyle. It’s a versatile base that can be customized to your heart’s content, ensuring you never get bored with your morning meal.

Fuel Your Day the Right Way: Forget about those sugary cereals and carb-laden pastries. This keto oatmeal is packed with protein, healthy fats, and fiber to keep you feeling full and energized until your next meal. It’s the perfect way to start your day on a healthy and satisfying note.

A Community of Keto Oatmeal Lovers: You’re not alone on this journey! Join the growing community of keto oatmeal enthusiasts who are discovering the joys of this delicious and nutritious breakfast alternative. Share your creations, swap flavor ideas, and inspire each other to stay on track with your keto goals.

Embrace the Delicious Possibilities: So what are you waiting for? Grab those simple ingredients, whip up a batch of this magical keto oatmeal, and get ready to experience a breakfast revolution. It’s time to ditch the deprivation mindset and embrace the delicious possibilities that keto has to offer.

Your taste buds (and your waistline) will thank you!

There you have it! Your keto journey doesn’t have to be a sad farewell to oatmeal. This recipe is a testament to the fact that healthy eating can be delicious, satisfying, and totally doable. Now go forth and conquer your mornings with a bowl of keto oatmeal that will make you wonder why you ever doubted it in the first place.

Bonus Tip: Snap a pic of your beautiful keto oatmeal creation and share it on social media using #KetoOatmealGoals. Who knows, you might inspire another oatmeal enthusiast to make the switch!

Keto Oatmeal

Prep Time 5 minutes
Cook Time 5 minutes
Servings 4
Calories 191
This keto oatmeal recipe is a perfect warm and hearty breakfast for when you're craving a bowl of oats. Made with just 4 ingredients, it's thick, creamy, and delicious both hot or cold!

Ingredients

  • 2 tablespoons ground flaxseed
  • 1 tablespoon chia seeds
  • 1/2 cup hemp hearts
  • 1 1/2 cups milk (I used coconut milk)
  • 2 tablespoons brown sugar substitute (optional)

Instructions 

  • Combine all ingredients in a large mixing bowl and refrigerate for 4 hours, or until the mixture thickens to an overnight oats consistency (thick and creamy).
  • If the oatmeal is too thick, add more milk to reach the desired consistency.
  • Microwave for 30-40 seconds until warm, or enjoy it cold in an overnight oats style.
  • Add your favorite toppings and enjoy immediately.

Notes

Notes:
  • TO STORE: Store leftovers in the refrigerator, covered, for up to one week.
  • TO FREEZE: Freeze individual portions in airtight containers for up to six months.
  • TO MEAL PREP: Prepare up to seven servings at once by quadrupling the ingredients. After refrigeration, divide the mixture into seven jars or bowls, cover, and store. When ready to eat, simply microwave and add toppings.
Nutrition (per serving):
  • Calories: 191 kcal
  • Carbohydrates: 4g
  • Protein: 11g
  • Fat: 15g
  • Sodium: 123mg
  • Potassium: 41mg
  • Fiber: 3g
  • Vitamin A: 131 IU
  • Vitamin C: 1mg
  • Calcium: 175mg
  • Iron: 4mg
  • Net Carbs: 1g
Calories: 191kcal

Ever had one of those days where your willpower crumbles faster than a poorly baked cookie? You know, the kind where the siren song of the dessert aisle becomes irresistible? Well, I’ve got a secret weapon that’s saved me from countless diet disasters: my trusty keto mug cake recipe.

Imagine this: warm, gooey chocolate melting in your mouth, a fluffy, decadent texture that screams “indulgence” – all ready in about the time it takes to nuke a cup of coffee. Sound too good to be true for a low-carb treat? Think again! This isn’t your average mug cake; it’s a one-minute miracle that’s both delicious and guilt-free.

Hold on to your hats, keto friends, because this isn’t your average mug cake recipe. Oh no, this is the holy grail of low-carb desserts, the kind of treat that’ll make you do a happy dance in your kitchen (or, let’s be real, right in front of the microwave).

The One-Minute Miracle: Guilt-Free Goodness in a Flash

This isn’t your grandma’s mug cake recipe that takes forever in the oven. We’re talking about a warm, gooey, chocolatey delight that’s ready in about the same time it takes to brew a cup of coffee. Yes, you read that right – one minute!

How is this possible, you ask? The secret lies in the magic of the microwave. It’s like a mini-oven that zaps your batter with heat waves, transforming it into a fluffy, decadent treat in mere seconds. No more waiting around, drooling over a preheating oven. This mug cake is all about instant gratification.

And let’s not forget the biggest bonus: it’s guilt-free! This isn’t some sugary bomb that’ll send your blood sugar soaring. We’re using keto-friendly ingredients like coconut flour, cocoa powder, and a sugar substitute, so you can indulge without the carb overload. It’s a win-win for your taste buds and your waistline.

This keto mug cake is perfect for those moments when…

  • You need a quick dessert fix after dinner.
  • You’re craving chocolate but don’t want to bake a whole cake.
  • You’re following a low-carb or keto diet and need a treat that fits your lifestyle.
  • You just want something warm, comforting, and delicious in a flash.

So, are you ready to experience the one-minute miracle? Trust me, once you taste this mug cake, you’ll be wondering how you ever lived without it. It’s the perfect way to satisfy your sweet tooth without sacrificing your health goals. Get ready to say goodbye to boring desserts and hello to pure keto bliss!

Why This Keto Mug Cake Recipe is My Secret Weapon

Let’s be real, folks: cravings happen. Whether it’s a late-night sweet tooth ambush or a midday hankering for something chocolatey, we’ve all been there. But when you’re on the keto train, finding a treat that won’t derail your progress can feel like searching for a unicorn.

Enter my secret weapon: this keto mug cake. It’s my go-to solution for those moments when temptation strikes, and I need a quick, satisfying fix that won’t leave me feeling guilty. Trust me, this little recipe has saved me from countless diet disasters.

So, what makes this mug cake so special?

  • It’s My Diet-Friendly Superhero: Keto, gluten-free, and easily adaptable for vegans (just swap the butter for coconut oil and use a plant-based milk), this mug cake is a lifesaver for those with dietary restrictions. It’s proof that you don’t have to sacrifice flavor or enjoyment to stick to your health goals.
  • It Satisfies My Sweet Tooth Like No Other: This mug cake is rich, decadent, and incredibly satisfying. It hits all the right notes with its fluffy texture, chocolatey aroma, and warm, gooey center. One bite, and you’ll forget all about those sugary temptations.
  • It Keeps Me on Track: This mug cake is so fulfilling that it actually helps me avoid binging on unhealthy snacks. Knowing I have this delicious treat in my back pocket makes it easier to resist those late-night cravings for chips or cookies. It’s my secret weapon for staying on track with my keto lifestyle.
  • It’s My Midnight Snack Savior: Let’s face it, sometimes the cravings hit hardest after dinner. But who wants to bake a whole cake when you’re just looking for a small treat? This mug cake is the perfect solution. It’s ready in a flash, so you can satisfy your sweet tooth without the hassle of baking a full-sized dessert.

In short, this keto mug cake is my ultimate lifesaver. It’s delicious, satisfying, and fits perfectly into my healthy lifestyle. It’s the perfect reminder that you can have your cake and eat it too (well, maybe not the whole cake, but definitely a mug cake!).

The Ingredients You Need for Keto Mug Cake Bliss

Okay, let’s gather our troops and get ready to bake some magic! Don’t worry, we’re not going to need a whole pantry full of fancy ingredients. This keto mug cake is all about simplicity and deliciousness, using staples you probably already have on hand.

  • Coconut Flour: This is our low-carb superstar. It’s high in fiber and gives the cake a lovely texture. Make sure to sift it to avoid any lumps.
  • Cocoa Powder: Unsweetened, of course! This is what gives our mug cake that rich, chocolatey flavor we all crave. Dutch-processed cocoa powder will give you an even deeper, darker chocolate experience.
  • Brown Sugar Substitute: We’re keeping it keto-friendly, so ditch the regular sugar. You can use a store-bought brown sugar substitute or whip up my homemade version using molasses and allulose (it’s surprisingly easy!).
  • Baking Powder: This is our leavening agent, the magic ingredient that makes the cake rise and become light and fluffy.
  • Salt: Just a pinch to balance out the sweetness and enhance the flavors.
  • Butter OR Coconut Oil: Melted butter adds a rich, creamy flavor, but coconut oil works just as well if you’re dairy-free or want a subtle coconut hint.
  • Eggs: These are the glue that holds everything together. Make sure they’re at room temperature for the best results.
  • Milk: Unsweetened coconut milk is my go-to, but you can use any milk you like – dairy or dairy-free. Just be sure it’s unsweetened to keep the carbs low.
  • Chocolate Chips: The cherry on top! I love making my own sugar-free chocolate chips, but you can use store-bought keto-friendly ones too.

That’s it! Just a handful of simple ingredients that transform into a warm, gooey, chocolatey masterpiece in minutes. No fancy equipment, no complicated techniques – just pure keto bliss in a mug.

Whipping Up Your Keto Mug Cake Masterpiece

Alright, let’s get down to business! It’s time to turn those humble ingredients into a warm, gooey, chocolatey masterpiece. But don’t worry, this isn’t some complicated baking project that requires a culinary degree. We’re keeping it simple, quick, and oh-so-delicious.

Step 1: Prep Your Mug

First things first, grab your favorite microwave-safe mug or a cute little ramekin (if you’re feeling fancy). Give it a quick spritz with some nonstick spray or a light coat of butter. We don’t want our precious cake sticking to the sides!

Step 2: Mix It Up

Now for the fun part! Grab a small bowl and whisk together all the dry ingredients: coconut flour, cocoa powder, brown sugar substitute, baking powder, and a pinch of salt. Make sure there are no lumps, we want a smooth, even batter.

Next, add in the wet ingredients: melted butter (or coconut oil), egg, and milk. Whisk everything together until you get a smooth, pourable batter. Remember, the milk is your friend! Add it gradually until the batter reaches the consistency of, well, cake batter. It should be thick but not too stiff.

Now for the best part: fold in those chocolate chips! I like to save a few to sprinkle on top for extra chocolatey goodness.

Step 3: Microwave Magic

Pour the batter into your greased mug and pop it in the microwave. Now, here’s the crucial part: only microwave for one minute. Yes, just one minute! Overcooking is the enemy of a perfect mug cake, so set a timer and don’t wander off.

Once the timer goes off, carefully remove the mug from the microwave (it will be hot!). Now comes the hard part: waiting a few seconds for it to cool down a bit. Resist the urge to dig in right away!

If the cake looks a little underdone in the center, don’t worry. Just let it sit for another 30 seconds, and it will continue to cook from the residual heat. If it still needs a little more time, microwave it in 15-second intervals until it’s set but still slightly gooey in the middle.

That’s it! Your keto mug cake is ready to be devoured. Top it with a dollop of whipped cream, a drizzle of sugar-free chocolate syrup, or just enjoy it as is. You’ve earned it!

No Microwave? No Problem! Oven Baking Tips

So, you’re craving a warm, gooey keto mug cake, but you don’t have a microwave or prefer the good ol’ oven? No worries, my friend! This recipe is totally adaptable, and I’ve got you covered with all the oven-baking tips you need.

Prepping for the Oven:

  • Ditch the Mug: While mugs are perfect for microwaving, they’re not ideal for the oven. Instead, grab a small ramekin or oven-safe dish. Grease it well with butter or oil to prevent sticking.
  • Preheat Your Oven: We want a nice, even temperature for our cake to bake to perfection. Preheat your oven to 180°C (350°F).

Baking Your Keto Mug Cake:

  • Transfer the Batter: Prepare the batter as instructed in the recipe, then carefully pour it into your greased ramekin.
  • Bake It Up: Place the ramekin on a baking sheet and slide it into the preheated oven. Bake for 8-10 minutes, or until the top is firm and a toothpick inserted in the center comes out clean (or with a few moist crumbs).
  • Cool and Enjoy: Let the cake cool for a few minutes in the ramekin before devouring. This will give it time to set and make it easier to serve.

Oven Baking Tips and Tricks:

  • Keep an Eye on It: Oven temperatures can vary, so start checking the cake after 8 minutes. We want it to be cooked through but not dried out.
  • Don’t Overbake: Remember, mug cakes are small and cook quickly. Overbaking can lead to a rubbery texture, so err on the side of underbaking if you’re unsure.
  • Experiment with Baking Time: If you like your mug cake extra gooey, reduce the baking time by a minute or two. If you prefer it more cake-like, add a minute or two.
  • Double or Triple the Recipe: Making this for a crowd? Go ahead and double or triple the recipe. Just remember to adjust the baking time accordingly.

Whether you’re a microwave master or an oven aficionado, this keto mug cake recipe has got you covered. So go ahead, choose your preferred cooking method and get ready to enjoy a warm, delicious treat that’s perfect for any occasion!

Pro Tips for Perfect Mug Cakes

Alright, my fellow mug cake enthusiasts, let’s take this deliciousness to the next level! I’ve whipped up countless mug cakes in my kitchen (and trust me, I’ve had my fair share of flops), so I’ve learned a few tricks along the way. These tips will help you avoid common mistakes and ensure your keto mug cake turns out perfect every time.

  1. Don’t Overcook It: This is the cardinal rule of mug cake baking. Seriously, it’s that important. These little guys can go from perfectly gooey to rubbery in a matter of seconds. So, set that timer for one minute and don’t get distracted. Once the minute is up, check the cake – if it looks a little underdone, let it rest for 30 seconds, as it will continue to cook from the residual heat. If it still needs more time, microwave it in 15-second intervals, checking after each one. Remember, it’s better to slightly undercook it than to overcook it!

  2. Choose Your Mug Wisely: The size and shape of your mug can actually make a difference. A standard 12-ounce mug is usually a good choice, but if you’re worried about the cake overflowing, opt for a larger mug or a shallow bowl. This will give the batter plenty of room to rise without creating a mess in your microwave.

  3. Milk to the Rescue: The milk in this recipe is more than just a liquid ingredient – it’s the key to achieving the perfect batter consistency. Add it gradually, one tablespoon at a time, until the batter resembles thick pancake batter. It should be pourable but not too runny. Too much milk will make the cake dense, while too little will make it dry and crumbly.

  4. Get Creative with Toppings: Sure, a plain keto mug cake is delicious on its own, but why not take it up a notch? A dollop of whipped cream, a sprinkle of chopped nuts, a drizzle of sugar-free chocolate syrup, or a few fresh berries can all elevate your mug cake to a whole new level of deliciousness. Get creative and experiment with different toppings to find your favorites!

  5. Don’t Be Afraid to Experiment: This recipe is a great starting point, but feel free to make it your own! Try adding a pinch of cinnamon, a dash of vanilla extract, or even a spoonful of nut butter to the batter. You can also swap out the chocolate chips for chopped nuts, shredded coconut, or your favorite keto-friendly candy. The possibilities are endless!

With these pro tips in your back pocket, you’ll be a mug cake master in no time. So go ahead, get baking, and enjoy the deliciousness!

Get Creative: Mug Cake Variations to Delight Your Taste Buds

Now that you’ve mastered the classic keto chocolate mug cake, it’s time to unleash your inner pastry chef and get a little adventurous! This recipe is incredibly versatile, and with a few simple tweaks, you can create a whole array of delicious mug cake variations to satisfy any craving.

Spice It Up:

  • Pumpkin Spice: Feeling those autumn vibes? Add a generous pinch of pumpkin pie spice to the batter for a warm, cozy treat. Top with a dollop of keto whipped cream and a sprinkle of cinnamon for extra flavor.
  • Chai Latte: Infuse your milk with a chai tea bag before adding it to the batter. This will give your mug cake a subtle, fragrant spice that pairs perfectly with the chocolate.

Nutty Delights:

  • Peanut Butter: Swirl in a tablespoon of sugar-free peanut butter for a classic flavor combination. Top with chopped peanuts for a crunchy twist.
  • Almond Joy: Mix in a few chopped almonds and shredded coconut for a tropical-inspired treat.

Fruity Fun:

  • Berrylicious: Fold in a handful of fresh or frozen berries (raspberries, blueberries, strawberries, you name it!) for a burst of sweetness and antioxidants.
  • Lemon Zest: Add a teaspoon of lemon zest to the batter for a refreshing, citrusy twist. Top with a dollop of keto whipped cream and a few lemon slices for extra flair.

Decadent Indulgences:

  • Mocha Madness: Stir in a teaspoon of instant coffee powder for a rich, caffeinated kick. Top with a dollop of whipped cream and a sprinkle of cocoa powder for an extra dose of chocolatey goodness.
  • Salted Caramel: Drizzle some sugar-free caramel sauce on top of your mug cake and sprinkle with a pinch of sea salt for a sweet and salty indulgence.

Remember, these are just a few ideas to get you started. Don’t be afraid to experiment and try out your own unique flavor combinations. After all, the best mug cake is the one that makes your taste buds sing!

Pro Tip: To prevent your mug cake from overflowing, make sure the batter fills no more than two-thirds of the mug. This will give it enough room to rise without creating a mess in your microwave.

Your Sweet Tooth, Conquered

I know what you’re thinking: “A keto mug cake that’s actually delicious? No way!” But trust me, this isn’t some sad, dry excuse for a dessert. This is a warm, gooey, chocolatey revelation that will change the way you think about low-carb treats.

This little mug cake is more than just a recipe; it’s a game-changer. It’s proof that you don’t have to deprive yourself of life’s little pleasures just because you’re following a healthy lifestyle. It’s a testament to the fact that you can have your cake and eat it too (well, maybe not the whole cake, but definitely a mug cake!).

Imagine this: it’s late at night, and your sweet tooth is starting to whisper in your ear. Instead of reaching for a sugary snack that will leave you feeling guilty, you whip up this keto mug cake in just a few minutes. You take that first warm, comforting bite, and your taste buds erupt in joy. The rich chocolate flavor, the fluffy texture, the gooey melted chocolate chips – it’s pure bliss in a mug.

And the best part? You can enjoy this guilt-free indulgence knowing that you’re staying true to your health goals. No sugar crashes, no carb overload, just pure satisfaction.

This keto mug cake is more than just a dessert; it’s a symbol of empowerment. It’s a reminder that you have the power to make healthy choices without sacrificing flavor or enjoyment. It’s a testament to the fact that you can live a delicious life, even on a keto diet.

So go ahead, embrace your sweet tooth and indulge in this little miracle. Let it be your secret weapon against cravings, your midnight snack savior, and your reminder that a healthy lifestyle can be incredibly delicious.

Trust me, once you try this keto mug cake, you’ll never look back. It’s not just a recipe; it’s a new way of thinking about desserts. It’s a sweet victory for your taste buds and your health goals. So what are you waiting for? Get baking, my friend!

Keto Mug Cake

Prep Time 1 minute
Cook Time 1 minute
Servings 1
Calories 194
This keto mug cake is the ultimate quick and easy low-carb dessert. It’s rich, chocolatey, and ready in under a minute, with just 2 grams of net carbs!

Ingredients

  • 1 tablespoon coconut flour
  • 1 tablespoon cocoa powder
  • 1 tablespoon brown sugar substitute or any keto-friendly sweetener
  • 1/4 teaspoon baking powder
  • 1 tablespoon melted butter
  • 1 large egg
  • 1 tablespoon milk
  • 1/2 tablespoon keto chocolate chips

Instructions 

  • Grease a microwave-safe mug or bowl.
  • In a small bowl, combine all dry ingredients and mix well. Add the wet ingredients and whisk until smooth. Stir in the chocolate chips.
  • Pour the batter into the greased mug and microwave for one minute.
  • Remove and enjoy immediately.

Notes

Notes:
To bake this mug cake in the oven, follow the same preparation steps. Then, pour the batter into a greased ramekin and bake at 180°C (350°F) for 8-10 minutes.
Nutrition (per serving):
  • Calories: 194 kcal
  • Carbohydrates: 6g
  • Protein: 9g
  • Fat: 18g
  • Sodium: 299mg
  • Potassium: 169mg
  • Fiber: 4g
  • Vitamin A: 644 IU
  • Calcium: 113mg
  • Iron: 2mg
  • Net Carbs: 2g
Calories: 194kcal

Craving a delightful way to top your favorite keto desserts? Look no further than these easy, sugar-free frosting recipes! We’ve got classic flavors like chocolate and vanilla, along with a rich and creamy cream cheese frosting.

Keto-Friendly and Packed with Flavor:

Traditional frostings are loaded with sugar, making them a no-go for a keto diet. But fear not! By using clever substitutes like sugar-free powdered sugar, you can whip up incredible frostings that taste just like the real deal.

These frostings are not only sugar-free but also low-carb and quick to prepare. They’re the perfect way to elevate your keto cakes, muffins, brownies, and more!

Making the Magic Happen: (Keto Frosting Base)

The beauty of these recipes lies in their versatility. With just one base recipe, you can create three amazing frosting flavors. Here’s what you’ll need for the base:

  • Sugar-free powdered sugar: This is the key ingredient, and you can even make your own at home!
  • Room temperature butter: Not melted, and unsalted is preferred unless you enjoy a hint of saltiness in your frosting.
  • Vanilla extract: A must-have for adding that classic dessert touch.

Simply cream together the powdered sugar and butter until smooth, then add the vanilla extract. With this base ready, you can now explore the different flavor options!

Flavor Variations: Choose Your Adventure!

  • Chocolate Frosting: Add cocoa powder and milk of your choice (dairy-free options available) for a decadent chocolatey treat.
  • Vanilla Frosting: Keep it simple with just milk (optional: add a vanilla bean pod for extra vanilla flavor).
  • Cream Cheese Frosting: Fold in softened cream cheese (full-fat or dairy-free) for a rich and tangy topping.

Vegan Options: Frosting for Everyone!

All these frostings can be easily transformed into vegan-friendly treats. Here’s how:

  • Swap the butter: Use dairy-free butter alternatives.
  • Milk matters: Opt for plant-based milk options like almond or soy milk.
  • Cream cheese switch: Choose dairy-free cream cheese, preferably from a block for better texture.

Tips for the Perfect Keto Frosting:

  • Thickness control: For a thicker frosting ideal for piping, avoid adding extra milk or water. If needed, add more sugar-free powdered sugar.
  • Thinning it out: Desire a thinner frosting or an icing-like consistency? Add more milk or water gradually until you reach your preferred texture.
  • Flavor explosion: Feeling adventurous? Play around with different sugar-free extracts like lemon, strawberry, or coffee to create unique flavor combinations in your vanilla base.
  • Mixing methods: No electric mixer? No problem! You can mix the frosting by hand. Just ensure your butter is softened and the sugar is sifted for a smooth consistency.

Storing Your Delicious Creations:

  • Refrigerate it: Regardless of the flavor, store your frosting in a sealed container in the refrigerator. They’ll stay fresh for up to a week.
  • Freezing option: Got leftover frosting? Freeze it in a shallow container and use it within 2 months. Thaw overnight in the fridge and let it come to room temperature before frosting your desserts.

Frosting Fun: Endless Dessert Possibilities!

These versatile frostings are the perfect way to dress up your favorite keto treats:

  • Cakes: Imagine a delightful keto birthday cake, chocolate cake, or a flourless chocolate cake adorned with these delicious frostings.
  • Brownies: Take your brownies to the next level! Try cream cheese frosting for cheesecake brownies, chocolate frosting for flourless brownies, and vanilla frosting for a delightful twist on cookie dough brownies.
  • Muffins: Add a touch of sweetness to your breakfast muffins or fudgy chocolate muffins.
  • Cupcakes: Top your keto or vegan cupcakes with these delightful frostings.

Keto Frosting Recipes: 3 Delicious Flavors

Prep Time 5 minutes
Cook Time 5 minutes
Total Time 10 minutes
Servings 12
Calories 107
Create the perfect finish for your keto desserts with these versatile frosting recipes, offering chocolate, vanilla, and cream cheese flavors. Made with sugar-free and low-carb ingredients, these frostings are easy and quick to whip up.

Ingredients

For the Frosting Base:

  • 3 cups sugar-free powdered sugar
  • 1/2 cup softened butter
  • 1 teaspoon vanilla extract

For Chocolate Frosting:

  • Add 1/2 cup cocoa powder
  • 1-2 tablespoons milk of choice (see notes)

For Cream Cheese Frosting:

  • Add 8 oz softened cream cheese
  • 1-2 tablespoons milk of choice (see notes)

For Vanilla Frosting:

  • Add 1-2 tablespoons milk of choice (see notes)

Instructions 

  • In a large mixing bowl, beat the powdered sugar and butter until smooth. Incorporate the vanilla extract.
  • Stir in the specific ingredients for your chosen flavor. Beat until you achieve the desired consistency. For a thinner frosting, gradually add more milk.

Notes

Notes:
  • Each serving is approximately 1/2 cup.
  • To make vegan frosting, use dairy-free butter and dairy-free cream cheese substitutes.
  • Begin with 1 tablespoon of milk and add incrementally as needed.
To Store:
Store your frosting in a sealed container in the refrigerator, where it will last for up to 1 week. Allow the frosting to sit at room temperature for 30-45 minutes before using.
To Freeze:
For freezing, place the frosting in a shallow container. It can be stored for up to 2 months. Thaw in the refrigerator overnight, then bring to room temperature before use.
Nutritional Information (Per Serving):
  • Calories: 107 kcal
  • Carbohydrates: 2g
  • Protein: 1g
  • Fat: 11g
  • Sodium: 100mg
  • Potassium: 61mg
  • Fiber: 1g
  • Vitamin A: 368 IU
  • Calcium: 22mg
  • Iron: 1mg
  • Net Carbs: 1g
Calories: 107kcal

Looking for a sweet treat that fits your keto lifestyle? Look no further than these amazing almond flour biscotti! They’re packed with flavor, incredibly easy to make, and use simple ingredients you might already have on hand.

A Twist on a Classic: Keto-Friendly Biscotti from Mom’s Kitchen

Remember those delightful biscotti your grandma used to make during the holidays? This recipe captures that same delightful taste and texture, but with a healthy, low-carb twist.

Growing up, [your name]’s mom was famous for her Christmas treats, and biscotti were always a highlight. Now, [he/she] is sharing a secret family recipe, adapted to be perfectly keto-friendly!

Easy to Make, Hard to Resist: Light, Crispy, and Full of Flavor

Don’t be intimidated by the fancy name! These biscotti come together in a snap. They’re light and crispy, packed with nuts, and have a touch of sweetness and almond flavor that won’t overpower your taste buds.

[Your name]’s mom couldn’t believe these were low-carb when she tried them! They taste just like the classic biscotti she always makes.

Let’s Bake! What You’ll Need:

  • Almond Flour: The base of these biscotti, giving them their light and airy texture. Choose blanched or superfine almond flour for best results.
  • Nuts: Chopped pistachios and almonds add a delightful crunch. Feel free to use other options like walnuts or cashews.
  • Baking Soda & Salt: Just a touch to help the biscotti rise and enhance the flavors.
  • Cinnamon: A hint of warm spice adds another layer of complexity.
  • Eggs: Make sure they’re at room temperature for even baking.
  • Honey: If you’re not strictly keto, regular honey works perfectly. For a keto-friendly option, use a sugar substitute like keto maple syrup or monk fruit sweetener.
  • Butter: Softened butter helps create a smooth dough. You can also use dairy-free butter if needed.
  • Almond Extract: A must-have for any biscotti recipe! Vanilla extract can be used as a substitute.
  • Cranberries (Optional): While not strictly keto, a few cranberries add a festive touch without significantly impacting the net carbs.

Simple Steps to Keto-Friendly Biscotti Bliss:

  1. Mix it Up: In a large bowl, whisk together all your dry ingredients (almond flour, baking soda, salt, cinnamon).
  2. Wet Ingredients: In a separate bowl, grab your eggs, honey, softened butter, and almond extract. Give them a good whisk until everything is well combined.
  3. Combine & Conquer: Gently fold the dry ingredients into the wet mixture until just incorporated. If using cranberries, fold them in at the end.
  4. Shape Up: Divide the dough in half and shape each half into a log about 1-inch thick. Place them on a baking sheet lined with parchment paper.
  5. First Bake: Pop those logs in the oven at 325°F (170°C) for 20 minutes, or until lightly golden brown.
  6. Cooling Down: Take the loaves out and let them cool for 15 minutes. This is important, so they don’t crumble when sliced.
  7. Slice and Bake Again: Now for the fun part! Slice the loaves into 1/2 inch thick pieces and arrange them back on the baking sheet. Bake for an additional 20 minutes at a lower temperature of 250°F (120°C).
  8. Enjoy!: Let the biscotti cool completely before digging in. Trust us, they’re worth the wait!

Tips for the Perfect Keto Biscotti:

  • Don’t be a perfectionist: These biscotti are forgiving. You can adjust the size and thickness to your preference. Just remember, thinner biscotti will bake a bit faster.
  • Nutty Variations: Feel free to experiment with different types of nuts like cashews or walnuts.
  • Patience is Key: Letting the loaves cool completely before slicing is crucial. They’ll firm up as they cool and be much easier to handle.
  • Festive Pairings: Enjoy your biscotti with a warm cup of hot chocolate, peppermint mocha, or a gingerbread latte for a delightful holiday treat.

Flavor Up Your Life: Fun Variations on the Classic Biscotti

This recipe is a fantastic base, but feel free to get creative and add your own twist! Here are some ideas:

  • Chocolate Chip: Indulge your chocolate cravings by adding ¼ cup cocoa powder and increasing the honey by 2 tablespoons. Leave out any dried fruit for this variation.
  • Cranberry Orange: For a zesty twist, substitute half the nuts with extra cranberries and add 1 teaspoon of orange extract.
  • Chocolate Dipped: Take your biscotti to the next level by dipping them in melted dark chocolate chips. A quick and decadent treat!
  • Espresso: Liven things up with a touch of coffee by adding 1 teaspoon of espresso extract and omitting the cranberries.
  • Lemon: For a bright and refreshing flavor, add 2 tablespoons of lemon zest and 1 teaspoon of lemon extract.

Storing and Freezing Your Biscotti:

These biscotti store beautifully, making them a perfect option for meal prepping or gifting. Here’s how to keep them fresh:

  • Room Temperature: Store leftover biscotti in an airtight container at room temperature for up to 4 weeks.
  • Freezing: For longer storage, place the biscotti in a ziplock bag and freeze them for up to 6 months.

Nutritional Information:

This recipe makes approximately 32 servings, and each biscotti boasts an impressive nutritional profile:

  • Calories: 110kcal
  • Carbohydrates: 3g (including 1g net carbs)
  • Protein: 3g
  • Fat: 10g
  • Fiber: 2g

So there you have it! This delicious and easy recipe allows you to enjoy a classic treat without compromising your keto lifestyle.

Let us know in the comments below what flavor variations you try!

Almond Flour Biscotti Recipe

Prep Time 5 minutes
Cook Time 45 minutes
Total Time 50 minutes
Servings 32
Calories 110
Enjoy a delightful treat with this almond flour biscotti! Light, crispy, and full of nuts, it's a surprisingly low-carb delight. The recipe uses simple ingredients and is easy to prepare.

Ingredients

  • 3 1/2 cups blanched almond flour
  • 1 teaspoon baking soda
  • 1/2 teaspoon salt
  • 1/2 cup sliced pistachios (see notes for alternatives)
  • 1 teaspoon cinnamon
  • 2 large eggs
  • 1/2 cup keto honey (standard honey can also be used)
  • 1/2 cup softened butter
  • 1/2 teaspoon almond extract (vanilla extract is an alternative)
  • 1/4 cup dried cranberries (optional)

Instructions 

  • Preheat your oven to 170°C (325°F). Line a large baking sheet with parchment paper.
  • In a large mixing bowl, combine all dry ingredients thoroughly. In a separate bowl, whisk together the wet ingredients until well combined.
  • Gently fold the dry ingredients into the wet mixture until fully incorporated. Stir in the cranberries at this stage, if using.
  • Lightly flour a surface in your kitchen. Divide the dough into two equal parts and shape each into a 1-inch thick rectangular loaf.
  • Place the loaves on the prepared baking sheet. Bake for 20 minutes or until they turn golden brown.
  • Remove the loaves from the oven and let them cool for 15 minutes. Reduce the oven temperature to 120°C (250°F).
  • Slice each loaf into 1/2-inch thick biscotti. Place them back on the baking sheet and bake for an additional 20 minutes.
  • Remove from the oven and allow them to cool completely before serving.

Notes

Notes:
  • Feel free to use other types of sliced nuts such as almonds or pecans.
  • To Store: Keep the biscotti in a sealed container at room temperature for up to 4 weeks.
  • To Freeze: Place the biscotti in a ziplock bag and freeze for up to 6 months.
Nutritional Information (Per Serving):
  • Calories: 110 kcal
  • Carbohydrates: 3g
  • Protein: 3g
  • Fat: 10g
  • Sodium: 105mg
  • Potassium: 24mg
  • Fiber: 2g
  • Vitamin A: 113 IU
  • Vitamin C: 1mg
  • Calcium: 31mg
  • Iron: 1mg
  • Net Carbs: 1g
Calories: 110kcal

Calling all cinnamon lovers and low-carb enthusiasts! This Keto Cinnamon Mug Cake is about to become your new favorite sweet treat. It’s fluffy, bursting with cinnamon flavor, and ready to satisfy your cravings in under 5 minutes – that’s right, no more waiting around for a whole cake to bake!

Imagine this: you’ve finished dinner, and a little voice whispers that it’s time for something sweet. Well, resist the urge for sugary treats and whip up this mug cake instead! It’s sugar-free, low-carb, and keto-friendly, so you can indulge without the guilt. Plus, it’s a single-serving cake, so there’s no need to share (unless you want to, of course)!

This recipe is also a lifesaver for busy parents. Get your kids involved in making their own healthy treat – they’ll love adding the ingredients and devouring the finished product. It’s a fun way to sneak in some extra healthy fats and protein while satisfying their sweet tooth.

Ingredients You Probably Already Have

The beauty of this mug cake is that it uses common keto-friendly ingredients that you might already have in your pantry. Here’s what you’ll need:

  • A touch of vanilla or almond extract: for that perfect touch of sweetness and flavor.
  • Yogurt or sour cream: adds moisture and gives the cake the ideal texture.
  • Melted coconut oil or softened butter: binds the ingredients together.
  • An egg: acts as another binder for this yummy cake.
  • Cinnamon: the star of the show!
  • Sugar-free sweetener: to keep the carbs down without sacrificing taste.
  • Almond flour and coconut flour: the perfect combination for a gluten-free, fluffy mug cake.
  • A pinch of salt: enhances all the other flavors.
  • Baking powder: helps the cake rise beautifully.

Easy-Peasy Directions: Keto Mug Cake in 3 Steps!

This recipe is so simple, you’ll be amazed! In fact, you can whip up this mug cake in under three minutes, if you have your ingredients prepped. Here’s how:

  1. Combine all the ingredients in a mug: No fancy equipment needed, just a simple mug will do!
  2. Mix it up well: Make sure everything is incorporated for a smooth batter.
  3. Microwave and enjoy! Pop the mug in the microwave for 90 seconds, and voila – your warm, delicious mug cake is ready.

We told you it was easy! This is the perfect treat for those times when you’re short on time or just need a quick and easy dessert.

Top it Off with Your Favorites!

While this mug cake is delicious on its own, why not take it to the next level with some yummy toppings? Here are some ideas to get you started:

  • Ice cream: because what’s better than warm cake topped with melty ice cream?
  • Fresh berries: add a touch of sweetness and vibrant color.
  • Sugar-free chocolate chips: a classic combination that never disappoints.
  • Keto cream cheese icing: transform this mug cake into a decadent cinnamon roll in minutes.
  • Chopped nuts: add a delightful crunch and healthy fats.

Substitutions and Variations

This recipe is easily adaptable to fit your dietary needs and preferences. Here are a few ideas:

  • Dairy-free? Swap the butter for coconut oil and the yogurt for coconut cream.
  • Love pumpkin spice? Use pumpkin spice instead of cinnamon for a fall-inspired twist.
  • Nut allergies? Substitute sunflower seed flour for the almond flour.

With so many options, you can create a new and delicious mug cake every time!

Keto Cinnamon Mug Cake

Prep Time 2 minutes
Cook Time 1 minute
Total Time 3 minutes
Servings 1
Calories 366
Savor the delight of a Keto Cinnamon Mug Cake, perfect for breakfast, a sweet treat, or as a delightful afternoon snack.

Ingredients

  • 1 tablespoon very soft butter
  • ¼ cup almond flour
  • 1 egg
  • 1 tablespoon coconut flour
  • 1 tablespoon plain yogurt or sour cream
  • 1 tablespoon Joy Filled Eats Sweetener (or alternative sweeteners - see notes)
  • ½ teaspoon cinnamon
  • ¼ teaspoon baking powder
  • ¼ teaspoon vanilla extract
  • A tiny pinch of salt

Instructions 

  • In a large mug, combine all ingredients thoroughly.
  • Microwave for 1 minute and 30 seconds.

Notes

Notes:
  • Net Carbs: This cake contains 6.2 NET carbs.
  • Cold Butter Tip: If the butter is cold, microwave it in the mug for a few seconds before adding the other ingredients.
  • Prep Ahead: Mix dry ingredients in advance and add wet ingredients when ready to cook.
  • Reheating: Reheat in the microwave for 10-20 seconds.
  • Sweetener Guide: My blend of xylitol, erythritol, and stevia, which is twice as sweet as sugar, is used. Comparable to Trim Healthy Mama Gentle Sweet and Truvia. For Swerve or Lakanto Monk Fruit, use 1.5 times the amount of sweetener. For Pyure or Trim Healthy Mama Super Sweet, use half the amount.
  • Note: Substitutions may not work in all recipes, particularly in candies such as caramel.
Nutritional Information (Per Serving):
  • Calories: 366.6
  • Carbohydrates: 12.2g
  • Protein: 14.2g
  • Fat: 30.4g
  • Saturated Fat: 10.6g
  • Polyunsaturated Fat: 1.3g
  • Monounsaturated Fat: 4.6g
  • Trans Fat: 0.5g
  • Cholesterol: 194.5mg
  • Sodium: 173.8mg
  • Potassium: 192mg
  • Fiber: 6g
  • Sugar: 2.3g
  • Vitamin A: 591IU
  • Vitamin C: 0.04mg
  • Calcium: 156.9mg
  • Iron: 2.2mg
Calories: 366kcal

Craving a warm, chocolatey dessert without blowing your keto goals? This recipe is for you! These keto lava cakes are ridiculously easy to make, with only 7 ingredients and 3 net carbs per serving. Plus, they’re ready in under 25 minutes – perfect for a quick and satisfying treat.

Imagine this: you sink your fork into a rich, moist cake, and a wave of warm, gooey chocolate lava erupts. That’s the magic of these keto lava cakes! They’re so good, you might feel like you’re sneaking a cheat-day dessert, but rest assured, they’re completely keto-friendly.

We all deserve a sweet treat now and then, but sometimes you don’t want to go overboard. That’s why these lava cakes are portion-controlled magic! Baked in ramekins, they’re the perfect size to satisfy your craving without going crazy. Plus, they’re gluten-free, grain-free, sugar-free, and low-carb – making them a win for everyone!

Here’s what you’ll need:

  • Salted Butter: for that classic lava cake flavor.
  • Sugar-Free Chocolate Chips: the key to that deep, delicious chocolate taste.
  • Sweetener: Feel free to use your favorite keto-friendly sweetener.
  • Pure Vanilla Extract: a touch of vanilla to round out the flavors.
  • Almond Flour: a great alternative flour for keto baking. You can substitute sunflower seed flour if you need to avoid nuts.
  • Unsweetened Cocoa Powder: choose a good quality cocoa powder for the richest chocolate flavor.
  • Large Eggs: essential for the cake’s structure.

Whipping Up Keto Lava Cake Magic: Easier Than You Think!

As you’ve seen, this recipe is a breeze! There are only three steps, so you can skip the complicated baking techniques and get straight to the delicious part.

  1. Preheat your oven to 375°F.
  2. In a saucepan or microwave, melt together the butter, chocolate chips, and sweetener. Once melted, stir in the vanilla extract, almond flour, and cocoa powder until smooth. Then, gently whisk in the beaten eggs.
  3. Generously grease your ramekins (this is important if you want to flip them for presentation!). Divide the batter evenly and bake for 13 minutes. The centers should be wet and jiggly – that’s the lava magic! Let them cool for a few minutes before serving. You can enjoy them right in the ramekins or flip them onto a plate for a fancy touch.

Fun Variations to Take Your Lava Cakes to the Next Level

Want to change things up? No problem! Here are some ideas to personalize your keto lava cakes:

  • Chocolate: Play around with different sugar-free chocolate chips like dark, milk, semi-sweet, white, or even peanut butter chips!
  • Extracts: Add a minty twist with peppermint extract, or go nutty with almond extract. Most extracts are keto-friendly, so have fun experimenting.
  • Sprinkles: Top your lava cakes with some festive sugar-free sprinkles for a special occasion.
  • Whipped Cream & Ice Cream: Because, why not? Keto-friendly whipped cream and a scoop of low-carb ice cream are the perfect companions for these warm, gooey cakes.
  • Salt: A sprinkle of sea salt on top adds a delightful sweet and salty contrast.

Top Tips for Gooey Perfection:

  • Grease those ramekins well! This is crucial for easy removal and that beautiful presentation.
  • Don’t overbake! Resist the urge to bake them longer – you want that molten chocolate center.
  • Serve immediately. Fresh out of the oven is when these lava cakes are at their gooiest best.

Common Keto Lava Cake Questions Answered:

Is the center safe to eat? Absolutely! Although the center is runny, it reaches a temperature high enough to cook the eggs safely. So dig in without worry!

Can I make the batter ahead of time? You sure can! Prepare the batter, store it in the fridge for up to 2 days, and then let it come to room temperature before baking.

There you have it! These keto lava cakes are the perfect way to indulge your sweet tooth without going off track. So preheat your oven, whip up a batch, and get ready to experience pure, delicious decadence!

Keto Lava Cake

Prep Time 10 minutes
Cook Time 13 minutes
Total Time 23 minutes
Servings 4
Calories 332
Indulge in a unique sensory delight with our Keto Chocolate Lava Cake recipe. Experience the sumptuous fusion of a tender cake and a lusciously molten center with each bite.

Equipment

  • 4 small ramekins or oven-safe mugs

Ingredients

  • ½ cup salted butter
  • cup sugar-free chocolate chips
  • ¼ cup Joy Filled Eats Sweetener (or alternatives as per recipe notes)
  • 1 teaspoon vanilla extract
  • 3 tablespoons almond flour
  • 3 tablespoons cocoa powder
  • 2 large eggs (lightly beaten)

Instructions 

  • Preheat the oven to 375°F.
  • In a microwave or a saucepan over low heat, melt the butter, chocolate, and sweetener. Once melted, remove from heat.
  • Stir in vanilla, almond flour, and cocoa until smooth. Then, blend in the beaten eggs.
  • Evenly distribute the mixture among 4 well-greased ramekins or small oven-safe coffee cups.
  • Bake for 13 minutes. Let them cool for 5 minutes before serving. Serve directly in the bakeware or invert onto plates.

Notes

Notes:
  • Nutrition: Nutrition facts are for one lava cake, containing 3 NET carbs per serving.
  • Substitutions: Various sugar-free chocolate types can be used, including milk, dark, or semi-sweet.
  • Prep Time Tip: Prepare batter 1-2 days in advance and refrigerate. Allow it to reach room temperature before baking.
  • Reheating: Leftover lava cakes can be refrigerated for up to 2 days. Reheat in the microwave for 15-20 seconds; avoid overheating.
  • Freezing: Store in an airtight container and freeze for 2-3 weeks.
  • Sweetener Tips: A blend of xylitol, erythritol, and stevia is used. It is twice as sweet as sugar. To substitute with Swerve or Lakanto Monk Fruit, use 1.5 times the sweetener amount. Use half the amount if substituting with Pyure or Trim Healthy Mama Super Sweet. Note that substitutions may not work in candy recipes, such as caramel.
Nutritional Information (Per Serving):
  • Calories: 332
  • Carbohydrates: 7g
  • Protein: 6g
  • Fat: 34g
  • Saturated Fat: 19g
  • Cholesterol: 143mg
  • Sodium: 237mg
  • Potassium: 183mg
  • Fiber: 4g
  • Sugar: 1g
  • Vitamin A: 828IU
  • Calcium: 46mg
  • Iron: 3mg
Calories: 332kcal

Looking for a quick and satisfying breakfast or snack that’s bursting with flavor and low in carbs? Then you need to try these Ham and Cheese Chaffles! With only 5 ingredients and about 1 net carb each, they’re the perfect way to stay on track with your keto goals.

Why You’ll Love These Chaffles:

  • Super Easy: Just 5 ingredients and minimal prep time make these chaffles a lifesaver on busy mornings.
  • Flavor Packed: Loaded with melty cheese, savory ham, and a hint of fluffiness, these chaffles are anything but bland.
  • Versatile: Enjoy them on their own, with a side of eggs, or cut into triangles for a delicious low-carb appetizer.
  • Keto-Friendly: With minimal carbs and a good amount of protein, these chaffles fit perfectly into your keto lifestyle.

What are Chaffles?

Chaffles are a tasty low-carb alternative to traditional waffles. Made with a base of cheese and eggs instead of flour, they’re perfect for those following a keto diet. This recipe also uses a touch of almond flour and baking powder for a bit of extra structure.

Ready to Make Them? Here’s What You’ll Need:

  • Eggs: 2 large eggs will provide the base for our chaffle batter.
  • Cheese: Any shredded cheese you like works! We recommend a blend of cheddar and mozzarella for a classic flavor combination.
  • Almond Flour: A ¼ cup of almond flour adds a touch of body and helps the chaffles crisp up nicely.
  • Baking Powder: Just ½ teaspoon of baking powder helps the chaffles rise slightly for a lighter texture.
  • Ham: Ditch the deli slices! ¾ cup of chopped ham adds a satisfying savory element.

Tips and Tricks:

  • Use a waffle maker of any size. This recipe makes 5 chaffles, perfect for a single serving or a quick breakfast for two.
  • Don’t overfill your waffle maker! A generous 2 tablespoons of batter is all you need per chaffle.
  • Customize your chaffles! Feel free to experiment with different types of cheese, spices, or even add your favorite low-carb veggies.

What Waffle Maker Should I Use?

The beauty of chaffles is that you can make them with any waffle maker you have on hand! This recipe yields 5 chaffles, so a standard-sized waffle maker will work perfectly. However, if you’re looking for a recommendation, I love using the handy little Ms. Dash Mini Waffle Maker. It’s compact and makes perfectly portioned chaffles, ideal for single servings or quick breakfasts for two.

This size is also great for creating low-carb sandwiches! Simply layer your favorite fillings between two chaffles for a satisfying and delicious keto-friendly option.

Ham and Cheese Chaffles

Prep Time 5 minutes
Cook Time 3 minutes
Total Time 8 minutes
Servings 5
Calories 174
Enjoy a delightful keto-friendly treat with these Ham and Cheese Chaffles, featuring a simple 5-ingredient recipe. Each chaffle contains only about 1 net carb, making it an excellent choice for a quick keto breakfast or snack.

Ingredients

  • 2 large eggs
  • 3/4 cup shredded cheese (a mix of cheddar and mozzarella recommended)
  • 1/4 cup almond flour
  • 1/2 teaspoon baking powder
  • 3/4 cup ham (chopped)

Instructions 

  • In a mixing bowl, beat the eggs thoroughly.
  • Gently fold in the cheese, almond flour, baking powder, and ham until well combined.
  • Preheat your waffle maker as per the manufacturer's instructions.
  • Pour the batter into the waffle maker, using about 2 scoops for a standard waffle maker (like Dash). Be cautious not to overfill.
  • Cook until there is no more steam and the waffles are golden brown.
  • Remove the waffles carefully and serve hot.

Notes

Notes:
  • Feel free to use any variety of shredded cheese you prefer.
  • The net carbs amount to approximately 1.2g per chaffle.
Nutritional Information (per waffle):
  • Calories: 174kcal
  • Carbohydrates: 1.6g
  • Protein: 12.9g
  • Fat: 12.8g
  • Cholesterol: 109mg
  • Sodium: 167mg
  • Fiber: 0.4g
  • Sugar: 0.2g
Calories: 174kcal

With these easy-to-follow instructions and helpful tips, you’ll be whipping up delicious Ham and Cheese Chaffles in no time!

Sticking to a keto or low-carb diet can be amazing, but those hunger pangs can hit hard. Figuring out what to munch on when you’re short on time can feel impossible. But fear not, fellow keto adventurer!

We’ve compiled a handy list of 50 delicious, zero-carb snacks to keep you fueled and satisfied, whether you’re at home or on the go. Plus, there are store-bought options for those busy moments.

Zero-Carb Snacking Made Easy

Imagine grabbing a satisfying snack that won’t kick you out of ketosis – that’s the power of zero-carb options! This list includes snacks with net carbs between 0 and 1 gram, so you can stay on track.

Pantry & Fridge Staples for Zero-Carb Snacking:

  1. Olives: A single ounce packs a satisfying punch with 0-1 net carbs depending on the variety.
  2. Guacamole: This creamy goodness is your friend, with just 0.5 net carbs per tablespoon. Spread it on cheese slices, dip low-carb veggies, or add it to scrambled eggs.
  3. Seaweed Snacks: Don’t be intimidated! These flavorful snacks are perfect for fans of Asian flavors, clocking in at 0 net carbs per serving. Look for options like salted or teriyaki.
  4. Cheese: Check the labels, but varieties like babybel or string cheese are great grab-and-go options, usually containing 0-1 net carbs per serving.
  5. Nuts: Almonds and macadamias might be your go-to, but for near-zero carb choices, opt for pecans (1 net carb per 15 halves) or Brazil nuts (1 net carb per 8 nuts).
  6. Avocado: This heart-healthy fat is a keto superstar. A quarter of an avocado has 1 net carb, so adjust the portion size for your needs.

Zero-Carb Snacks on-the-Go:

  1. Zero-Carb Bagels: Believe it or not, keto-friendly bagels exist! Top them with your favorite zero-carb options like cheese, lunchmeat, or guac. (Net carbs: 0)
  2. Grass-Fed Beef Snack Sticks: A protein punch without the carbs, perfect for curbing those cravings.
  3. Pork Rinds: Crunchy and flavorful, pork rinds are a zero-carb staple. Enjoy them plain or add your favorite seasonings.
  4. Hard-Boiled Eggs: A classic and convenient protein-packed snack, hard-boiled eggs are perfect for on-the-go or at-home munching. They are naturally zero-carb and come pre-packaged in their own shells!
  5. Cucumber Slices with Cream Cheese: For a refreshing and satisfying snack, pair cucumber slices with a dollop of cream cheese. The cucumbers are zero-carb, and cream cheese typically has negligible carbs.
  6. Celery Sticks with Nut Butter: Celery sticks provide a nice crunch, while nut butter adds a creamy texture and protein. Choose a nut butter with no added sugars for the ultimate zero-carb snack.
  7. Pickles: Pickles are a tasty and crunchy zero-carb option. Just be mindful of sodium content, especially if you are on a restricted sodium intake.
  8. Beef Jerky: Beef jerky is a great source of protein and healthy fats, making it a perfect keto snack. Look for varieties with no added sugars or fillers.
  9. Salami Slices: Salami is a protein-rich, zero-carb option that can be enjoyed on its own or paired with cheese or pickles.
  10. Sugar-Free Dark Chocolate: Dark chocolate with a high cocoa content (at least 70%) can be a delicious and satisfying keto snack. Just be sure to choose sugar-free varieties and limit portion sizes, as dark chocolate does contain carbs.
  11. Macadamia Nuts: Macadamia nuts are a good source of healthy fats and fiber, making them a keto-friendly snack. They are also naturally low in carbs, with about 1.5 grams of net carbs per ounce.
  12. Coconut Flakes: Unsweetened coconut flakes are a versatile zero-carb ingredient that can be enjoyed on their own or added to yogurt, smoothies, or baked goods.
  13. SF Jello: Sugar-free Jello is a light and refreshing snack that is perfect for satisfying a sweet tooth without the carbs. Look for varieties made with stevia or other sugar substitutes.
  14. Roasted Seaweed: Kick things up a notch from plain seaweed snacks with roasted seaweed. These offer a smoky and savory taste bud explosion, all while remaining zero-carb.
  15. Deviled Eggs: Spruce up your hard-boiled eggs by whipping up a deviled egg filling. Keep it simple with just mustard and mayo, or get fancy with herbs and spices. The beauty lies in the customization, and they stay zero-carb.
  16. Sliced Bell Peppers with Guacamole: Bell peppers offer a satisfying crunch and come in various vibrant colors to brighten your snack time. Pair them with your favorite guacamole for a delightful zero-carb combo.
  17. Beef Broth: Warm yourself up with a steaming cup of beef broth. It’s surprisingly filling and packed with electrolytes, making it a great option, especially after a workout. Bonus – it’s zero-carb!
  18. Mung Bean Sprouts: These tiny powerhouses are a fantastic source of protein and fiber. Enjoy them raw with a sprinkle of your favorite seasonings, or add them to stir-fries for a zero-carb crunch.
  19. Sugar-Free Koolaid: Here’s a surprising one! Sugar-free Koolaid (unsweetened) provides a sweet and refreshing drink option without the carbs. Add a splash of water or club soda for some fizz, and enjoy guilt-free.
  20. Water with Lemon or Lime: Plain water is always a fantastic choice, but adding a squeeze of lemon or lime can elevate it to a whole new level. It’s refreshing, hydrating, and zero-carb.
  21. Cheese Crisps: Craving something crunchy? Make your own cheese crisps by baking shredded parmesan cheese on a parchment-lined baking sheet. Let them cool, and enjoy a delightful zero-carb alternative to potato chips.
  22. Strawberry with Whipped Cream: Looking for a sweet treat? Look no further than a juicy strawberry topped with a dollop of sugar-free whipped cream. This satisfying snack offers a taste of sweetness while staying zero-carb.
  23. Turkey Roll-Ups: Take a slice of deli turkey and spread it with a dollop of cream cheese or pesto. Roll it up for a quick, protein-rich, and zero-carb snack.
  24. Pickled Vegetables: Explore the world of pickled vegetables! Options like cauliflower, green beans, and asparagus offer a tangy and crunchy zero-carb treat.
  25. SF Coffee or Tea: Enjoy a hot cup of your favorite coffee or tea. Just be mindful of added sugars or creamers. Opt for sugar substitutes like stevia and unsweetened nut milk alternatives for a zero-carb option.
  26. Mushrooms: Sauteed mushrooms with a sprinkle of herbs and spices are a delicious and savory zero-carb snack.
  27. Pork Rinds with Salsa: Give your pork rinds a flavor boost with salsa! Choose a sugar-free salsa variety for a zero-carb explosion.
  28. Watermelon Rind: Don’t toss those watermelon rinds! The white part, surprisingly, is low in carbs and can be enjoyed raw or pickled for a refreshing zero-carb snack.
  29. Celery Sticks with Cream Cheese & Everything Bagel Seasoning: Spruce up your celery and cream cheese combo with a sprinkle of everything bagel seasoning for a delightful zero-carb burst of flavor.
  30. SF MCT Oil: MCT oil (medium-chain triglycerides) can be a satiating option. While technically it has calories, it’s readily absorbed by the body for energy and doesn’t have a net carb impact. Just remember, a little goes a long way!
  31. Spicy Cauliflower Crackers: Roast thin slices of cauliflower seasoned with chili flakes, garlic powder, and your favorite spices for a crunchy, zero-carb cracker alternative.
  32. Herb-Crusted Tofu Cubes: Marinate cubed tofu in a mixture of soy sauce, lime juice, and your favorite herbs. Pan-fry them till crispy for a protein-packed, zero-carb snack.
  33. Roasted Chickpeas: Dry roasted chickpeas offer a satisfying crunch with a nutty flavor. Just be sure to choose unsalted varieties for a pure zero-carb experience.
  34. SF Flavored Sparkling Water: Craving some fizz? Opt for sugar-free flavored sparkling water. The bubbles can help curb cravings and keep you hydrated, all while staying zero-carb.
  35. Cucumber “Boats” with Guacamole: Hollow out a few cucumber slices and fill them with your favorite guacamole for a refreshing and flavorful zero-carb snack.
  36. Kimchi: This fermented Korean cabbage offers a spicy and tangy flavor profile. It’s packed with probiotics and is naturally zero-carb.
  37. SF Hard Candy: Looking for a hard candy fix? Sugar-free hard candies in flavors like peppermint or butterscotch can satisfy your sweet tooth without the carbs.
  38. SF Protein Smoothie: Whip up a quick and satisfying protein smoothie using unsweetened almond milk, protein powder, and a handful of frozen berries. Choose sugar-free protein powder to maintain the zero-carb status.
  39. Bone Broth Ice Pops: Freeze leftover bone broth into ice pop molds for a refreshing and hydrating zero-carb treat. Add a squeeze of lemon or lime for extra flavor.
  40. Sliced Radishes with Dill Dip: Radishes offer a delightful peppery bite and satisfying crunch. Pair them with a homemade dill dip made with Greek yogurt, fresh dill, and a squeeze of lemon for a zero-carb snack sensation.
  41. Sugar-Free Chia Seed Pudding: Chia seeds absorb liquid and expand, creating a pudding-like texture. Make a sugar-free chia pudding with unsweetened almond milk, chia seeds, and a splash of vanilla extract. Enjoy it chilled for a zero-carb sweet snack.
  42. Roasted Edamame Pods: Edamame pods are a great source of plant-based protein. Roast them with a sprinkle of sea salt for a salty and satisfying zero-carb snack.
  43. Smoked Salmon with Cream Cheese Roll-Ups: Elevate your snack game with smoked salmon roll-ups. Spread a thin layer of cream cheese on a slice of smoked salmon and roll it up for a luxurious and zero-carb bite.

Sticking to a keto diet can be challenging, especially when cravings hit. But with a little planning and preparation, you can easily stay on track and reach your goals.

This cheat sheet has provided you with a variety of zero-carb snack options that are both delicious and satisfying. So next time you’re feeling hungry, reach for one of these snacks instead of a carb-heavy option.

Remember:

  • When choosing snacks, focus on whole, unprocessed foods.
  • Be mindful of your portion sizes.
  • Listen to your body and eat when you’re hungry, not when you’re bored.

With a little effort, you can easily make keto a sustainable lifestyle.

Craving a refreshing and delicious dessert that’s kind to your body? Look no further than this No-Bake Lemon Cheesecake! It’s perfect for any occasion, from spring celebrations to summer barbecues.

Here’s what makes this cheesecake special:

  • Sugar-free and gluten-free: Enjoy a delicious treat without compromising your dietary needs.
  • Creamy and zingy: The perfect balance of sweet and tart, thanks to the luscious cheesecake filling and vibrant lemon flavor.
  • No gelatin needed: The whipped cream and mascarpone come together beautifully for a smooth and stable texture.
  • Easy to customize: Top with whipped cream, fresh berries, or even sliced lemon for an extra touch of elegance.

Ready to whip up this delightful dessert? Let’s get started!

Ingredients (makes 12 slices):

  • For the crust (optional):

    • 1 cup macadamia nuts (roasted or raw)
    • 1/2 cup almonds (roasted or raw)
    • 2 tbsp powdered sweetener (such as Allulose or Erythritol)
    • 2 tbsp unsalted butter, melted
    • 1 tsp vanilla extract
  • For the cheesecake filling:

    • 2 1/2 cups heavy whipping cream
    • 8 oz full-fat cream cheese or mascarpone cheese, softened
    • 3/4 cup powdered sweetener
    • 1/2 cup fresh lemon juice (adjust to taste)
    • Zest of 1-2 lemons (adjust to taste)
    • 1/2 – 1 lemon, sliced, for decoration (optional)

Instructions:

  1. (Optional) Roast the nuts: Preheat your oven to 285°F (fan-assisted) or 320°F (conventional). Spread the nuts on a baking sheet and bake for 25 minutes, or until golden brown and fragrant. Allow to cool slightly.
  2. Prepare the crust (optional): Process the nuts, sweetener, butter, and vanilla extract in a food processor until finely ground. Press the mixture into the bottom of an 8-inch or 9-inch springform pan lined with parchment paper. Refrigerate while you prepare the filling.
  3. Make the cheesecake filling: In a bowl, whip 2 cups of heavy cream until soft peaks form. Set aside.
  4. In another bowl, beat the cream cheese (or mascarpone), remaining sweetener, lemon juice, and zest until smooth and creamy.
  5. Gently fold the whipped cream into the cheesecake mixture until just combined.
  6. Pour the filling over the chilled crust (or directly into the pan if not using a crust) and spread evenly.
  7. Refrigerate for at least 3 hours, or until set.
  8. To serve: Run a knife around the edges of the pan to loosen the cheesecake. Whip the remaining 1/2 cup of heavy cream until stiff peaks form. Pipe or spread the whipped cream on top of the cheesecake. Decorate with lemon slices (optional).

Tips:

  • For a less tart cheesecake, start with 1/4 cup of lemon juice and add more to taste.
  • You can use regular lemons instead of Meyer lemons, just adjust the amount of juice accordingly.
  • Store leftover cheesecake in the refrigerator for up to 5 days.

Enjoy this delightful low-carb and no-bake lemon cheesecake! It’s sure to become a new favorite dessert for any occasion.

Low-Carb No Bake Lemon Cheesecake Recipe

Servings 12 slices
Calories 468
Indulge in this scrumptious low-carb, no-bake lemon cheesecake - a perfect blend of tangy and sweet flavors, all while keeping your carb intake in check.

Ingredients

Cheesecake Base:

  • 1 cup roasted macadamia nuts (134 g/ 4.8 oz)
  • 1/2 cup roasted blanched almonds (73 g/ 2.6 oz)
  • 2 tbsp powdered Allulose or Erythritol (20 g/ 0.7 oz)
  • 2 tbsp unsalted butter (28 g/ 1 oz)
  • 1 tsp sugar-free vanilla extract

Cheesecake Layer:

  • 2 1/2 cups heavy whipping cream (divided (600 ml/ 20 fl oz))
  • 500 g full-fat cream cheese or mascarpone (1.1 lb)
  • 3/4 cup powdered Allulose or Erythritol (120 g/ 4.2 oz)
  • 1/2 cup fresh Meyer lemon juice (120 ml)
  • Zest of 1-2 Meyer lemons (to taste)
  • 1/2 to 1 Meyer lemon (sliced for decoration)

Instructions 

  • Roast Nuts: Preheat the oven to 140°C (285°F) fan-assisted or 160°C (320°F) conventional. Place nuts on a baking tray in a single layer and roast for about 25 minutes until golden and fragrant. (Optional: Can use raw nuts)
  • Prepare Base: Process warm nuts in a food processor until finely chopped. Add sweetener, butter, and vanilla, and process again until it comes together. Press this mixture into a springform pan lined with parchment paper and refrigerate.
  • Cheesecake Layer: In a bowl, mix 2 cups of heavy cream with cream cheese (or mascarpone), sweetener, lemon juice, and zest until smooth and creamy using a mixer. Spread over the chilled nut base and refrigerate for at least 3 hours.
  • Final Touches: Beat the remaining heavy cream to stiff peaks and pipe or spread over the cheesecake. Decorate with lemon slices.
  • To Serve: Run a sharp knife around the edges to release the cheesecake. Serve immediately or chill for an hour. Store in the fridge for up to 5 days.

Notes

Per Serving (1 slice):
  • Net Carbs: 4.4 grams
  • Protein: 5.6 grams
  • Fat: 47.3 grams
  • Calories: 468 kcal
Meyer lemons are less acidic and have a slight orange hue. If using regular lemons, adjust the juice quantity to taste.
Calories: 468kcal