Author

Chloe Davis

Browsing

These dry-rubbed ranch chicken meal prep bowls deliver a savory, deeply browned crust that survives four days in the fridge. I skip standard russets here because baby gold potatoes hold their creamy centers perfectly through the microwave.

: Plated dry-rubbed ranch chicken meal prep bowl with parmesan roasted potatoes, broccoli, and a side of dressing

Why This Dry Rub Method Wins

Marinades turn soggy in containers. Wet sauces wash away. Coating small, cubed breast meat with the dry packet creates immediate friction in the hot pan, locking down a heavily seasoned exterior that stays intact all week.

Searing the Chicken and Roasting the Vegetables

Prep the potatoes: Halve the baby golds and toss them thoroughly in a large mixing bowl with one tablespoon of olive oil, the parmesan cheese, garlic powder, smoked paprika, and kosher salt. Spread them cut-side down on a parchment-lined baking sheet. That flat contact with the hot pan is what builds the crispy bottom. Roast at 425°F for 25 to 30 minutes, pulling them when the bottoms release easily with a spatula and look deeply golden.

Halved baby potatoes roasted on a lined baking sheet with a golden parmesan crust

Placing the potatoes cut-side down maximizes their contact with the hot pan for a better crust.

Char the broccoli: Toss the florets in the same mixing bowl using the remaining tablespoon of olive oil. Spread them evenly onto a second baking sheet. Slide them into the oven during the final 12 to 15 minutes of the potatoes’ roasting time. Watch the edges closely. You want a visible, light char on the outer florets while the thickest stems just turn tender to the bite.

Sear the chicken: Coat the cubed breast meat completely in the dry ranch seasoning mix. Heat the last tablespoon of olive oil in a large skillet over medium-high heat. Drop the chicken in a single layer and step away for a few minutes. I used to stir constantly, but letting the meat sit undisturbed is the only way to lock down that thick exterior before you toss them. Cook for 5 to 7 minutes total, turning occasionally, until all sides are browned and an instant-read thermometer registers 165°F in the center.

Cubed chicken pieces searing in a hot skillet with a browned dry ranch crust

Assemble the bowls: Remove everything from the heat and divide the roasted vegetables and chicken evenly across four meal prep containers. Portion two tablespoons of liquid dressing into small condiment cups on the side. Do not leave the food out on the counter to cool completely. Seal and refrigerate the warm containers within 2 hours of cooking.

Golden chicken, crispy potatoes, and roasted broccoli arranged on a baking sheet ready for packing

Arranging the ranch chicken, potatoes, and broccoli into a glass meal prep container

Storage and Reheating

  • Store the sealed containers in the refrigerator for up to 4 days.
  • Reheat your portions loosely covered for 90 seconds to 2 minutes in the microwave.
  • Wait to pour on the liquid ranch dressing until after heating so the cold sauce contrasts with the hot chicken.

Questions About Ranch Chicken Bowls

Can I use chicken thighs instead of breasts?

Yes, boneless skinless thighs work beautifully here. Keep the pieces uniform in size and sear them until they reach an internal temperature of 165°F.

Will the potatoes get grainy in the fridge?

Small Yukon golds contain significantly less starch than standard baking varieties. This means their interiors remain smooth and dense, rather than turning powdery or mealy after a minute in the microwave.

Can I prep the vegetables ahead of time?

You can halve the potatoes and chop the broccoli up to a day in advance. Store them in separate airtight containers in the refrigerator until you are ready to toss them in oil and roast.

I always look forward to Thursday lunches when I prep these, knowing the chicken is just as savory as it was on Sunday. Grab your containers and get the skillet hot.

Print
clockclock iconcutlerycutlery iconflagflag iconfolderfolder iconinstagraminstagram iconpinterestpinterest iconfacebookfacebook iconprintprint iconsquaressquares iconheartheart iconheart solidheart solid icon
: Plated dry-rubbed ranch chicken meal prep bowl with parmesan roasted potatoes, broccoli, and a side of dressing

5 Stars 4 Stars 3 Stars 2 Stars 1 Star

No reviews

Dry-Rubbed Ranch Chicken Meal Prep Bowls

Recipe by Chloe Davis

This meal prep bowl pairs juicy, ranch-rubbed chicken bites with crispy parmesan-crusted potatoes and tender roasted broccoli. Swapping standard russets for baby gold potatoes ensures they stay incredibly creamy when reheated, while tossing the chicken in dry ranch seasoning creates a savory, effortless crust that holds up perfectly in the fridge.


  • Total Time45 minutes
  • Yield4 bowls (serves 4) 1x

Find it on your board when it's time to cook

Ingredients

Scale

Crispy Parmesan Potatoes & Broccoli

Ranch Chicken

  • 1.5 lbs (680g) boneless, skinless chicken breasts, cut into 1-inch pieces
  • 1 tbsp (15ml) olive oil
  • 1 (1 oz / 28g) packet dry ranch seasoning mix
  • 1/2 cup (120ml) prepared ranch dressing, for serving


Instructions

  1. Preheat and prep: Preheat your oven to 425°F (220°C). Line two large, rimmed baking sheets with parchment paper.
  2. Roast the potatoes: In a large mixing bowl, toss the halved baby potatoes with 1 tablespoon of the olive oil, Parmesan cheese, garlic powder, smoked paprika, and kosher salt until completely coated. Spread them out cut-side down on the first baking sheet. Roast for 25 to 30 minutes, until they are fork-tender and deeply golden and crispy on the bottom.
  3. Roast the broccoli: While the potatoes cook, toss the broccoli florets in the same mixing bowl with the remaining 1 tablespoon of olive oil (from the potato and broccoli ingredient list). Spread them evenly onto the second baking sheet. Add the broccoli to the oven during the final 12 to 15 minutes of the potatoes’ cooking time, roasting until the edges are lightly charred and the stems are tender.
  4. Cook the chicken: Place the cubed chicken in a bowl and toss thoroughly with the dry ranch seasoning mix until evenly coated. Heat the remaining 1 tablespoon of olive oil (from the chicken ingredient list) in a large skillet over medium-high heat. Add the chicken in a single layer and sear for 5 to 7 minutes, tossing occasionally, until golden brown on all sides and the internal temperature reaches 165°F (74°C) on an instant-read thermometer.
  5. Assemble the meal prep bowls: Divide the roasted potatoes, broccoli, and cooked chicken evenly among four shallow meal prep containers. Portion 2 tablespoons of liquid ranch dressing into small individual condiment containers to store on the side. To ensure food safety, do not leave the food out to cool completely; seal and refrigerate the warm containers within 2 hours of cooking. Store in the refrigerator for up to 4 days.
Find it on your board when it's time to cook

Notes

  • Why it works: Cutting the chicken into bite-sized pieces before searing gives you significantly more surface area for the dry ranch seasoning to cling to, creating a highly seasoned crust that won’t wash away or turn soggy during storage.
  • Reheating tip: Baby gold potatoes have a lower starch content than russets, meaning they maintain their creamy texture and won’t turn grainy when microwaved. Reheat your bowl loosely covered for 90 seconds to 2 minutes, adding the cold dressing only after heating.

Nutrition (per serving — estimates)

Calories: 645 | Total Carbs: 41g (Fiber: 6g, Sugar: 4g) | Fat: 33g (Saturated: 8g) | Protein: 46g | Sodium: 1460mg

Nutritional values are approximate, based on standard reference data (USDA FoodData Central). Actual values vary by brand and exact measurements. For precision, use a tracker like MyFitnessPal or Cronometer.

  • Prep Time: 15 minutes
  • Cook Time: 30 minutes
  • Category: Meal Prep
  • Method: Roasting / Pan-Searing
  • Cuisine: American

Nutrition

  • Serving Size: 1 bowl
  • Calories: 645
  • Sugar: 4g
  • Sodium: 1460mg
  • Fat: 33g
  • Saturated Fat: 8g
  • Carbohydrates: 41g
  • Fiber: 6g
  • Protein: 46g

These cilantro-lime salsa chicken meal prep bowls trade dry poultry and plain grains for pan-seared cutlets simmered directly in red salsa. You get four days of grab-and-go lunches that reheat into tender, heavily sauced bites instead of rubbery leftovers.

Shredded salsa chicken with cotija cheese and scallions next to cilantro-lime rice in a glass meal prep container

Why This Quick-Simmer Method Works

Slice the chicken thin. Sear it fast. Simmering the thinner cutlets directly in the chunky red salsa and broth prevents the meat from drying out while giving the chili powder and cumin a textured surface to cling to.

Cooking the Salsa Chicken and Rice

Start the brown rice. Bring it to a boil. Drop the heat to your stove’s lowest setting and let it simmer for 40 to 45 minutes until the grains absorb the liquid and feel tender to the bite.

Roast the peppers and onions. Spread them flat on a baking sheet. Give them 20 to 25 minutes in a 400°F (200°C) oven until you see the edges turn visibly dark and caramelized.

Sliced red onion and bell peppers roasting on a baking sheet with dark caramelized edges

Cut the chicken breasts horizontally. Season both sides evenly. Dropping thick, whole breasts into a skillet guarantees a rubbery exterior before the center cooks, so halving them gives you thin cutlets that sear in just 2 to 3 minutes per side.

Pour in the salsa and broth. Cover the skillet. Let the liquid bubble on medium-low for 10 to 12 minutes until an instant-read thermometer hits 165°F (74°C) in the thickest part of the meat.

Seared chicken cutlets simmering inside a black skillet surrounded by thick red salsa

The chicken finishes cooking entirely inside the salsa, trapping the moisture.

Shred the cooked chicken on a cutting board. Return it to the pan. I toss the pulled meat vigorously in the warm juices so it absorbs the seasoned salsa rather than drying out on the counter.

Shredded chicken being tossed with thick red salsa inside a skillet

Fluff the rested brown rice. Pour in the fresh lime juice. Stir the chopped cilantro through the warm grains so the herbs wilt slightly and release their oils into the bowl.

Build the prep containers. Divide the rice evenly. Layer the roasted vegetables, the saucy shredded chicken, crumbled cotija cheese, and sliced scallions into four airtight containers before sealing them up for the week.

Divided glass meal prep container holding cilantro-lime rice, roasted peppers, and shredded salsa chicken

Storing and Reheating Your Prep Bowls

  • Keep the sealed containers in the fridge for up to 4 days.
  • Microwave uncovered for 2 to 2.5 minutes, stirring the chicken and rice halfway through so the center heats evenly.
  • I leave cold toppings like sour cream or avocado off the bowls until after reheating to preserve their temperature contrast against the warm meat.

Common Questions About This Salsa Chicken

Can I freeze these meal prep bowls?

You can freeze the cooked chicken and rice for up to three months, though the roasted bell peppers will lose their firm texture when thawed.

How do I keep the brown rice from getting mushy?

Let the pot rest covered for 10 minutes off the heat before fluffing it. This allows the steam to finish cooking the grains gently without waterlogging them.

Portion these components while they are still steaming. I let the residual heat soften the raw scallions slightly, which sets you up for a week of reliable lunches that actually maintain their texture straight out of the microwave.

Print
clockclock iconcutlerycutlery iconflagflag iconfolderfolder iconinstagraminstagram iconpinterestpinterest iconfacebookfacebook iconprintprint iconsquaressquares iconheartheart iconheart solidheart solid icon
Divided glass meal prep container holding cilantro-lime rice, roasted peppers, and shredded salsa chicken

5 Stars 4 Stars 3 Stars 2 Stars 1 Star

No reviews

Cilantro-Lime Salsa Chicken Meal Prep Bowls

Recipe by Chloe Davis

Meal prep doesn’t have to be boring. We swap plain grains for a zesty cilantro-lime brown rice and pair it with juicy, quick-simmered salsa chicken and roasted peppers. It’s an easy, flavorful setup that reheats beautifully all week long, saving you from the midday takeout slump.


  • Total Time1 hour
  • Yield4 bowls (serves 4) 1x

Find it on your board when it's time to cook

Ingredients

Scale

Cilantro-Lime Rice

Roasted Veggies

  • 2 large bell peppers, any color, sliced into strips
  • 1 medium red onion, sliced
  • 1 Tbsp avocado oil or olive oil (15ml)
  • 1/2 tsp garlic powder
  • 1/4 tsp kosher salt

Salsa Chicken

Toppings

  • 1/4 cup crumbled cotija cheese or feta (30g)
  • 2 scallions (green onions), thinly sliced


Instructions

  1. Start the rice: In a medium pot, combine the brown rice, water (or broth), and 1/2 teaspoon kosher salt. Bring to a boil over high heat. Cover, reduce the heat to the lowest setting, and simmer for 40 to 45 minutes, or until the liquid is absorbed and the rice is tender. Remove from heat and let it rest, covered, for 10 minutes.
  2. Roast the veggies: Preheat your oven to 400°F (200°C). Place the sliced bell peppers and red onion on a large baking sheet. Drizzle with 1 tablespoon of oil and sprinkle with the garlic powder and salt. Toss to coat well, spread into an even layer, and roast for 20 to 25 minutes until the edges are nicely browned.
  3. Prep the chicken: While the veggies roast, slice the chicken breasts in half horizontally to create thinner cutlets (this helps them cook faster and stay juicier). Season both sides evenly with the chili powder and cumin.
  4. Sear and simmer: Heat 1 tablespoon of oil in a large skillet over medium-high heat. Add the chicken cutlets and sear for 2 to 3 minutes per side to build a crust. Pour the salsa and 1/4 cup of broth into the skillet. Bring to a simmer, cover, and reduce the heat to medium-low. Simmer for 10 to 12 minutes, or until the chicken is cooked through and registers 165°F (74°C) on an instant-read thermometer.
  5. Shred the chicken: Transfer the cooked chicken to a cutting board and shred using two forks. Return the shredded meat to the skillet, tossing it in the warm salsa mixture so it absorbs all the pan juices.
  6. Finish the rice: Fluff the rested brown rice with a fork. Stir in the fresh lime juice and chopped cilantro.
  7. Assemble for meal prep: Divide the cilantro-lime rice evenly among four airtight meal prep containers. Add a scoop of the roasted veggies and a portion of the saucy shredded chicken to each. Top with crumbled cotija cheese and sliced scallions. Serve immediately, or seal and refrigerate.
Find it on your board when it's time to cook

Notes

  • Why it works: Slicing the chicken breasts into thinner cutlets before cooking prevents the dreaded rubbery texture of boiled whole breasts, while giving you more surface area for the spices to cling to.
  • Storage and Reheating: These bowls keep perfectly in the fridge for up to 4 days. When ready to eat, microwave uncovered for 2 to 2.5 minutes, stirring halfway through. If you prefer to add sour cream or fresh avocado, leave those off until after reheating.

Nutrition (per serving — estimates)

Calories: 495 | Total Carbs: 54g (Fiber: 7g, Sugar: 9g) | Fat: 12g (Saturated: 2g) | Protein: 42g
Nutritional values are approximate, based on standard reference data (USDA FoodData Central). Actual values vary by brand and exact measurements. For precision, use a tracker like MyFitnessPal or Cronometer.

  • Prep Time: 15 minutes
  • Cook Time: 45 minutes
  • Category: Main Course, Meal Prep
  • Method: Roasting, Stovetop
  • Cuisine: American

Nutrition

  • Serving Size: 1 bowl
  • Calories: 495
  • Sugar: 9g
  • Fat: 12g
  • Saturated Fat: 2g
  • Carbohydrates: 54g
  • Fiber: 7g
  • Protein: 42g

These 20-minute Kofta-Spiced Ground Beef Pitas deliver deep Middle Eastern flavor on a busy weeknight. I rely on a hard skillet sear to build dark, crispy edges on the meat before stuffing it into warm bread.

A warm pita pocket overflowing with spiced ground beef, diced cucumbers, tomatoes, and bright pink sumac onions on a ceramic plate

Why This Skillet Method Works

Standard sautéing steams the meat. We avoid that entirely. Leaving the beef untouched in a hot pan mimics the charred exterior of traditional grilled skewers, while the quick pickled onions cut right through that richness with a bright, tangy finish.

Searing the Kofta-Spiced Ground Beef

Massage the onions. Toss the sliced red onion with lemon juice. Add the sumac and salt. Rub them briefly with your fingers until they soften and turn a bright, glossy pink.

Thinly sliced red onions tossed with sumac and lemon juice in a clear glass bowl

Sear without stirring. Drop the beef into a hot skillet in one flat layer. Leave it completely alone for three to four minutes. This uninterrupted contact builds the crucial crust you need before you break the chunks apart.

Don’t Rush the Crust

  • Stirring early releases water. The meat turns gray. Force yourself to step away from the stove for those first few minutes so the beef actually sears.

Check the temperature. Stir in the diced yellow onion and garlic. Cook for another three to four minutes. The center must hit 160°F on a meat thermometer before you take it off the heat.

Toast the spices. Push the meat aside. Drop the tomato paste and spice blend directly onto the hot metal. Give it thirty seconds to bloom until fragrant before stirring everything together.

Ground beef pushed to the edges of a cast iron skillet with tomato paste and dark spices toasting in the center

Pushing the meat aside lets the spices toast directly on the hot iron.

Stuff the pitas. Warm the bread slightly. Coat the inside with yogurt. Load in the hot beef, cool cucumbers, and a heavy pinch of those pink onions.

A close-up of a pita pocket being loaded with hot spiced beef over a layer of white yogurt

Storing Your Beef and Onions

Keep the components separate. Store the cooked beef in an airtight container in the fridge for up to four days. Reheat the meat gently in a skillet with a splash of water so it does not dry out during the process. The sumac onions stay crisp and punchy in the fridge for up to three days.

Pita Preparation FAQs

Can I mix the kofta spices ahead of time?

Yes, you can combine the cumin, allspice, cinnamon, salt, and pepper in a small jar weeks in advance.

What kind of skillet is best for searing the beef?

Cast iron holds heat perfectly. It prevents temperature drops. If you use stainless steel instead, make sure the pan heats fully before adding oil so the meat actually sears rather than sticks.

I keep a batch of this spice blend mixed in my pantry at all times. Serve these stuffed pockets immediately while the contrast between the hot beef and cool yogurt is at its absolute peak.

Print
clockclock iconcutlerycutlery iconflagflag iconfolderfolder iconinstagraminstagram iconpinterestpinterest iconfacebookfacebook iconprintprint iconsquaressquares iconheartheart iconheart solidheart solid icon
A warm pita pocket overflowing with spiced ground beef, diced cucumbers, tomatoes, and bright pink sumac onions on a ceramic plate

5 Stars 4 Stars 3 Stars 2 Stars 1 Star

No reviews

Kofta-Spiced Ground Beef Pitas with Sumac Onions

Recipe by Chloe Davis

This 20-minute weeknight dinner channels the warm, spiced flavors of classic Middle Eastern kofta into a lightning-fast skillet meal. Hard-searing the ground beef builds incredible crispy edges, while a quick topping of bright, tangy sumac onions cuts right through the richness for a vibrant, perfectly balanced sandwich.


  • Total Time20 minutes
  • Yield4 pita pockets (serves 4) 1x

Find it on your board when it's time to cook

Ingredients

Scale

Sumac Onions

  • 1/2 medium red onion, very thinly sliced
  • 1 tablespoon fresh lemon juice (15 ml)
  • 1 teaspoon ground sumac
  • 1/4 teaspoon kosher salt

Kofta-Spiced Beef

  • 1 tablespoon olive oil (15 ml)
  • 1 lb (450 g) ground beef (80/20 or 85/15 preferred)
  • 1/2 medium yellow onion, finely diced
  • 3 large garlic cloves, minced
  • 1 tablespoon tomato paste
  • 1 1/2 teaspoons ground cumin
  • 1 teaspoon ground allspice
  • 1/2 teaspoon ground cinnamon
  • 1/2 teaspoon kosher salt
  • 1/4 teaspoon freshly ground black pepper
  • 1/3 cup finely chopped fresh flat-leaf parsley

For Serving

  • 2 large round pita breads, halved to form 4 pockets
  • 1 cup diced English cucumber
  • 1 cup quartered cherry tomatoes
  • 1/2 cup plain whole-milk Greek yogurt or tahini sauce


Instructions

  1. Marinate the onions: In a small bowl, toss the sliced red onion with the lemon juice, sumac, and kosher salt. Massage the onions briefly with your fingers until they soften and turn bright pink. Set aside to pickle lightly while you cook the beef.
  2. Sear the beef: Heat the olive oil in a large skillet (cast iron works beautifully here) over medium-high heat until shimmering. Add the ground beef in one even layer, breaking it into large chunks. Let it cook completely undisturbed for 3 to 4 minutes to develop a dark, crispy crust on the bottom.
  3. Aromatize and cook through: Break the beef up further and stir in the diced yellow onion and garlic. Cook for another 3 to 4 minutes until the onions soften and the beef is fully browned with no pink remaining (reaching an internal temperature of 160°F). Drain any excess fat from the pan if desired.
  4. Bloom the spices: Push the meat to the edges of the pan to create a clear spot in the center. Add the tomato paste, cumin, allspice, cinnamon, kosher salt, and black pepper to that open spot. Toast the spices for 30 seconds until very fragrant, then stir everything together to coat the beef evenly. Remove from the heat and stir in the fresh parsley.
  5. Assemble the pitas: Warm the pita halves so they are soft and pliable. Slather the inside of each pocket with Greek yogurt or tahini sauce, then load generously with the spiced beef. Top with the diced cucumber, cherry tomatoes, and a heavy pinch of the pickled sumac onions.
Find it on your board when it's time to cook

Notes

  • Why it works: Letting the ground beef sear undisturbed before stirring mimics the charred exterior of grilled kofta kebabs, building deep flavor and textural contrast that standard sautéing can’t match.
  • Prep ahead: The spice blend (cumin, allspice, cinnamon, salt, and pepper) can be mixed in a small jar weeks in advance. The sumac onions will keep in an airtight container in the fridge for up to 3 days, becoming delightfully punchier over time.

Nutrition (per serving — estimates)

Calories: 440 | Total Carbs: 23g (Fiber: 4g, Sugar: 5g) | Fat: 28g (Saturated: 10g) | Protein: 24g

Nutritional values are approximate, based on standard reference data (USDA FoodData Central). Actual values vary by brand and exact measurements. For precision, use a tracker like MyFitnessPal or Cronometer.

  • Prep Time: 10 minutes
  • Cook Time: 10 minutes
  • Category: Main Course
  • Method: Stovetop
  • Cuisine: Middle Eastern-Inspired

Nutrition

  • Serving Size: 1 stuffed pita pocket
  • Calories: 440
  • Sugar: 5g
  • Fat: 28g
  • Saturated Fat: 10g
  • Carbohydrates: 23g
  • Fiber: 4g
  • Protein: 24g

Sweet marinades are notorious for turning into bitter charcoal the second they hit hot grill grates. We bypass that completely with a two-zone fire, giving you glossy, deeply caramelized edges and perfectly cooked thighs every single time.

Grilled huli huli chicken thighs on an oval platter with charred green onions

The Secret to a Scorch-Free Glaze

High-sugar marinades burn fast. The honey and brown sugar will scorch before the center cooks. Setting up a two-zone grill solves the math by letting you sear the meat quickly over hot grates for visual appeal before sliding it to the cool side.

The indirect heat thickens the reserved marinade into a sticky lacquer. It finishes the chicken gently. You get all the flavor of an open flame without eating any burnt carbon.

The Role of Pineapple Juice

I always use canned pineapple juice here. Fresh juice is too aggressive. Fresh pineapple holds highly active enzymes that will turn the meat to mush if left sitting too long, while canned juice has been heated during processing to mellow the enzymes.

How to Grill Huli Huli Chicken

I use boneless thighs here. They handle heat beautifully. Breasts dry out far too quickly on a grill when you are trying to set a thick, sticky glaze.

Mix the marinade. Combine the liquid ingredients well. Ensure the brown sugar fully dissolves. Pour exactly 1/3 cup into a separate container and refrigerate it so you have a food-safe glaze for brushing later, then pour the rest over the chicken and refrigerate for at least two hours.

Boneless chicken thighs coated in a dark brown marinade inside a metal bowl with grated garlic visible

Build the two-zone fire. Light one half of the grill. Leave the other half unlit. You want the hot side sitting between 400°F and 425°F before you wipe the grates with a lightly oiled paper towel.

Sear for color. Lay the meat down. Set a timer. You want exactly 3 to 4 minutes per side so the sugars caramelize into dark grill marks without crossing into burnt territory.

Chicken thighs searing on a hot grill with dark grill marks forming on the edges

Glaze and finish. Slide the chicken over. Brush on the glaze. Move the seared thighs to the unlit side, coat them heavily with your reserved marinade, and close the lid for 4 to 6 minutes. I keep my tongs in one hand and my thermometer in the other during these final minutes, pulling the meat the exact second the thickest part hits 165°F.

Brushing a shiny dark glaze onto chicken thighs on the unlit side of a grill

Blister the scallions. Drop the scallions down. Turn them once. Place the trimmed green onions directly over the hot flames during the final two minutes until they blister, adding a sharp, savory bite that cuts right through the sweet glaze. Transfer everything to a platter and rest for 5 minutes.

Storing and Reheating Leftovers

  • Keep leftovers sealed tightly. Store them in the fridge. They will hold their texture and flavor for up to four days.
  • I reheat these in the oven. The microwave ruins the texture. Warming the chicken on a foil-lined pan at 350°F brings the sticky glaze right back to life without turning the meat rubbery.

Grilling Questions

Can I marinate the chicken overnight?

Yes, you can leave it in the fridge for up to 12 hours. Any longer than that and the rice vinegar will begin to break down the surface proteins.

What if I do not have an outdoor grill?

Use a cast-iron grill pan indoors. Sear the chicken on medium-high heat for the grill marks, drop the heat to medium-low, brush on the glaze, and cover the pan until the internal temperature reaches 165°F.

Serve these straight off the platter while the glaze is still bubbling hot. Save this recipe for your next cookout, and watch how fast those charred scallions disappear alongside the meat.

Plated huli huli chicken thighs on a light background with charred scallions and sesame seeds

Print
clockclock iconcutlerycutlery iconflagflag iconfolderfolder iconinstagraminstagram iconpinterestpinterest iconfacebookfacebook iconprintprint iconsquaressquares iconheartheart iconheart solidheart solid icon
Plated huli huli chicken thighs on a light background with charred scallions and sesame seeds

5 Stars 4 Stars 3 Stars 2 Stars 1 Star

No reviews

Grilled Huli Huli Chicken with Charred Scallions

Recipe by Chloe Davis

This Hawaiian-inspired chicken gets a glossy, sticky glaze on the grill without burning. By swapping a standard direct-heat method for a two-zone fire, you get perfect caramelized edges and juicy meat, finished with fire-blistered green onions for a visual and savory punch.


  • Total Time2 hours 30 minutes
  • Yield4 servings 1x

Find it on your board when it's time to cook

Ingredients

Scale

Chicken & Marinade

  • 1/3 cup (80 ml) pineapple juice
  • 1/3 cup (80 ml) ketchup
  • 1/3 cup (80 ml) low-sodium soy sauce
  • 1/4 cup (50 g) dark brown sugar, packed
  • 1/4 cup (85 g) honey
  • 2 tablespoons unseasoned rice vinegar
  • 4 large cloves garlic, grated
  • 1 tablespoon freshly grated ginger
  • 1 tablespoon Worcestershire sauce
  • 2 teaspoons toasted sesame oil
  • 1 teaspoon chili garlic sauce or Sriracha
  • 2 pounds (900 g) boneless, skinless chicken thighs

Grilling & Garnish

  • Neutral oil (such as avocado or canola), for the grill grates
  • 1 bunch scallions (green onions), root ends trimmed
  • 1 tablespoon toasted sesame seeds


Instructions

  1. Mix the marinade: In a medium bowl, whisk together the pineapple juice, ketchup, soy sauce, brown sugar, honey, rice vinegar, garlic, ginger, Worcestershire sauce, sesame oil, and chili garlic sauce until smooth.
  2. Reserve the glaze: Pour exactly 1/3 cup of the marinade into a small container and refrigerate it. (This will be your clean basting glaze later).
  3. Marinate the chicken: Place the chicken thighs in a large zip-top bag or a mixing bowl. Pour the remaining marinade over the meat, tossing to ensure every piece is coated. Seal or cover tightly and refrigerate for at least 2 hours, or up to 12 hours.
  4. Prep a two-zone grill: Set up your outdoor grill for two-zone cooking: heat one side to medium-high direct heat (about 400°F to 425°F) and leave the other side unlit (indirect heat). Clean the grates thoroughly, then use long grilling tongs to hold a paper towel lightly moistened with neutral oil and carefully wipe the grates. Remove the chicken from the fridge and discard the used marinade.
  5. Sear over direct heat: Place the chicken on the hot side of the grill. Cook for 3 to 4 minutes per side, just until you achieve deep, caramelized grill marks. Keep a close eye on the meat; the sugars in the marinade can scorch quickly.
  6. Glaze on indirect heat: Move the seared chicken to the cooler, unlit side of the grill. Brush the meat generously with the reserved 1/3 cup of clean marinade. Close the grill lid and let the chicken cook for another 4 to 6 minutes, until the glaze thickens into a sticky coating and a meat thermometer inserted into the thickest part registers 165°F.
  7. Char the scallions: During the final 2 minutes of cooking, lay the whole scallions directly on the hot side of the grill. Turn them once until they are lightly blistered and charred.
  8. Rest and garnish: Transfer the glazed chicken and charred scallions to a serving platter. Let the meat rest for 5 minutes, sprinkle with toasted sesame seeds, and serve.
Find it on your board when it's time to cook

Notes

  • Why it works: High-sugar marinades easily burn over direct flames. Using a two-zone grill setup lets you get the necessary sear quickly, then gently cook the meat through and caramelize the glaze on the cooler side without creating bitter carbon.
  • Flavor upgrade: Swapping standard dry sherry for pineapple juice not only aligns closer to classic regional profiles, but its natural enzymes help tenderize the chicken thighs beautifully.

Nutrition (per serving — estimates)

Calories: 347 | Total Carbs: 17g (Fiber: 1g, Sugar: 14g) | Fat: 11g (Saturated: 3g) | Protein: 45g

Nutritional values are approximate, based on standard reference data (USDA FoodData Central). Actual values vary by brand and exact measurements. For precision, use a tracker like MyFitnessPal or Cronometer.

  • Prep Time: 15 minutes
  • Cook Time: 15 minutes
  • Category: Main Course
  • Method: Grilling
  • Cuisine: Hawaiian-Inspired

Nutrition

  • Serving Size: 1 portion (about 6 oz cooked chicken)
  • Calories: 347
  • Sugar: 14g
  • Fat: 11g
  • Saturated Fat: 3g
  • Carbohydrates: 17g
  • Fiber: 1g
  • Protein: 45g

This 15-minute Pesto-Swirled Chicken Parmesan Bowl delivers the heavy comfort you want without the wait. You build a fast marinara and cheese base in the microwave, skipping the stovetop entirely while the air fryer keeps the chicken chunks shatteringly crisp at the bite.

Pesto-swirled chicken parmesan bowl ready to serve with golden crispy chicken pieces over red sauce and melted cheese

Why This Bowl Works

Whole milk cottage cheese acts like ricotta here. It brings a thick, creamy texture. It melts beautifully under the acidic marinara without breaking or turning into a watery mess. I keep a tub around specifically for fast lunches like this, because it handles the microwave heat better than traditional ricotta ever does.

Heating the sauce separate from the breaded chicken is the real trick. Sitting in hot liquid ruins a fried coating quickly. By cooking the chicken in the dry heat of an air fryer and placing it over the bowl at the last second, every single piece keeps its crunch.

How to Build the Bowl

Crisp the chicken. Grab frozen breaded chunks. Toss them in the air fryer at 400°F (200°C) for 8 to 10 minutes until they hit a safe internal temperature of 165°F (74°C). Pull them out and slice them into smaller pieces so they fit easily on a spoon.

Crispy breaded chicken pieces cut open on a wooden board showing white meat inside a golden coating

Mix the base. Grab a microwave-safe bowl. Stir the cottage cheese, marinara sauce, garlic powder, and dried oregano together until the spices distribute evenly.

Glass bowl containing a thick red marinara base topped with shredded cheese and spices

Melt the cheese. Spread the mozzarella and Parmesan across the top. Microwave on High for 60 to 90 seconds, pulling the bowl carefully when you see the sauce bubbling rapidly around the glass edges. I always pull the bowl right at 60 seconds to check, because letting it boil too long turns the mozzarella rubbery.

Hot and bubbling creamy orange cheese base inside a glass bowl

Garnish and swirl. Spoon the basil pesto across the hot cheese layer. Use the back of your spoon to gently drag the green lines through the melted surface.

Green basil pesto lines lightly swirled into melted cheese inside a glass bowl

Finish the bowl. Drop the sliced chicken and fresh basil right on top. Keep the chicken entirely above the sauce line so the breaded exterior stays completely dry until you eat it.

Leftovers and Reheating

  • Store the cooked chicken and the cheese base in separate airtight containers in the fridge for up to three days.
  • Reheat the sauce bowl in the microwave until bubbling, stirring once halfway through.
  • Warm the chicken in the air fryer at 350°F (175°C) for a few minutes to restore the exterior crunch, then combine them.

Common Chicken Parmesan Bowl Questions

Can I use regular ricotta instead of cottage cheese?

You can, but look for whole milk ricotta and drain any excess liquid first. Standard ricotta tends to release more water in the microwave than 4% cottage cheese does.

Will low-fat cottage cheese work in the base?

Stick to whole milk (4% milkfat) for this recipe. Low-fat or fat-free versions separate when heated and create a watery, grainy sauce.

This warm, cheesy bowl comes together faster than calling for delivery. Grab a fork, scoop through the melted mozzarella to catch a crunchy piece of chicken, and enjoy your lunch. Save this page for the next time you need a hot meal in a hurry.

Print
clockclock iconcutlerycutlery iconflagflag iconfolderfolder iconinstagraminstagram iconpinterestpinterest iconfacebookfacebook iconprintprint iconsquaressquares iconheartheart iconheart solidheart solid icon
Green basil pesto lines lightly swirled into melted cheese inside a glass bowl

5 Stars 4 Stars 3 Stars 2 Stars 1 Star

No reviews

Pesto-Swirled Chicken Parmesan Bowl

Recipe by Chloe Davis

This 15-minute savory bowl satisfies heavy chicken parm cravings with practically zero effort. A bubbling, cheesy base of marinara and cottage cheese gets a bright swirl of pesto, all topped with crispy, air-fried chicken pieces so they never lose their crunch in the sauce.


  • Total Time15 minutes
  • Yield1 bowl (serves 1) 1x

Find it on your board when it's time to cook

Ingredients

Scale

Chicken and Base

  • 4 ounces (115g) frozen breaded chicken breast chunks (about 56 pieces)
  • ¾ cup (170g) whole milk cottage cheese (4% milkfat)
  • ⅓ cup (75g) marinara sauce
  • 2 tablespoons (14g) shredded whole milk mozzarella cheese
  • 1 tablespoon (5g) grated Parmesan cheese

Seasonings and Garnish

  • ¼ teaspoon garlic powder
  • ¼ teaspoon dried oregano
  • 1 teaspoon basil pesto
  • Fresh basil leaves, torn (optional)


Instructions

  1. Crisp the chicken: Cook the frozen chicken chunks in an air fryer at 400°F (200°C) for 8 to 10 minutes (or according to package directions), until golden brown, crispy, and heated to an internal temperature of 165°F (74°C). Cut into bite-sized pieces.
  2. Mix the base: While the chicken cooks, combine the cottage cheese, marinara sauce, garlic powder, and dried oregano in a microwave-safe bowl. Stir well to incorporate the seasonings evenly.
  3. Melt the cheese: Sprinkle the shredded mozzarella and Parmesan cheese in an even layer over the cottage cheese mixture. Microwave on High for 60 to 90 seconds, watching closely, until the sauce is bubbling at the edges and the cheeses are completely melted.
  4. Garnish and serve: Drizzle the basil pesto over the melted cheeses and use a spoon to lightly swirl it into the surface. Top immediately with the warm, crispy chicken pieces and fresh basil. Serve hot.
Find it on your board when it's time to cook

Notes

  • Why it works: Whole milk cottage cheese acts just like ricotta in this bowl, providing a rich, creamy base that melts beautifully under the acidic marinara without separating or turning watery.
  • Keep the crunch: Heating the breaded chicken in the sauce ruins its texture. By heating the cheese base separately and crowning it with the chicken right before eating, you preserve the satisfying contrast between the crispy breading and the creamy sauce.

Nutrition (per serving — estimates)

Calories: 565 | Total Carbs: 29g (Fiber: 3g, Sugar: 7g) | Fat: 31g (Saturated: 10g) | Protein: 42g

Nutritional values are approximate, based on standard reference data (USDA FoodData Central). Actual values vary by brand and exact measurements. For precision, use a tracker like MyFitnessPal or Cronometer.

  • Prep Time: 5 minutes
  • Cook Time: 10 minutes
  • Category: Lunch
  • Method: Air Fryer and Microwave
  • Cuisine: American Italian

Nutrition

  • Serving Size: 1 bowl
  • Calories: 565
  • Sugar: 7g
  • Fat: 31g
  • Saturated Fat: 10g
  • Carbohydrates: 29g
  • Fiber: 3g
  • Protein: 42g

These thick lemon blueberry cookies bypass the refrigerator entirely to get you baking immediately. The heavily sugared citrus exterior shatters slightly at the bite, revealing a dense interior loaded with whole fruit and bright acidity.

Thick lemon blueberry cookies with a sparkling sugar crust and visible blueberries resting on a baking sheet

Why This No-Chill Dough Works

  • Creamed butter. Use room-temperature butter. Cream it properly. Whipping softened butter creates a sturdy structure that prevents the dough from spreading into flat puddles, completely eliminating the need to wait on the fridge.
  • Surface sugar. Roll the portions generously. Coat every side. The coarse outer layer draws out a tiny amount of surface moisture during baking, which leaves behind a crackly shell that contrasts the soft center.

Key Ingredient Notes

Cornstarch. Measure this accurately. Do not skip it. A small amount of starch tenderizes the final crumb and keeps the interior exceptionally soft while the exterior remains crisp.

Fresh lemons. Buy whole fruit. Wash them thoroughly. You need the zest to flavor both the dough and the outer coating, so bottled juice cannot act as a substitute here.

Mixing and Baking the Lemon Blueberry Cookies

Rub the lemon sugar. Combine the sugar and zest in a small bowl. Massage the two together using your hands. Stop when the mixture turns pale yellow and smells sharply of citrus, which means the natural oils are fully released.

Granulated sugar mixed with yellow lemon zest inside a small bowl

Cream the base. Beat the softened butter, granulated sugar, and remaining zest on medium speed. Watch the clock for two to three minutes. The mixture must become airy and pale so the dough holds its rigid shape in the hot oven.

Finish the dough. Mix in the egg, lemon juice, and vanilla. Add the dry ingredients gradually on low speed. Stop the mixer when only a few dry streaks remain so you do not overwork the gluten structure.

Fold the berries. Dry your fresh blueberries completely. Treat them gently. Even a little surface water alters the baking chemistry, and an overly aggressive spatula will crush the fruit and dye your entire batch blue.

Thick cookie dough in a mixing bowl with scattered blueberries and a silicone spatula

Scoop and coat. Portion the dough into two-tablespoon balls. Roll each one generously in the citrus sugar. I make sure every single side is heavily crusted so the outside bakes with a distinctly crisp shell.

Bake and cool. Bake at 350°F for 13 to 15 minutes. Watch the outer edges. Pull the pan when the rims are firm and barely browned, letting the soft centers finish cooking on the hot baking sheet.

Baked lemon blueberry cookies with light surfaces and golden edges resting on a parchment-lined pan

Storing Your Lemon Blueberry Cookies

  • Room temperature. Keep baked cookies in an airtight container. Store them on the counter. Placing a paper towel at the bottom absorbs excess moisture from the fruit, keeping the exterior crisp for up to three days.

Lemon Blueberry Cookie FAQs

Can I use frozen blueberries in this dough?

Yes, but keep them entirely frozen. Fold them straight from the freezer into the dough. You will just need to add one to two extra minutes to your total baking time.

Serve these completely cooled. Give them time to rest. I prefer eating them a few hours after baking, when the flavors settle, the sugar shell peaks, and you finally have a reliable dessert worth saving to your baking board.

Print
clockclock iconcutlerycutlery iconflagflag iconfolderfolder iconinstagraminstagram iconpinterestpinterest iconfacebookfacebook iconprintprint iconsquaressquares iconheartheart iconheart solidheart solid icon
Baked lemon blueberry cookies with light surfaces and golden edges resting on a parchment-lined pan

5 Stars 4 Stars 3 Stars 2 Stars 1 Star

No reviews

Lemon Blueberry Cookies with a Zesty Sugar Crust

Recipe by Chloe Davis

These soft, muffin-like cookies are packed with bursting fresh blueberries and punchy citrus flavor, but the real star is the crunchy, zest-rubbed sugar coating on the outside. Because this recipe uses creamed butter instead of melted, they bake up thick and chewy with absolutely zero chilling required.


  • Total Time60 minutes
  • Yield24 cookies (serves 24) 1x

Find it on your board when it's time to cook

Ingredients

Scale

Lemon Sugar Coating

  • ¼ cup (50 g) granulated or raw turbinado sugar
  • 1 tablespoon fresh lemon zest (about 1 medium lemon)

Cookie Dough

  • 2 ¼ cups (280 g) all-purpose flour
  • 2 teaspoons cornstarch
  • 1 teaspoon baking powder
  • ½ teaspoon baking soda
  • ½ teaspoon fine sea salt
  • ¾ cup (170 g) unsalted butter, softened to room temperature
  • 1 ¼ cups (250 g) granulated sugar
  • 1 ½ tablespoons fresh lemon zest (about 1 ½ medium lemons)
  • 1 large egg, room temperature
  • 1 tablespoon fresh lemon juice
  • 1 teaspoon vanilla extract
  • 1 ¼ cups (175 g) fresh blueberries, rinsed and thoroughly dried


Instructions

  1. Preheat and prep: Preheat your oven to 350°F (175°C). Line two large baking sheets with parchment paper.
  2. Mix the coating: In a small, shallow bowl, combine the ¼ cup of sugar and 1 tablespoon of lemon zest. Rub them together with your fingers until the sugar is fragrant and tinted slightly yellow. Set aside.
  3. Whisk the dry ingredients: In a medium bowl, whisk together the flour, cornstarch, baking powder, baking soda, and salt.
  4. Cream the butter and sugar: In a large mixing bowl (or a stand mixer fitted with the paddle attachment), beat the softened butter, granulated sugar, and remaining 1 ½ tablespoons of lemon zest on medium speed for about 2 to 3 minutes, until light and fluffy.
  5. Add the wet ingredients: Scrape down the sides of the bowl. Beat in the egg, lemon juice, and vanilla extract until completely smooth and well incorporated.
  6. Combine wet and dry: Turn the mixer to low speed (or use a spatula) and gradually mix in the dry ingredients until just a few streaks of flour remain.
  7. Fold in the berries: Gently fold in the fresh blueberries using a flexible spatula. Work carefully to avoid crushing the berries so the dough doesn’t turn blue.
  8. Scoop and coat: Using a 2-tablespoon cookie scoop, portion the dough into 24 balls. Roll each dough ball generously in the prepared lemon sugar coating, then place them onto the lined baking sheets spaced about 3 inches apart.
  9. Bake and cool: Bake for 13 to 15 minutes, or until the edges are just set and lightly golden but the centers still look slightly soft. Let the cookies cool and set on the baking sheet for 5 minutes before transferring them to a wire rack to cool completely to room temperature (about 25 more minutes).
Find it on your board when it's time to cook

Notes

  • Why it works: Creaming room-temperature butter rather than using melted butter creates a sturdy dough structure. This prevents the cookies from spreading into flat puddles in the oven, completely eliminating the need for dough chilling time.
  • Handling the berries: It is crucial that fresh blueberries are completely dry before they hit the dough; excess water will alter the baking chemistry. If using frozen blueberries, do not thaw them first—fold them in straight from the freezer, though you may need to add 1 to 2 extra minutes to the baking time.

Nutrition (per serving — estimates)

Calories: 150 | Total Carbs: 22g (Fiber: 1g, Sugar: 13g) | Fat: 6g (Saturated: 4g) | Protein: 2g

Nutritional values are approximate, based on standard reference data (USDA FoodData Central). Actual values vary by brand and exact measurements. For precision, use a tracker like MyFitnessPal or Cronometer.

  • Prep Time: 15 minutes
  • Cooling Time: 30 minutes
  • Cook Time: 15 minutes
  • Category: Dessert
  • Method: Baking
  • Cuisine: American

Nutrition

  • Serving Size: 1 cookie
  • Calories: 150
  • Sugar: 13g
  • Fat: 6g
  • Saturated Fat: 4g
  • Carbohydrates: 22g
  • Fiber: 1g
  • Protein: 2g

These crispy hot honey cabbage dumpling cups trade the deep fryer for a shatteringly crunchy baked wonton shell. I rely on a standard muffin tin to create their shape, which makes them significantly faster to assemble than heavily folded traditional appetizers.

Golden baked wonton cups on a white plate drizzled with hot honey and topped with scallions

The Secret to a Crunchy Base

Sauté the vegetables first. Cabbage holds a massive amount of water. Cooking it down in a skillet before filling the wontons evaporates that excess moisture so the bottom of the cup crisps in the oven instead of steaming.

Choosing Your Cabbage

You can use either Napa or standard green cabbage. Napa cabbage is naturally tender. It cooks down very fast. If you opt for a standard green head, you will likely need an extra minute in the skillet to soften those sturdy leaves properly.

How to Make Crispy Hot Honey Cabbage Dumpling Cups

Cook down the filling. Heat your neutral oil in a skillet. Cook the shredded cabbage and grated carrot until the volume drops by half. You want the vegetables softened and slightly browned before adding the aromatics, which usually takes about four to five minutes.

Shredded cabbage and grated carrots cooking down in a black skillet

Stir in the ginger and garlic. Add the minced garlic, fresh ginger, and most of your sliced scallions. Stir constantly for exactly one minute. Once the garlic smells sharp and fragrant, pull the pan off the heat and stir in the soy sauce and sesame oil.

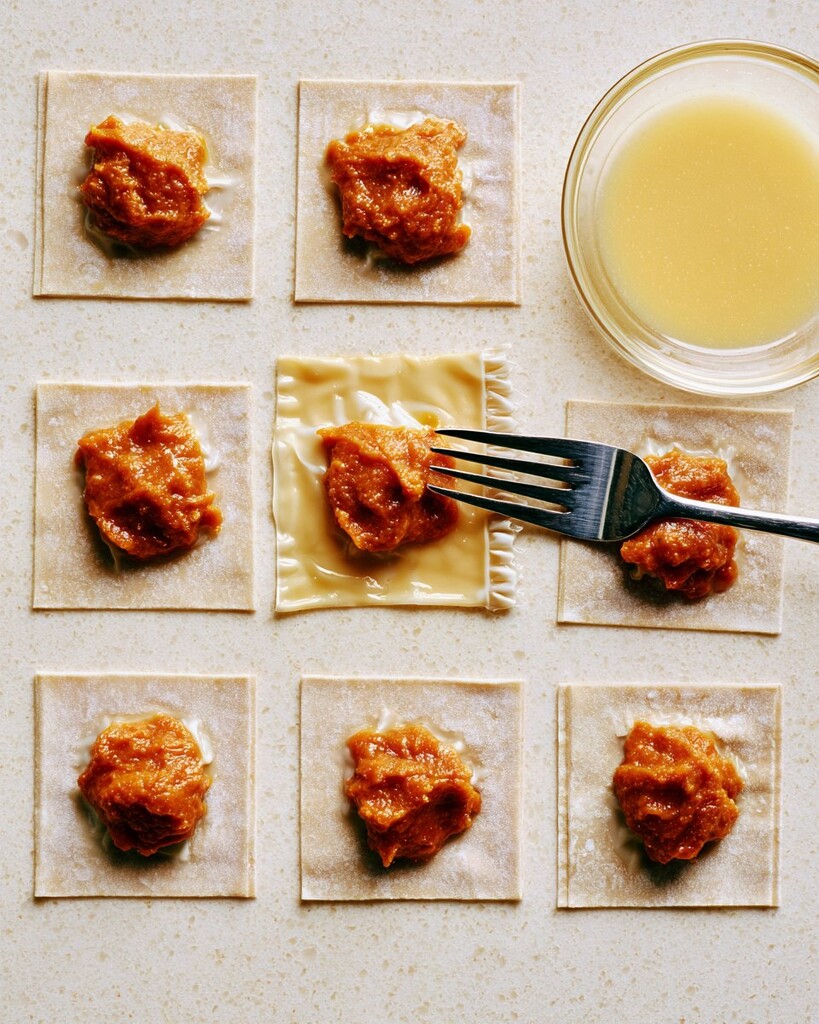
Shape the wontons. Coat a standard muffin tin with cooking spray. Press one wrapper into each well. Divide the cooled filling evenly among the twelve cups, letting the square corners of the dough fold naturally over the edges.

Raw wonton wrappers pressed into a muffin tin and filled with vegetable mixture

Bake and watch the corners. Bake at 375°F for 10 to 12 minutes. Watch them closely during the final two minutes. Those delicate exposed wrapper edges go from deep golden to burnt very fast, so I pull the tin the moment the points look deeply toasted.

Baked dumpling cups in a muffin tin with browned edges

Cool and garnish. Let them sit in the hot tin. Wait about five minutes. The bottoms need that brief resting time to set completely before you move them to a serving platter and finish them with the hot honey and sesame seeds.

Prepping Ahead

  • You can prep the vegetable mixture up to three days early and keep it chilled in a sealed container. Spoon the cold vegetables into your wrappers right before baking, and add an extra minute or two to the oven time.

Dumpling Cup FAQs

Can I use double wonton wrappers?

No, stick to a single layer. Two wrappers will leave the inner layer doughy and undercooked while the outside burns.

How do I keep the wonton edges from burning?

Mist the exposed corners lightly with cooking spray before the tin goes into the oven. The oil encourages even browning rather than scorching.

I love setting a platter of these out while they are still warm and the honey is slightly sticky. They look like a complicated weekend project, but the oven does all the difficult work.

Print
clockclock iconcutlerycutlery iconflagflag iconfolderfolder iconinstagraminstagram iconpinterestpinterest iconfacebookfacebook iconprintprint iconsquaressquares iconheartheart iconheart solidheart solid icon
Golden baked wonton cups on a white plate drizzled with hot honey and topped with scallions

5 Stars 4 Stars 3 Stars 2 Stars 1 Star

No reviews

Crispy Hot Honey Cabbage Dumpling Cups

Recipe by Chloe Davis

These bite-sized dumpling cups deliver all the savory, ginger-garlic goodness of a classic egg roll with zero deep-frying. Baking wonton wrappers in a muffin tin creates the perfect crunchy vessel for a deeply savory charred cabbage filling, and finishing them with a sweet-and-spicy hot honey drizzle completely steals the show. It’s a beautifully balanced, portion-friendly appetizer that looks impressive but is incredibly forgiving to make.


  • Total Time37 minutes
  • Yield12 cups (serves 4) 1x
  • DietDairy-Free, Vegetarian

Find it on your board when it's time to cook

Ingredients

Scale

Cabbage Filling

  • 1 Tbsp (15ml) neutral oil (such as canola or avocado oil)
  • 3 cups (210g) finely shredded Napa or green cabbage
  • 1 small carrot, grated
  • 3 scallions, thinly sliced (divided)
  • 3 cloves garlic, minced
  • 1 Tbsp (6g) fresh ginger, grated
  • 2 Tbsp (30ml) soy sauce (or tamari)
  • 1 Tbsp (15ml) toasted sesame oil

Cups & Garnish

  • 12 wonton wrappers
  • Cooking spray
  • 2 Tbsp (40g) hot honey
  • 1 tsp (3g) toasted sesame seeds


Instructions

  1. Preheat and prep: Preheat your oven to 375°F (190°C). Lightly coat a standard 12-cup muffin tin with cooking spray.
  2. Sauté the vegetables: Heat the neutral oil in a large skillet over medium-high heat. Add the shredded cabbage and grated carrot. Cook for 4 to 5 minutes, stirring frequently, until the vegetables soften and their volume reduces by about half.
  3. Aromatize and season: Stir in two-thirds of the sliced scallions (reserve the rest for garnish), the minced garlic, and the grated ginger. Cook for 1 more minute until highly fragrant. Remove the skillet from the heat, then stir in the soy sauce and toasted sesame oil. Let the mixture cool slightly.
  4. Assemble the cups: Gently press one wonton wrapper into each well of the prepared muffin tin, folding the sides as needed to form a small cup. Divide the cabbage filling evenly among the cups (about 2 tablespoons per cup). Lightly mist the exposed edges of the wrappers with cooking spray to help them crisp.
  5. Bake to a crisp: Bake on the center rack for 10 to 12 minutes, or until the wonton edges are deeply golden and crisp. Keep a close eye on them during the last two minutes so the delicate corners don’t over-brown.
  6. Garnish and serve: Let the cups cool in the tin for 5 minutes before carefully transferring them to a platter. Drizzle generously with hot honey and top with the reserved scallions and toasted sesame seeds just before serving.
Find it on your board when it's time to cook

Notes

  • Why it works: Sautéing the cabbage before filling the wonton wrappers cooks off the vegetable’s natural excess water. This concentrates the savory flavors and ensures the bottom of your dumpling cups stay shatteringly crisp in the oven instead of turning soggy.
  • Make-ahead tip: You can cook the cabbage filling up to 3 days in advance and store it in an airtight container in the fridge. Assemble the cold filling into the wrappers and bake right before you’re ready to serve (you may need to add 1-2 minutes to the bake time if the filling is chilled).

Nutrition (per serving — estimates)

Calories: 180 | Total Carbs: 24g (Fiber: 2g, Sugar: 9g) | Fat: 8g (Saturated: 1g) | Protein: 3g

Nutritional values are approximate, based on standard reference data (USDA FoodData Central). Actual values vary by brand and exact measurements. For precision, use a tracker like MyFitnessPal or Cronometer.

  • Prep Time: 15 minutes
  • Cooling Time: 5 minutes
  • Cook Time: 17 minutes
  • Category: Appetizer
  • Method: Baked
  • Cuisine: Asian-Inspired

Nutrition

  • Serving Size: 3 cups
  • Calories: 180
  • Sugar: 9g
  • Fat: 8g
  • Saturated Fat: 1g
  • Carbohydrates: 24g
  • Fiber: 2g
  • Protein: 3g

Build this make-ahead salted caramel brownie trifle early so the baked squares can soften under the cream. It layers coffee-spiked cake with cold, airy cheesecake mousse and salty pretzel pieces, transforming a simple boxed mix into a towering dessert for a crowd.

Salted caramel brownie trifle with layers of cheesecake mousse and crushed pretzels

Upgrading a Boxed Base

Use melted butter. Brew strong coffee. These two liquid swaps give a standard boxed mix the dense structure needed to hold up under heavy ribbons of caramel and cream without turning to mush.

How to Construct the Layers

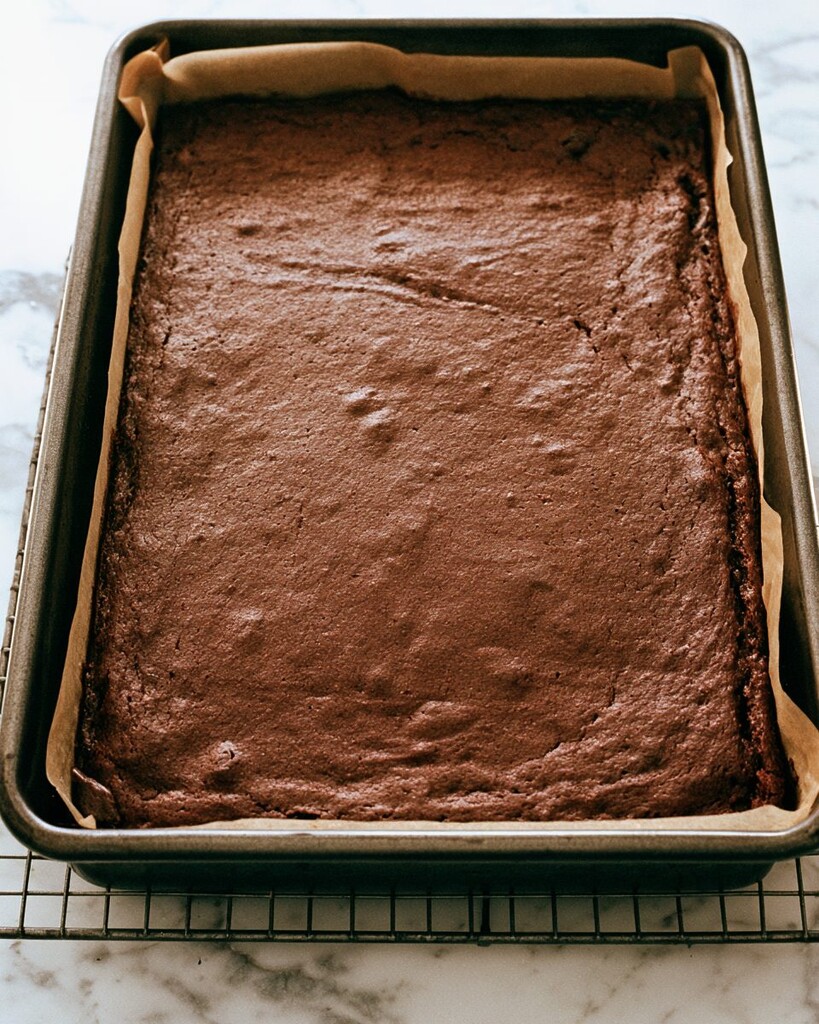
Bake the base. Preheat the oven to 325°F (163°C). Swap the required water and oil for coffee and butter. Pull the pan at 28 minutes when a toothpick leaves sticky crumbs, because carryover heat will finish setting the center as it cools on the counter.

Baked brownie base in a parchment-lined baking pan

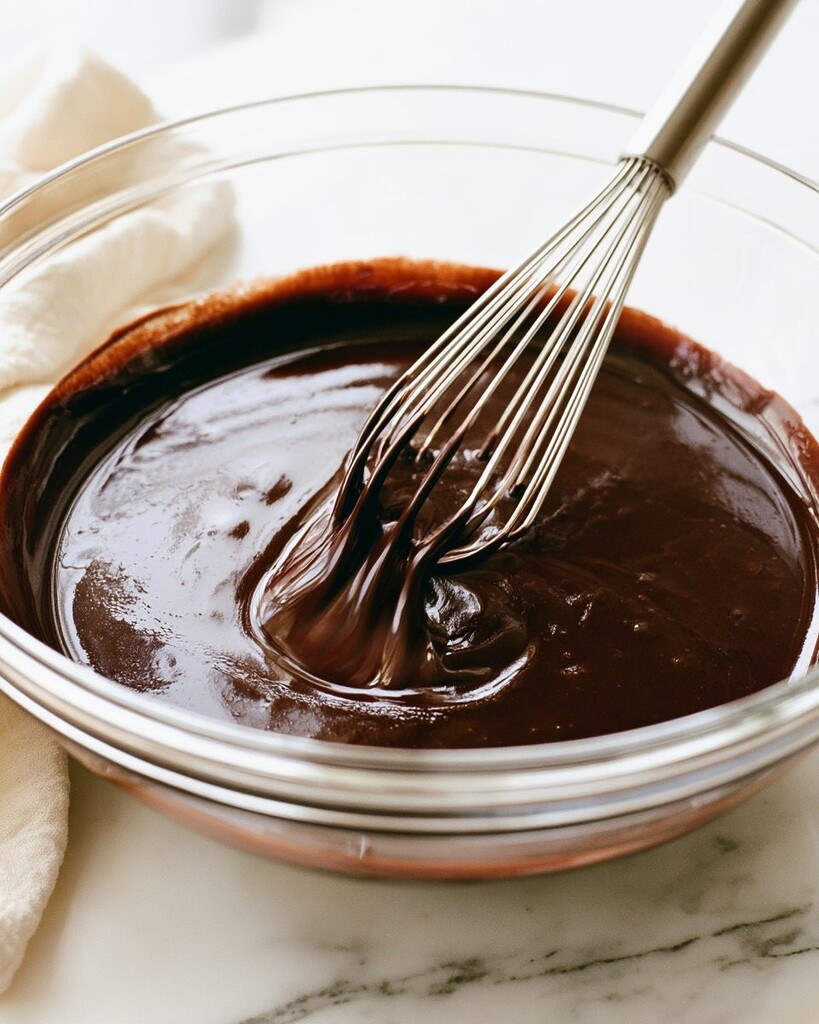
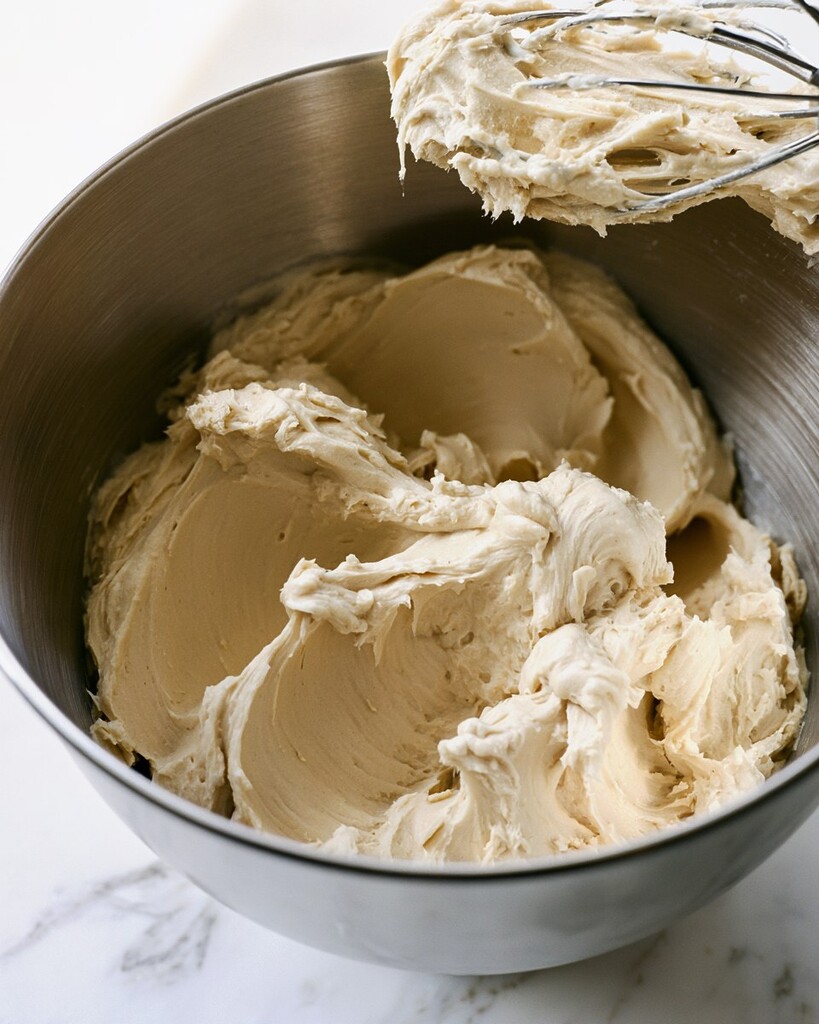
Whip the cheesecake mousse. Use powdered sugar. Beat the softened blocks until entirely smooth. I scrape down my mixing bowl twice during this step, otherwise hidden lumps of unmixed cream cheese will ruin the texture when you fold in the heavy cream.

Thick cheesecake mousse being folded with a silicone spatula in a white bowl

Assemble the dessert. Cut the cooled slab into 1-inch squares. Arrange a third of them in the glass dish. Spread the mousse and a drizzle of sauce evenly across the surface, repeating this sequence twice more until the bowl is full.

Hold the crunch. Whip the final topping. Spoon it over the trifle. Wait to add the crushed pretzels and flaky sea salt until right before serving so they stay crisp against the wet cream.

Fully assembled salted caramel brownie trifle topped with cream and pretzels in a glass bowl

Trifle Assembly and Leftovers

  • Build the dessert through the final whipped cream layer 12 to 24 hours in advance.
  • Keep the bowl covered loosely in the refrigerator so the top does not get crushed.
  • Leftovers last three days chilled, though the pretzel garnish will soften after the first night.

Planning Your Trifle

Can I make this without a trifle bowl?

Yes, you can assemble the layers in a 9×13-inch baking dish. The ingredient ratios stay exactly the same, but you will only make two sets of layers instead of three.

Do I have to use coffee in the batter?

No, you can use water if you prefer. The coffee simply deepens the chocolate flavor without making the baked squares taste roasted.

I prefer serving this straight from the fridge while the center is still firm. Save this recipe for your next large gathering when you need a dish that actually improves overnight.

Print
clockclock iconcutlerycutlery iconflagflag iconfolderfolder iconinstagraminstagram iconpinterestpinterest iconfacebookfacebook iconprintprint iconsquaressquares iconheartheart iconheart solidheart solid icon
Fully assembled salted caramel brownie trifle topped with cream and pretzels in a glass bowl

5 Stars 4 Stars 3 Stars 2 Stars 1 Star

No reviews

Salted Caramel Brownie Trifle with Pretzel Crunch

Recipe by Chloe Davis

This towering dessert takes a shortcut brownie base and upgrades it with strong brewed coffee, layering it between a fluffy no-bake cheesecake mousse and ribbons of salted caramel. Finished with a crown of crushed pretzels and flaky sea salt, it delivers the perfect textural contrast of rich, creamy, sweet, and salty.


  • Total Time5 hours
  • Yield1 trifle (serves 16) 1x

Find it on your board when it's time to cook

Ingredients

Scale

Brownie Base

  • 1 (18.3-ounce / 519g) box fudge brownie mix (plus the eggs required on the box)
  • Melted unsalted butter (to replace the oil called for on the box)
  • Strong brewed coffee, cooled (to replace the water called for on the box)

Cheesecake Mousse

Whipped Topping & Layers

  • 1 1/2 cups (360ml) heavy whipping cream, cold
  • 1/3 cup (40g) powdered sugar
  • 1 cup (240ml) thick salted caramel sauce, divided
  • 1 cup (110g) roughly crushed salted pretzels
  • 1/2 teaspoon flaky sea salt


Instructions

  1. Bake the brownies: Preheat your oven to 325°F (163°C). Line a 9×13-inch baking pan with parchment paper. Prepare the brownie mix according to package directions, but for a richer, bakery-style flavor, swap the requested oil for an equal amount of melted butter, and replace the water with strong brewed coffee. Bake for 28–32 minutes until a toothpick inserted in the center comes out with moist, fudgy crumbs. Let the brownies cool completely in the pan.
  2. Whip the cheesecake base: In a large mixing bowl, beat the softened cream cheese, 3/4 cup of powdered sugar, and vanilla bean paste on medium speed until completely smooth and creamy, about 2 minutes. Scrape down the sides of the bowl to ensure there are no lumps.
  3. Fold in the cream: In a separate bowl, whip 1 1/2 cups of the heavy cream until stiff peaks form. Gently fold this whipped cream into the cream cheese mixture in two additions using a rubber spatula. Mix just until no white streaks remain, keeping the mousse as airy as possible. Set aside.
  4. Whip the topping: In another chilled bowl, beat the remaining 1 1/2 cups of heavy cream with the remaining 1/3 cup of powdered sugar until medium-stiff peaks form.
  5. Assemble the trifle: Cut the cooled brownies into 1-inch squares. In a large glass trifle bowl, arrange one-third of the brownie squares in an even layer. Spread one-third of the cheesecake mousse evenly over the brownies. Drizzle with about 1/4 cup of the salted caramel sauce. Repeat these layers (brownies, mousse, caramel) two more times.
  6. Top and chill: Spoon the whipped cream topping over the trifle in fluffy swoops. Cover the bowl loosely with plastic wrap and refrigerate for at least 4 hours to allow the layers to soften and meld together.
  7. Garnish and serve: Right before serving, sprinkle evenly with the crushed pretzels, drizzle with the remaining 1/4 cup of caramel sauce, and finish with the flaky sea salt so the pretzels maintain their crunch.
Find it on your board when it's time to cook

Notes

  • Why it works: Swapping granulated sugar for powdered sugar in the cheesecake layer prevents any grainy texture, resulting in a silkier mousse that dissolves instantly on the tongue and sets up perfectly when chilled.
  • Make-ahead tip: This trifle actually tastes better on day two as the brownies absorb moisture from the mousse. You can assemble the entire dessert (through step 6) 12–24 hours in advance.

Nutrition (per serving — estimates)

Calories: 560 | Total Carbs: 45g (Fiber: 1g, Sugar: 32g) | Fat: 40g (Saturated: 23g) | Protein: 5g

Nutritional values are approximate, based on standard reference data (USDA FoodData Central). Actual values vary by brand and exact measurements. For precision, use a tracker like MyFitnessPal or Cronometer.

  • Prep Time: 30 minutes
  • Chilling Time: 4 hours
  • Cook Time: 30 minutes
  • Category: Dessert
  • Method: Layered
  • Cuisine: American

Nutrition

  • Serving Size: 1 scoop
  • Calories: 560
  • Sugar: 32g
  • Fat: 40g
  • Saturated Fat: 23g
  • Carbohydrates: 45g
  • Fiber: 1g
  • Protein: 5g

This chicken and orzo casserole turns the baked-feta method into a hands-off dinner with a thick sauce that coats every grain of pasta. I use chicken thighs to keep the meat juicy, finishing the dish with the golden, shattering crunch of toasted panko.

Baked Greek chicken and orzo casserole topped with golden panko, fresh basil, and roasted cherry tomatoes in a white dish

Why This Baked Feta Casserole Works

Most pasta bakes turn into a uniform mush. We avoid that entirely here. Pouring warm chicken broth into the baking dish jumpstarts the cooking process, ensuring the bottom layer of orzo absorbs liquid at the exact same rate as the top.

How to Make Greek Chicken and Orzo Casserole

Toast the topping first. Get the panko golden brown in a small skillet. It takes about 3 to 4 minutes, so remove the pan from the heat immediately before the residual heat scorches the breadcrumbs.

Panko breadcrumbs toasting in a metal skillet until golden brown

Build the casserole base. Toss the chicken pieces, dry orzo, tomatoes, spinach, and aromatics directly in the greased 9×13-inch baking dish. Clear a small space right in the center. Nestle the feta block into that opening so it touches the bottom, ensuring it melts evenly later.

Uncooked chicken, orzo, spinach, and cherry tomatoes surrounding a block of feta cheese in a white baking dish

Keep the feta block right in the center so it has room to melt outward into the warm broth.

Bake tightly covered. Pour in the warm broth. Cover the dish tightly with aluminum foil. This precise steam environment forces the dry orzo to plump evenly without scorching on the exposed edges.

Uncover and finish cooking. Pull the foil off carefully. Watch out for the hot steam plume. Bake another 15 to 20 minutes until the liquid is mostly absorbed and the chicken reaches a safe internal temperature of 165°F (74°C).

Stirring hot baked feta into cooked orzo and chicken with a wooden spoon to create a thick sauce

Watch the Moisture

  • I’ve pulled this out too early and ended up with chalky pasta. Trust the timeline. If the edges look dry but the center still holds watery broth, give it a quick stir and add five more minutes to the bake.

Stir into a thick sauce. Crush the hot feta immediately. Stir it aggressively into the surrounding pasta. The cheese will melt into a creamy emulsion that binds the tomatoes and chicken together.

Creamy cooked orzo, chicken, and cherry tomatoes in a white baking dish with a wooden spoon

Storing and Reheating Leftovers

  • Keep leftovers in an airtight container in the fridge for up to four days. Reheat individual portions in the microwave with a splash of water to loosen the feta sauce. The panko will lose its crunch in the fridge, so I always store it in a separate jar at room temperature and sprinkle it on fresh.

Casserole Prep and Substitutions

Can I use chicken breasts instead of thighs?

Yes, but cut them into larger 2-inch chunks. White meat cooks faster than dark meat and can dry out during the 35-minute total oven time.

Can I assemble this casserole ahead of time?

No, the dry orzo will absorb the warm broth and turn gummy before it ever reaches the oven. Prep your ingredients in advance, but do not combine the pasta and liquid until right before baking.

This has become my reliable answer for a hands-off weeknight dinner. The rich, salty bite of the feta sauce balanced against that bright lemon crunch makes it a casserole actually worth serving to company.

Print
clockclock iconcutlerycutlery iconflagflag iconfolderfolder iconinstagraminstagram iconpinterestpinterest iconfacebookfacebook iconprintprint iconsquaressquares iconheartheart iconheart solidheart solid icon
Baked Greek chicken and orzo casserole topped with golden panko, fresh basil, and roasted cherry tomatoes in a white dish

5 Stars 4 Stars 3 Stars 2 Stars 1 Star

No reviews

Greek Chicken and Orzo Casserole with Crispy Lemon-Herb Panko

Recipe by Chloe Davis

The famous baked-feta method meets a hearty weeknight dinner in this creamy, one-pan chicken and orzo bake. Swapping out the usual chicken breasts for juicy chicken thighs ensures the meat stays tender during the long bake, while a quick toasted lemon-panko topping adds the perfect crispy contrast to the rich feta sauce.


  • Total Time59 minutes
  • Yield1 casserole (serves 6) 1x

Find it on your board when it's time to cook

Ingredients

Scale

The Casserole

  • 1 ½ lbs (680g) boneless, skinless chicken thighs, cut into 1 ½-inch pieces
  • 1 ½ cups (255g) uncooked orzo pasta
  • 1 pint (10 oz / 283g) cherry or grape tomatoes
  • 2 cups (60g) packed fresh baby spinach
  • ½ cup (65g) pitted Kalamata olives, roughly chopped
  • 1 large shallot, finely chopped
  • 4 cloves garlic, minced
  • 1 tablespoon olive oil
  • 2 teaspoons dried oregano
  • 1 teaspoon kosher salt
  • ½ teaspoon freshly ground black pepper
  • 2 ¾ cups (650ml) low-sodium chicken broth, warmed
  • 1 (8-oz / 225g) block feta cheese (preferably packed in brine, drained)

Crispy Lemon-Herb Topping

  • 1 tablespoon olive oil
  • ⅓ cup (17g) panko breadcrumbs
  • 1 large lemon, zested and juiced (divided)
  • ¼ cup (5g) chopped fresh basil (or dill)


Instructions

  1. Preheat and prep: Preheat your oven to 400°F (200°C). Lightly grease a 9×13-inch baking dish with nonstick spray or a little olive oil.
  2. Toast the topping: In a small skillet, heat 1 tablespoon of olive oil over medium heat. Add the panko breadcrumbs and toast, stirring frequently, until golden brown and crispy, about 3 to 4 minutes. Remove from heat and stir in the lemon zest. Set aside.
  3. Build the base: In your prepared 9×13-inch baking dish, combine the chopped chicken thighs, orzo, cherry tomatoes, spinach, olives, shallot, garlic, 1 tablespoon of olive oil, dried oregano, kosher salt, and black pepper. Toss everything together until the ingredients are evenly mixed and coated.
  4. Add broth and feta: Pour the warm chicken broth evenly over the mixture. Use a spoon to clear a small space right in the center of the dish, and nestle the block of feta cheese directly into that opening.
  5. Bake covered: Cover the baking dish tightly with aluminum foil. Bake for 20 minutes. This traps the steam, ensuring the orzo cooks evenly without drying out on top.
  6. Bake uncovered: Remove the foil carefully (watch for hot steam). Return the dish to the oven uncovered and bake for another 15 to 20 minutes, or until the liquid is mostly absorbed, the orzo is tender, and the chicken reaches an internal temperature of 165°F (74°C).
  7. Stir into a sauce: Remove the casserole from the oven. Using a sturdy spoon, immediately crush the hot feta block and stir it thoroughly into the surrounding pasta and chicken mixture until it melts into a thick, creamy sauce. Stir in the reserved lemon juice.
  8. Garnish and serve: Just before serving, sprinkle the crispy lemon panko and fresh chopped basil evenly over the top of the casserole to add a bright, crunchy finish.
Find it on your board when it's time to cook

Notes

  • Why it works: Using warm chicken broth rather than room-temperature broth jumpstarts the cooking process in the oven, ensuring the bottom layer of orzo cooks at the same rate as the top layer. Swapping out chicken breasts for chicken thighs prevents the meat from drying out during the two-stage baking time.
  • Texture fix: Feta-pasta bakes can sometimes feel uniformly soft once stirred. The toasted panko topping solves this by adding a much-needed textural crunch that breaks up the richness of the creamy sauce.

Nutrition (per serving — estimates)

Calories: 540 | Total Carbs: 45g (Fiber: 5g, Sugar: 6g) | Fat: 24g (Saturated: 9g) | Protein: 36g

Nutritional values are approximate, based on standard reference data (USDA FoodData Central). Actual values vary by brand and exact measurements. For precision, use a tracker like MyFitnessPal or Cronometer.

  • Prep Time: 15 minutes
  • Cook Time: 44 minutes
  • Category: Dinner
  • Method: Baked
  • Cuisine: Mediterranean-Inspired American

Nutrition

  • Serving Size: About 1 ½ cups
  • Calories: 540
  • Sugar: 6g
  • Fat: 24g
  • Saturated Fat: 9g
  • Carbohydrates: 45g
  • Fiber: 5g
  • Protein: 36g

These everything bagel ham and cheese pinwheels skip the standard chilling step, delivering crackling, deep golden layers in under thirty minutes. I rely on a 400°F oven to force the cold pastry to rise immediately, securing that flaky height without the wait.

Golden baked everything bagel ham and cheese pinwheels with clear spiral layers on a white plate

Why These Pinwheels Bake in 30 Minutes

Skip the warm-up. Work fast. Cold pastry hitting a hot oven is the entire secret to this timeline.

  • The temperature jump: Baking at 400°F creates a rapid burst of steam between the dough layers. This gives you a taller puff and lets you safely skip the traditional chilling step entirely.
  • The cutting technique: A standard chef’s knife will press down and ruin the delicate structure. A serrated bread knife saws cleanly through the deli meat without disturbing your spiral.

Rolling and Baking the Pinwheels

Keep it cold. Move quickly. Leave the puff pastry in the refrigerator until the exact moment you are ready to unfold it on your board.

Spread the mustard. Add the meat. Leaving a half-inch border around the edges ensures the log seals tightly when you finish rolling.

Unfolded puff pastry spread with mustard, layered with deli ham and shredded cheese

Work from the long edge. Keep the roll tight. I always pinch the final seam firmly against the log, because a loose roll lets the cheese leak and burn before the pastry finishes browning.

Grab a serrated knife. Use gentle pressure. Sawing back and forth cuts clean three-quarter-inch rounds without crushing the delicate, cold dough.

Rolled ham and cheese puff pastry log alongside sliced spirals and a serrated knife

Brush the edges. Coat the tops. An egg wash acts as a glue, ensuring the everything bagel seasoning sticks to the pastry rather than scattering across your baking sheet.

Space them out. Check the gaps. You want at least an inch between each round so the hot oven air can circulate and crisp the exposed sides.

Unbaked ham and cheese pinwheels topped with everything bagel seasoning on a lined baking sheet

Watch the timer. Check the color. Bake the rounds at 400°F for 14 to 16 minutes, rotating the pans halfway through to ensure an even bake.

Pull the pan. Let them sit. The pastry is done when it is tall and deep golden brown, and the Gruyère bubbles actively at the edges.

Baked puff pastry pinwheels with bubbling cheese and toasted seasoning on a baking sheet

Storing and Reheating Puff Pastry

  • Keep leftover pinwheels in an airtight container in the refrigerator for up to 3 days.
  • Warm them on a bare baking sheet in a 350°F oven for 5 to 7 minutes until the cheese remelts and the pastry crisps up again. Never use the microwave.

Serving the Pinwheels

Let them rest. Do not rush. Give the pinwheels 3 to 5 minutes on the hot baking sheet before moving them.

Grab a spatula. Lift them gently. This brief pause allows the melted cheese to set slightly, keeping the spirals intact when you transfer them to a platter.

Flaky golden ham and cheese pinwheels arranged on a white serving plate

Everything Bagel Pinwheel FAQs

Can I assemble these pinwheels ahead of time?

Yes, you can roll the log, wrap it tightly in plastic wrap, and keep it in the refrigerator for up to 24 hours before slicing. Wait to apply the egg wash and seasoning until right before baking.

Why did my pastry squish when I cut it?

You likely used a smooth-bladed chef’s knife or pressed straight down. Always use a serrated bread knife and let the gentle sawing motion do the work to protect the layers.

These make a sturdy, savory addition to any appetizer spread. I pull them off the sheet pan the second the cheese stops bubbling so they do not stick, ensuring every spiral lands on the plate whole.

Print
clockclock iconcutlerycutlery iconflagflag iconfolderfolder iconinstagraminstagram iconpinterestpinterest iconfacebookfacebook iconprintprint iconsquaressquares iconheartheart iconheart solidheart solid icon
Flaky golden ham and cheese pinwheels arranged on a white serving plate

5 Stars 4 Stars 3 Stars 2 Stars 1 Star

No reviews

Quick Everything Bagel Ham and Cheese Pinwheels

Recipe by Chloe Davis

By skipping the tedious chilling step and crowning them with a savory, crunchy spice finish, these flaky pinwheels go from fridge to table in under 30 minutes. The classic pairing of savory deli ham and melted Gruyère gets a massive flavor upgrade that looks impressive but takes almost zero effort to assemble.


  • Total Time27 minutes
  • Yield24 pinwheels (serves 12) 1x

Find it on your board when it's time to cook

Ingredients

Scale

Pastry & Filling

  • 2 sheets frozen puff pastry, thawed but kept cold (1 box, 17.3 oz / 490g)
  • 2 tablespoons (30g) Dijon mustard
  • 8 oz (225g) thinly sliced deli ham (such as Black Forest or Virginia baked)
  • 1 ½ cups (170g) freshly shredded Gruyère or sharp white cheddar cheese

Topping


Instructions

  1. Prep the oven and pans: Preheat the oven to 400°F (200°C). Line two large baking sheets with parchment paper. Leave the puff pastry in the refrigerator until the exact moment you are ready to roll—working with very cold dough is the secret to skipping the chilling time later.
  2. Layer the filling: Unfold one sheet of cold puff pastry onto a lightly floured cutting board or a sheet of parchment. Spread evenly with 1 tablespoon of the Dijon mustard, leaving a bare 1/2-inch border around all four edges. Shingle 4 ounces of the ham slices evenly over the mustard, then sprinkle with 3/4 cup of the shredded cheese.
  3. Roll and slice: Starting from the long edge, tightly roll the pastry up into a log. Using a very sharp serrated knife and a gentle back-and-forth sawing motion, immediately cut the log into 12 even rounds (about 3/4-inch thick). Place them flat on the prepared baking sheet, spacing them at least an inch apart. Repeat the entire process with the second sheet of pastry, remaining mustard, ham, and cheese.
  4. Glaze and season: Lightly brush the tops and exposed outer edges of all the pinwheels with the egg wash. Sprinkle the everything bagel seasoning evenly over the glazed edges to create a savory crust.
  5. Bake to golden: Bake for 14 to 16 minutes, rotating the pans halfway through, until the puff pastry is tall and deep golden brown, and the cheese is bubbling and crispy at the edges.
  6. Cool and serve: Let the pinwheels rest on the baking sheets for 3 to 5 minutes so the melted cheese can set slightly, then serve warm.
Find it on your board when it's time to cook

Notes

  • Why it works: Baking at 400°F rather than a lower temperature creates a rapid burst of steam between the pastry layers, giving you a taller, flakier puff and allowing you to safely skip the traditional 20-minute chilling step entirely.
  • Slicing secret: A serrated bread knife is mandatory for a clean 30-minute workflow. A standard chef’s knife will press down and squish the delicate, unchilled layers, while a serrated blade saws cleanly through the ham without disturbing your spiral.

Nutrition (per serving — estimates)

Calories: 245 | Total Carbs: 16g (Fiber: 1g, Sugar: 1g) | Fat: 16g (Saturated: 6g) | Protein: 10g

Nutritional values are approximate, based on standard reference data (USDA FoodData Central). Actual values vary by brand and exact measurements. For precision, use a tracker like MyFitnessPal or Cronometer.

  • Prep Time: 12 minutes
  • Resting Time: 10 minutes
  • Cook Time: 15 minutes
  • Category: Appetizer
  • Method: Baked
  • Cuisine: American

Nutrition

  • Serving Size: 2 pinwheels
  • Calories: 245
  • Sugar: 1g
  • Fat: 16g
  • Saturated Fat: 6g
  • Carbohydrates: 16g
  • Fiber: 1g
  • Protein: 10g