Author

Chloe Davis

Browsing

These hot honey chipotle chicken sliders pack skillet-charred chicken, creamy adobo spread, and a sticky sweet-heat glaze into soft pull-apart rolls. I layer the cheese above and below the meat to keep the bread completely sturdy as it bakes.

Hot honey chipotle chicken sliders with glossy glazed tops, melted cheese, and toasted sesame seeds on a platter.

The Strategy Behind Sturdy, Crispy Sliders

Sweet rolls turn soft quickly under hot chicken. A double cheese barrier prevents moisture transfer. Pepper Jack melts below and above the diced meat, creating a protective fat seal that keeps pan juices from softening the bottom crust while anchoring every bite in place.

The bake runs in two distinct stages. The honey glaze contains natural sugars that burn if exposed to dry heat for too long. Tenting the pan with foil for the first 10 minutes traps steam to melt the shredded cheese completely, while the final uncovered 4 to 5 minutes crisps the roll tops to a rich mahogany finish.

How to Make Hot Honey Chipotle Chicken Sliders

Trim the chicken cutlets. Whisk the adobo sauce, olive oil, honey, grated garlic, smoked paprika, cumin, salt, and black pepper until smooth. Toss the tenders thoroughly and let them sit at room temperature for 15 minutes to take off the chill.

Set a cast-iron skillet over medium-high heat. Wait for the dry pan to get hot before laying the chicken down in a single layer. Cook the tenders undisturbed for 3 to 4 minutes per side until dark char spots develop and an instant-read thermometer reaches 165°F (74°C) in the thickest section.

Boneless chicken tenders searing in a black cast-iron skillet with dark charred edges.

Look for deep char marks along the edges before flipping to lock in the smoky adobo crust.

Rest the cooked chicken on a cutting board for 5 minutes. Dice the meat into small bite-sized pieces. Toss the chopped chicken directly through the remaining board juices so every piece stays moist before assembling.

Keep the roll sheet intact. Slice through the entire 12-roll block horizontally using a long serrated knife. Lift off the top half cleanly and place the bottom bread slab onto a parchment-lined rimmed baking sheet.

Hawaiian sweet rolls arranged closely in an intact sheet on a parchment-lined baking sheet.

Whisk the mayonnaise, minced chipotle pepper, honey, lime juice, garlic powder, and salt in a small bowl. Spread half across the bottom bread slab. Scatter 1 cup (100 g) of shredded Pepper Jack over the sauce, add the diced chicken in an even layer, and cap with the remaining 1 cup (100 g) of cheese.

Shredded Pepper Jack cheese and diced chicken spread over the sauced bottom layer of Hawaiian rolls.

Preheat your oven to 375°F (190°C). Whisk the melted butter, hot honey, and smoked paprika together. Brush half of this glaze over the roll crowns, tent loosely with aluminum foil to protect the sugars, and bake at 375°F (190°C) for 10 minutes.

Remove the foil tent carefully. Brush the remaining glaze across the hot rolls and scatter the toasted sesame seeds over top. Return the pan to the oven uncovered for 4 to 5 minutes until the crowns turn deep golden brown and the edges feel crisp to the touch.

I always check the browning at the 3-minute mark during the uncovered bake. Honey glazes can jump from golden to scorched rapidly due to their high sugar content, so pull them the second the roll edges turn crisp.

Baked slider pulled apart showing melted cheese, seasoned chicken, and a golden sesame seed crust.

Slicing and Serving

Scatter finely chopped cilantro or scallions across the warm roll tops. Let the slider sheet sit on the baking sheet for 2 minutes so the bubbling cheese sets slightly before you cut. I press straight down with a sharp chef knife along the natural seams rather than dragging the blade through the warm crust, keeping each slider intact and tidy.

Warm chipotle chicken sliders sliced and arranged on a serving plate with melted cheese and fresh herbs.

Make-Ahead Prep and Leftover Storage

  • Refrigerator storage: Store cooled leftover sliders in an airtight container for up to 3 days.
  • Reheating for crispness: Reheat sliders on a foil-lined baking sheet in a 350°F (175°C) oven or toaster oven for 6 to 8 minutes. Avoid microwaving, which makes the bread rubbery.
  • Advance chicken prep: You can marinate, cook, and dice the chicken up to 2 days in advance and keep it chilled in an airtight container. Assemble and glaze just before baking.

Frequently Asked Questions About Chicken Sliders

Can I adjust the heat level in these sliders?

Yes, you can swap the hot honey in the glaze for standard honey and replace the Pepper Jack with Monterey Jack cheese. You can also reduce the minced chipotle pepper in the mayo to half a pepper for a milder spread.

Can I assemble the slider slab hours before baking?

It is best to assemble right before baking to prevent the bread from absorbing excess moisture. You can prepare the cooked diced chicken and the chipotle mayo up to 2 days in advance and keep them refrigerated in separate containers.

What is the best way to cut Hawaiian rolls evenly?

Keep the rolls connected as a single block and place one flat hand gently on top. Use a long, sharp serrated bread knife parallel to the counter, slicing through in smooth sawing strokes rather than pressing down.

Pull these warm sliders apart while the cheese is still bubbling and the honey glaze is sticky. Save this recipe for your next game day gathering or casual crowd dinner when you want bold smoke and sweetness in every bite.

Print
clockclock iconcutlerycutlery iconflagflag iconfolderfolder iconinstagraminstagram iconpinterestpinterest iconfacebookfacebook iconprintprint iconsquaressquares iconheartheart iconheart solidheart solid icon
Warm chipotle chicken sliders sliced and arranged on a serving plate with melted cheese and fresh herbs.

5 Stars 4 Stars 3 Stars 2 Stars 1 Star

No reviews

Hot Honey Chipotle Chicken Sliders

Recipe by Chloe Davis

Juicy skillet-charred chicken tossed in smoky adobo sauce, layered with melted Pepper Jack and creamy chipotle mayo on sweet Hawaiian rolls, all finished with a glossy hot honey butter glaze.


  • Total Time60 minutes
  • Yield12 sliders (serves 6) 1x

Find it on your board when it's time to cook

Ingredients

Scale

Chipotle Marinated Chicken

  • 1 lb (454 g) boneless, skinless chicken tenders (or chicken breast, sliced into cutlets)
  • 2 tbsp (30 ml) adobo sauce (from a 7-oz can of chipotle peppers in adobo)
  • 1 tbsp (15 ml) olive oil
  • 1 tbsp (15 ml) honey
  • 2 cloves garlic, finely grated or minced
  • 1 tsp (3 g) smoked paprika
  • ½ tsp (1.5 g) ground cumin
  • ½ tsp (1.5 g) kosher salt
  • ¼ tsp (0.75 g) freshly cracked black pepper

Creamy Chipotle Mayo

  • ½ cup (115 g) mayonnaise
  • 1 canned chipotle pepper in adobo sauce, finely minced
  • 1 tbsp (15 ml) honey
  • 1 tsp (5 ml) fresh lime juice
  • ¼ tsp (0.75 g) garlic powder
  • ¼ tsp (0.75 g) kosher salt

Hot Honey Butter Glaze

  • 3 tbsp (45 g) unsalted butter, melted
  • 1½ tbsp (22 ml) hot honey (or regular honey mixed with a pinch of cayenne)
  • ¼ tsp (0.75 g) smoked paprika
  • 1 tsp (3 g) toasted sesame seeds

Sliders Assembly

  • 1 package (12-count / 340 g) Hawaiian sweet rolls, kept intact as a single sheet
  • 2 cups (200 g) shredded Pepper Jack cheese (or Monterey Jack), divided
  • 2 tbsp (6 g) finely chopped fresh cilantro or scallions, for garnish


Instructions

  1. Marinate the chicken: In a medium bowl, whisk together the adobo sauce, olive oil, honey, grated garlic, smoked paprika, cumin, salt, and black pepper. Add the chicken tenders, tossing until thoroughly coated. Let marinate at room temperature for 15 minutes (or cover and refrigerate for up to 8 hours).
  2. Sear and chop: Heat a large cast-iron skillet or heavy frying pan over medium-high heat. Cook the chicken in a single layer for 3 to 4 minutes per side, until nicely charred on the outside and the internal temperature reaches 165°F (74°C) on an instant-read thermometer. Transfer to a cutting board, rest for 5 minutes, then dice into bite-sized pieces and toss with the resting juices on the board.
  3. Whisk the mayo: In a small bowl, stir together the mayonnaise, minced chipotle pepper, honey, lime juice, garlic powder, and salt until smooth and uniform.
  4. Preheat and prep: Preheat the oven to 375°F (190°C). Line a rimmed baking sheet with parchment paper.
  5. Assemble the slider sheet: Using a long serrated knife, slice the entire slab of rolls in half horizontally to create a single top sheet and bottom sheet. Place the bottom sheet on the prepared baking sheet. Spread half of the chipotle mayo evenly across the cut surface. Top with 1 cup (100 g) of shredded cheese, all of the chopped chicken, the remaining 1 cup (100 g) of cheese, and spread the remaining mayo over the cut side of the top roll sheet. Place the top roll sheet over the layers.
  6. Glaze and bake: In a small bowl, whisk together the melted butter, hot honey, and smoked paprika. Brush half of the glaze evenly over the roll tops. Tent the sliders loosely with aluminum foil and bake at 375°F (190°C) for 10 minutes to melt the cheese. Remove the foil, brush with the remaining butter glaze, sprinkle with toasted sesame seeds, and bake uncovered for 4 to 5 minutes, until the tops are deeply golden and crisp along the edges.
  7. Garnish and serve: Sprinkle chopped cilantro or scallions across the warm tops. Cut along the roll seams into individual sliders and serve immediately while warm and melty.
Find it on your board when it's time to cook

Notes

  • Why it works: Splitting the cheese into two layers—one beneath the chicken and one on top—creates a moisture barrier that keeps the sweet rolls from turning soggy while locking the chopped chicken into every pull-apart section.
  • Make-ahead prep: The chicken can be marinated, seared, and diced up to 2 days in advance and kept refrigerated in an airtight container. Assemble the sliders just before baking so the rolls remain fluffy.

Nutrition (per serving — estimates)

Calories: 660 | Total Carbs: 43g (Fiber: 1g, Sugar: 21g) | Fat: 40g (Saturated: 15g) | Protein: 33g | Sodium: 910mg

Nutritional values are approximate, based on standard reference data (USDA FoodData Central). Actual values vary by brand and exact measurements. For precision, use a tracker like MyFitnessPal or Cronometer.

  • Prep Time: 20 minutes
  • Marinating Time: 15 minutes
  • Cook Time: 20 minutes
  • Category: Sandwiches & Sliders
  • Method: Stovetop & Baking
  • Cuisine: American

Nutrition

  • Serving Size: 2 sliders
  • Calories: 660
  • Sugar: 21g
  • Sodium: 910mg
  • Fat: 40g
  • Saturated Fat: 15g
  • Carbohydrates: 43g
  • Fiber: 1g
  • Protein: 33g

This Italian grinder tortellini salad combines cheese-stuffed pasta, savory cured meats, and crisp vegetables in a tangy pepperoncini dressing. I chill the seasoned pasta base first so the dumplings absorb the vinegar before adding greens for a cold, refreshing crunch.

Italian grinder tortellini salad served in a ceramic bowl with mozzarella, cured meats, and red pepper flakes

Why the Split Dressing Method Protects Texture

Pasta absorbs liquid rapidly while warm. Cold lettuce wilts under acid and salt. By dividing the dressing into two additions, you season the tender tortellini during chilling without compromising the crisp texture of the iceberg lettuce.

Tossing the freshly rinsed pasta with a single tablespoon of pickled pepperoncini brine locks in brightness immediately. The starch drinks up the brine, establishing a tangy foundation before the mayonnaise emulsion coats the surface.

How to Make Italian Grinder Tortellini Salad

Cook and cool the tortellini. Bring a large pot of salted water to a rolling boil over high heat. Drop the pasta and boil for 3 to 4 minutes until tender yet firm. Drain immediately in a colander and rinse under cold running water for 1 minute to halt carryover cooking. Shake off all excess moisture thoroughly. I always pull the pasta right at the three-minute mark, because warm pasta will turn soggy once dressed if it stays in the boiling water even thirty seconds too long. Transfer the cooled tortellini to a large bowl and toss with 1 tablespoon of pepperoncini brine.

Whisk the creamy dressing. Combine the mayonnaise, olive oil, red wine vinegar, 2 tablespoons of pepperoncini brine, Dijon mustard, minced garlic, Italian seasoning, kosher salt, black pepper, and grated Parmesan in a medium bowl. Whisk vigorously until the mixture emulsifies into a smooth, pale dressing speckled with herbs.

Whisking the creamy pepperoncini salad dressing in a white bowl until smooth

Whisk until the oil and vinegar form a creamy, cohesive emulsion with no visible separation.

Combine the meats and chill. Add the Genoa salami, pepperoni, deli ham, mozzarella pearls, halved cherry tomatoes, sliced pepperoncini, and red onion to the bowl with the tortellini. Pour two-thirds of the prepared dressing over the top. Fold the ingredients gently with a silicone spatula until every piece is evenly coated. Cover the bowl tightly and refrigerate for at least 30 minutes, or up to 24 hours, while keeping the remaining one-third of the dressing chilled in a separate container.

Cooked tortellini, sliced salami, pepperoni, ham, mozzarella, tomatoes, and red onion layered in a metal bowl

Tortellini and deli meats evenly coated in creamy dressing in a mixing bowl

Finish with crisp lettuce. Pull the salad from the refrigerator just before you plan to eat. Pour the reserved one-third of the dressing directly over the chilled mixture, then add the shredded iceberg lettuce. Toss gently until the greens are coated and distributed throughout the bowl. Garnish with a pinch of crushed red pepper flakes and serve immediately.

Shredded iceberg lettuce and reserved dressing added on top of the chilled pasta mixture

Creamy Italian grinder tortellini salad tossed and ready to serve with crushed red pepper flakes

Make-Ahead Strategy and Refreshing Leftovers

  • Make-ahead assembly: You can prepare the tortellini, cured meats, cheese, and the initial dressing up to 24 hours in advance. Store the shredded lettuce and reserved dressing in separate containers until serving time to maintain crunch.
  • Refreshing day-two leftovers: Chilled pasta naturally drinks up dressing over time. If leftovers look dry the next day, fold in 1 teaspoon of red wine vinegar and a light drizzle of olive oil to loosen the dressing and restore its glossy shine.

Frequently Asked Questions About Grinder Pasta Salad

Can I use frozen or dried tortellini instead of refrigerated?

Yes, but adjust your cooking time to the package instructions and test for doneness early. Pull the pasta the second the center is tender so it does not tear during mixing.

Why is iceberg lettuce preferred over romaine or spinach?

Iceberg offers a distinct watery crunch that mimics a classic Italian submarine sandwich. Softer greens collapse quickly under the weight of mayonnaise and vinegar.

How long can this dressed pasta salad sit at room temperature?

Keep the salad chilled until serving and do not leave it out for more than two hours. If serving outdoors in warm weather, set the serving bowl over a larger bowl filled with ice.

In my kitchen, I set this out alongside warm garlic bread or grilled chicken for effortless summer gatherings. Save this recipe for your next potluck when you need a hearty side dish that travels well and stays remarkably fresh.

Print
clockclock iconcutlerycutlery iconflagflag iconfolderfolder iconinstagraminstagram iconpinterestpinterest iconfacebookfacebook iconprintprint iconsquaressquares iconheartheart iconheart solidheart solid icon
Italian grinder tortellini salad served in a ceramic bowl with mozzarella, cured meats, and red pepper flakes

5 Stars 4 Stars 3 Stars 2 Stars 1 Star

No reviews

Italian Grinder Tortellini Salad

Recipe by Chloe Davis

Packed with savory cured deli meats, tender cheese tortellini, and crisp vegetables tossed in a tangy pepperoncini-spiked dressing. A split-dressing method seasons the pasta while keeping the shredded lettuce cold and crunchy.


  • Total Time55 minutes
  • Yield6 servings 1x

Find it on your board when it's time to cook

Ingredients

Scale

For the Creamy Grinder Dressing

  • ⅓ cup (80 ml) mayonnaise
  • 2 tbsp (30 ml) extra-virgin olive oil
  • 2 tbsp (30 ml) red wine vinegar
  • 2 tbsp (30 ml) pepperoncini brine
  • 1 tbsp (15 ml) Dijon mustard
  • 1 small garlic clove, finely grated or minced
  • 1 tsp dried Italian seasoning
  • ½ tsp kosher salt
  • ¼ tsp freshly ground black pepper
  • ¼ cup (25 g) finely grated Parmesan cheese

For the Salad

  • 16 oz (455 g) refrigerated cheese tortellini
  • 1 tbsp (15 ml) pepperoncini brine
  • 4 oz (115 g) Genoa salami, sliced into bite-sized strips
  • 4 oz (115 g) sliced pepperoni, halved
  • 4 oz (115 g) deli ham, diced
  • 6 oz (170 g) fresh mozzarella pearls, drained
  • 1½ cups (225 g) cherry tomatoes, halved
  • ½ cup (60 g) sliced mild pepperoncini, drained
  • ⅓ cup (40 g) thinly sliced red onion
  • 2 cups (100 g) shredded iceberg lettuce
  • Pinch of crushed red pepper flakes (optional, for serving)


Instructions

  1. Cook the tortellini: Bring a large pot of salted water to a rolling boil over high heat. Add the tortellini and cook for 3 to 4 minutes, or until just tender to the bite. Drain thoroughly in a colander, rinse immediately under cold running water for 1 minute to stop cooking, and shake off excess moisture. Transfer the cooled pasta to a large mixing bowl and toss with 1 tbsp of pepperoncini brine to season.
  2. Whisk the dressing: In a medium bowl, whisk together the mayonnaise, olive oil, red wine vinegar, 2 tbsp pepperoncini brine, Dijon mustard, grated garlic, Italian seasoning, kosher salt, black pepper, and grated Parmesan until smooth and emulsified.
  3. Assemble and chill: Add the chopped salami, pepperoni, ham, mozzarella pearls, halved tomatoes, sliced pepperoncini, and red onion to the bowl with the tortellini. Pour two-thirds of the prepared dressing over the mixture and toss gently until evenly coated. Cover tightly and refrigerate for at least 30 minutes (or up to 24 hours) to allow the pasta to absorb the flavors. Keep the remaining one-third of the dressing covered in the refrigerator.
  4. Toss and serve: Just before serving, uncover the salad, pour the reserved dressing over top, and add the shredded iceberg lettuce. Toss gently until the greens are coated and evenly distributed. Garnish with a pinch of crushed red pepper flakes, if using, and serve immediately.
Find it on your board when it's time to cook

Notes

  • Why it works: Tossing the drained tortellini with a splash of pickled pepperoncini brine seasons the pasta directly, while reserving a portion of the dressing to toss with the iceberg lettuce right before serving prevents the greens from wilting during chilling.
  • Make-ahead strategy: You can assemble the pasta, meats, cheese, and first portion of dressing up to 24 hours in advance. Keep the shredded iceberg and reserved dressing separate until the moment you plan to serve to maintain crunch.
  • Refreshing leftovers: Chilled pasta continues to absorb moisture as it sits. If leftovers appear dry on day two, toss with a teaspoon of red wine vinegar and an extra drizzle of olive oil to restore the creamy texture.

Nutrition (per serving — estimates)

Calories: 635 | Total Carbs: 38g (Fiber: 3g, Sugar: 3g) | Fat: 41g (Saturated: 14g) | Protein: 28g | Sodium: 1210mg

Nutritional values are approximate, based on standard reference data (USDA FoodData Central). Actual values vary by brand and exact measurements. For precision, use a tracker like MyFitnessPal or Cronometer.

  • Prep Time: 20 minutes
  • Chilling Time: 30 minutes
  • Cook Time: 5 minutes
  • Category: Salad
  • Method: Boiling, Tossed
  • Cuisine: American

Nutrition

  • Serving Size: 1½ cups (approx. 285 g)
  • Calories: 635
  • Sugar: 3g
  • Sodium: 1210mg
  • Fat: 41g
  • Saturated Fat: 14g
  • Carbohydrates: 38g
  • Fiber: 3g
  • Protein: 28g

Slow cooker Cajun garlic butter chicken delivers juicy, fork-tender shredded meat drenched in a glossy, butter-slicked spiced sauce over warm rice. I keep the liquid low in the pot so the seasoned juices stay concentrated for a rich evening glaze.

Zoom Img Of Shredded Cajun garlic butter chicken over fluffy white rice in a shallow bowl garnished with green onions and parsley

Why This Slow Cooker Cajun Chicken Stays Rich and Glossy

Low added liquid keeps the flavor potent. Cubed butter melts directly over the seasoned poultry as it cooks, creating a concentrated base without thinning into a watery broth.

Cornstarch slurry creates the cling. Stirring raw starch into hot liquid creates lumps, but whisking it with cold water first allows it to combine smoothly with heavy cream into a rich, clinging glaze.

A short final toss coats every strand. Shredded chicken behaves like a sponge. Returning the pulled meat into the bubbling pan sauce ensures every surface absorbs the garlic butter before serving.

How to Make Slow Cooker Cajun Garlic Butter Chicken

Season and layer the base. Place the boneless, skinless chicken breasts flat across the base of a 6-quart slow cooker. Rub 2 tablespoons of the low-sodium Cajun seasoning across both sides of the poultry. Scatter the minced garlic and cubed unsalted butter over the top, then pour the low-sodium chicken broth and Worcestershire sauce around the edges. Keeping the butter on top lets it baste the meat continuously as it liquefies.

Cook until tender. Cover with the lid. Cook on LOW for 3 1/2 to 4 hours or on HIGH for 1 1/2 to 2 hours. Check the thickest section of the meat with an instant-read thermometer to confirm it reaches 165°F (74°C). The chicken should yield effortlessly under gentle pressure while releasing fragrant, garlicky steam.

Shred the meat. Transfer the cooked chicken to a cutting board, keeping the seasoned broth inside the cooker. Pull the meat apart using two metal forks. I prefer pulling the chicken into slightly thicker ribbons rather than fine shreds, which keeps the meat remarkably juicy once it returns to the warm liquid.

Shredding cooked chicken breasts into tender strips inside a slow cooker using two metal forks

Two forks pull the tender meat into juicy ribbons in seconds.

Simmer and thicken the sauce. Whisk the cornstarch and cold water in a small ramekin until completely dissolved. Pour the slurry, room-temperature heavy cream, and the remaining 1/2 tablespoon Cajun seasoning into the slow cooker, whisking briskly into the juices. Cook uncovered on HIGH for 10 to 15 minutes, stirring occasionally, until active bubbles form and the mixture turns into a glossy, reddish-orange sauce that coats the back of a spoon.

Watch the dairy temperature. Cold cream straight from the refrigerator can separate when poured into hot cooking fat. Let the heavy cream sit on the counter while the slow cooker finishes its cycle so it blends into a smooth, velvety emulsion.

Coat the chicken in the glaze. Return the shredded meat to the slow cooker bowl. Fold the chicken through the sauce until every strip is thoroughly coated. Let it rest in the warm sauce for two minutes so the seasoned butter clings tightly to every fiber.

Shredded chicken tossed and coated in a thick, glossy reddish-orange Cajun garlic butter sauce inside the slow cooker

Prepare the rice and plate. Cook the long-grain white rice according to package directions while the sauce bubbles, then fluff with a fork. Divide the warm rice among shallow bowls and ladle the saucy chicken generously over top. Finish with the sliced green onions and chopped parsley for a crisp, fresh contrast in every bite.

Shredded Cajun garlic butter chicken over fluffy white rice in a shallow bowl garnished with green onions and parsley

Storing and Reheating Cajun Chicken

  • Refrigerating leftovers: Store the shredded chicken and cooked rice in separate airtight containers in the refrigerator for up to 4 days. Storing them apart stops the rice from absorbing all the sauce during storage.
  • Stovetop reheating: Place the chicken in a small saucepan over medium-low heat with a splash of broth or water. Stir gently as the butter warms to restore the glossy texture without scorching the cream.
  • Microwave reheating: Warm single portions in 45-second bursts at 70% power, stirring between intervals to distribute heat evenly and prevent the chicken from drying out.

Slow Cooker Cajun Garlic Butter Chicken FAQs

Can I make this recipe with boneless chicken thighs?

Yes, boneless and skinless chicken thighs work well and remain exceptionally juicy. Keep the cooking time on LOW at 3 1/2 to 4 hours, and trim excess exterior fat before seasoning so the sauce does not turn greasy.

How do I adjust the heat level in the sauce?

Choose a mild Creole seasoning blend for gentle warmth, or select a spicier blend with extra cayenne for noticeable kick. Stick with a low-sodium blend to prevent the concentrated butter sauce from becoming overly salty.

Can I freeze the shredded chicken in the sauce?

You can freeze the cooked chicken in its sauce in a freezer-safe container for up to 3 months. Thaw overnight in the refrigerator and warm slowly over low heat, stirring gently if the butter and cream need recombining.

I love spooning a generous portion of this saucy chicken over warm rice when everyone wants an effortless, comforting meal at the end of the day. Put your slow cooker to work, let the garlic butter simmer, and enjoy a deeply satisfying dinner tonight.

Print
clockclock iconcutlerycutlery iconflagflag iconfolderfolder iconinstagraminstagram iconpinterestpinterest iconfacebookfacebook iconprintprint iconsquaressquares iconheartheart iconheart solidheart solid icon
Shredded Cajun garlic butter chicken over fluffy white rice in a shallow bowl garnished with green onions and parsley

5 Stars 4 Stars 3 Stars 2 Stars 1 Star

No reviews

Slow Cooker Cajun Garlic Butter Chicken

Recipe by Chloe Davis

Tender shredded chicken simmers in a rich, velvety Cajun garlic butter sauce until pull-apart tender, then finishes with fresh scallions over fluffy white rice. It delivers bold Louisiana comfort with minimal prep and simple pantry staples.


  • Total Time4 hours 30 minutes
  • Yield4 servings 1x

Find it on your board when it's time to cook

Ingredients

Scale

Slow Cooker Chicken

Creamy Finish

  • 1/2 cup (120ml) heavy cream, room temperature
  • 1 tbsp (8g) cornstarch
  • 2 tbsp (30ml) cold water

Serving & Garnish

  • 1 1/4 cups (250g) uncooked long-grain white rice
  • 3 medium green onions (scallions), thinly sliced
  • 2 tbsp (8g) fresh flat-leaf parsley, finely chopped


Instructions

  1. Season and arrange: Place the chicken breasts in the bottom of a 6-quart slow cooker. Rub 2 tablespoons of the low-sodium Cajun seasoning evenly across both sides of the chicken. Scatter the minced garlic and cubed butter evenly over the top, then pour the chicken broth and Worcestershire sauce around the base of the chicken.
  2. Slow cook: Cover and cook on LOW for 3 1/2 to 4 hours (or on HIGH for 1 1/2 to 2 hours) until the chicken reaches an internal temperature of 165°F (74°C) and pulls apart easily with a fork.
  3. Shred the chicken: Transfer the cooked chicken to a cutting board and shred into bite-sized strips using two forks, leaving the seasoned juices in the slow cooker.
  4. Thicken the sauce: In a small bowl, whisk the cornstarch and cold water together until completely smooth. Pour the cornstarch slurry, heavy cream, and remaining 1/2 tablespoon Cajun seasoning into the slow cooker, whisking to combine with the cooking juices. Cook uncovered on HIGH for 10 to 15 minutes, stirring occasionally, until the sauce bubbles gently and thickens into a glossy, reddish-orange glaze. Return the shredded chicken to the slow cooker and toss to coat.
  5. Prepare the rice: While the sauce thickens, cook the long-grain white rice according to package directions until tender, then fluff with a fork.
  6. Assemble and serve: Divide the warm rice among four shallow bowls. Ladle the saucy shredded chicken generously over each portion and finish with the sliced green onions and chopped parsley.
Find it on your board when it's time to cook

Notes

  • Why it works: Trimming the added broth and letting the butter gently melt directly over the seasoned chicken keeps the cooking juices concentrated, so the cream and cornstarch slurry emulsify into a clingy, velvety sauce rather than a watery broth.
  • Dairy temperature tip: Use room-temperature heavy cream rather than chilled cream straight from the refrigerator to ensure a smooth, silky blend that will not break when stirred into the hot slow cooker juices.
  • Make-ahead & storage: Store leftover chicken and rice in separate airtight containers in the refrigerator for up to 4 days. Reheat the chicken in a saucepan over medium-low heat with a splash of chicken broth to restore the sauce’s silky texture.

Nutrition (per serving — estimates)

Calories: 760 | Total Carbs: 55g (Fiber: 2g, Sugar: 1g) | Fat: 35g (Saturated: 19g) | Protein: 56g | Sodium: 620mg

Nutritional values are approximate, based on standard reference data (USDA FoodData Central). Actual values vary by brand and exact measurements. For precision, use a tracker like MyFitnessPal or Cronometer.

  • Prep Time: 15 minutes
  • Cook Time: 4 hours 15 minutes
  • Category: Dinner, Main Course
  • Method: Slow Cooker
  • Cuisine: American, Cajun-Inspired

Nutrition

  • Serving Size: 1 generous bowl (about 1 cup chicken and sauce over 1 cup cooked rice)
  • Calories: 760
  • Sugar: 1g
  • Sodium: 620mg
  • Fat: 35g
  • Saturated Fat: 19g
  • Carbohydrates: 55g
  • Fiber: 2g
  • Protein: 56g

This hands-off oven-roasted vanilla bean pumpkin butter avoids the burner completely. The steady heat transforms the puree and maple syrup, reducing the mixture until it becomes a dark, spiced spread that clings thickly to a spoon.

Dark reddish-brown vanilla bean pumpkin butter spread thickly over a slice of toasted bread resting on a light-colored plate

Why Roasting Beats the Stovetop

Fruit butters need evaporation to thicken. Boiling them on a burner guarantees a messy kitchen. An uncovered baking dish in the oven solves this instantly by maximizing the surface area and applying a steady heat that gently toasts the sugars without any sudden splatters. The maple and brown sugar caramelize slowly. The apple cider evaporates evenly. This leaves you with a concentrated toffee note that a fast stovetop simmer simply cannot replicate.

How to Make Oven-Roasted Pumpkin Butter

Combine the base ingredients. Grab a wide, shallow baking dish. I usually reach for a 9×9-inch ceramic pan. Whisk the pumpkin puree, apple cider, maple syrup, dark brown sugar, vanilla bean paste, cinnamon, ginger, nutmeg, cloves, and kosher salt until the mixture is completely uniform and pale orange.

Pale orange pumpkin mixture in a wide baking dish before roasting

The raw mixture needs to look completely smooth and wet before it hits the heat.

Roast and scrape. Bake the uncovered dish at 350°F (175°C) for 40 to 45 minutes. Pull the pan out every 15 minutes. Scrape down the sides and corners thoroughly with a rubber spatula so the edges do not scorch, because the sugars will burn if left sitting against the hot ceramic.

Thickened, dark brown roasted pumpkin butter in a baking dish after 45 minutes in the oven

Cool for texture. Let the dish sit at room temperature. Give it 30 minutes. The spread continues to tighten up as the heat escapes, meaning it will hold a clean line when you drag a spoon through the center.

Thick, smooth reddish-brown pumpkin butter being transferred into a glass jar with a serving spoon

Serving the Pumpkin Spread

Treat this exactly like a fruit jam. Spread it thickly over warm toast. My favorite way to eat this is swirled directly into plain morning oats, where the concentrated cinnamon and ginger act as a built-in seasoning.

Smooth, dark roasted vanilla bean pumpkin butter displayed in a glass jar with a spoon resting inside

Storage and Freezing

  • Fridge: Transfer the cooled butter to an airtight glass jar and keep it in the refrigerator for 3 to 4 days.
  • Freezer: Freeze the spread in a durable container for up to 3 months, then thaw it overnight in the fridge before serving.

Quick Questions About the Pumpkin Butter

Can I use pumpkin pie spice instead of individual spices?

Yes. Swap the cinnamon, ginger, nutmeg, and cloves for 2 teaspoons of a pre-mixed pumpkin pie spice blend.

Why is there liquid pooling around my finished butter?

The puree needs more time in the oven. Clear liquid means the apple cider has not fully evaporated, so return the pan to the heat for another 5 to 10 minutes until the spread holds its shape.

Trust the oven’s steady heat. Skip the messy stovetop entirely. This dark, richly spiced batch proves you do not need to babysit a boiling pot, so spoon it into a glass jar and save the recipe for a cleaner kitchen every autumn.

Print
clockclock iconcutlerycutlery iconflagflag iconfolderfolder iconinstagraminstagram iconpinterestpinterest iconfacebookfacebook iconprintprint iconsquaressquares iconheartheart iconheart solidheart solid icon
Thick, smooth reddish-brown pumpkin butter being transferred into a glass jar with a serving spoon

5 Stars 4 Stars 3 Stars 2 Stars 1 Star

No reviews

Oven-Roasted Vanilla Bean Pumpkin Butter

Recipe by Chloe Davis

Skip the messy, volcanic stovetop splatters entirely. This hands-off, oven-roasted version caramelizes the pumpkin puree into a deep mahogany spread, flecked with real vanilla bean and heavily spiced with warm aromatics.


  • Total Time80 minutes
  • Yield1 1/2 cups (serves 12) 1x

Find it on your board when it's time to cook

Ingredients

Scale

Pumpkin Base

  • 1 (15-ounce) can pumpkin puree (425g)
  • 1/2 cup apple cider (120ml)
  • 1/3 cup pure maple syrup (80ml)
  • 2 tablespoons dark brown sugar, packed (25g)
  • 1 teaspoon vanilla bean paste (5ml)

Spice Blend

  • 1 teaspoon ground cinnamon
  • 1/2 teaspoon ground ginger
  • 1/4 teaspoon freshly grated nutmeg
  • 1/8 teaspoon ground cloves
  • 1/4 teaspoon kosher salt


Instructions

  1. Prep the oven and pan: Preheat the oven to 350°F (175°C). Select a wide, shallow baking dish (like an 8×8-inch or 9×9-inch ceramic or glass pan)—the larger surface area speeds up evaporation and helps the mixture reduce evenly.
  2. Mix the ingredients: In the baking dish, whisk together the pumpkin puree, apple cider, maple syrup, dark brown sugar, vanilla bean paste, cinnamon, ginger, nutmeg, cloves, and kosher salt until completely smooth.
  3. Roast and reduce: Bake uncovered for 40 to 45 minutes. Remove the dish to carefully stir the mixture every 15 minutes, scraping down the sides. The pumpkin butter is done when it has darkened to a rich, caramelized mahogany color, reduced by about a third, and holds its shape on a spoon without weeping any clear liquid around the edges.
  4. Cool and store: Let the butter cool completely in the dish for about 30 minutes; it will continue to thicken slightly as its temperature drops. Transfer to a clean glass jar or airtight container. Store in the refrigerator for 3 to 4 days, or freeze for up to 3 months for longer storage.
Find it on your board when it's time to cook

Notes

  • Why it works: Roasting the puree in a wide dish instead of simmering it on the stove eliminates the dangerous, messy splattering typical of boiling fruit butters. The dry heat of the oven also actively caramelizes the maple and brown sugars for a richer, toffee-like depth that stovetop cooking can’t replicate.
  • Spice swap: If you prefer the convenience of a pre-mixed blend, you can substitute 2 teaspoons of pumpkin pie spice for the individual cinnamon, ginger, nutmeg, and cloves.

Nutrition (per serving — estimates)

Calories: 50 | Total Carbs: 12g (Fiber: 1g, Sugar: 10g) | Fat: 0g (Saturated: 0g) | Protein: 0g

Nutritional values are approximate, based on standard reference data (USDA FoodData Central). Actual values vary by brand and exact measurements. For precision, use a tracker like MyFitnessPal or Cronometer.

  • Prep Time: 5 minutes
  • Cooling Time: 30 minutes
  • Cook Time: 45 minutes
  • Category: Spreads
  • Method: Roasting
  • Cuisine: American

Nutrition

  • Serving Size: 2 tablespoons
  • Calories: 50
  • Sugar: 10g
  • Fat: 0g
  • Saturated Fat: 0g
  • Carbohydrates: 12g
  • Fiber: 1g
  • Protein: 0g

These salted maple brown butter apple blondies fold fresh diced apples directly into a thick brown sugar batter. I bake them slightly lower than standard so the edges stay golden while the center yields a dense, fudgy crumb with no wet spots.

Two salted maple brown butter apple blondies on a light plate showing a shiny glazed surface and dense centers

The Secret to Dense Apple Bars

Standard fruit bars often turn out soggy. The moisture from the apples pools in the middle. By dropping the oven temperature to 325°F, you give the fresh fruit time to soften and release its liquid slowly, which keeps the edges from drying out before the center fully sets. Apple butter brings deep spice flavor but adds extra water. An extra egg yolk provides the necessary fat to bind it. Combined with the dark brown sugar, that single yolk creates a rich structure that mimics a classic brownie base rather than a fluffy cake.

How to Make and Glaze the Batter

Melt the butter over medium heat. Watch the pan closely. It will foam and bubble before golden specks settle at the bottom, taking about 5 to 7 minutes to finish browning.

Browned butter in a small metal pot with light foam and dark specks at the bottom

The milk solids drop to the bottom and toast, creating the signature nutty aroma.

Pull it off the heat immediately. Let the butter cool for 10 minutes. I pour mine into a large glass mixing bowl right away because the residual heat of a metal pot will scorch the milk solids if left sitting.

Whisk the dark brown sugar and apple butter into the cooled butter. Add the whole eggs, the extra yolk, and the vanilla. Beat the wet ingredients vigorously until the mixture becomes smooth and glossy.

Switch to a rubber spatula. Fold the dry ingredients in gently. Once only a few streaks of flour remain, fold in most of the diced apples and the optional toasted pecans.

Folding diced apples and chopped pecans into dark blondie batter in a glass bowl with a silicone spatula

Spread this thick batter evenly into a parchment-lined 9×13-inch metal baking pan. Press the reserved apples across the surface. This ensures the fruit distributes evenly across the top instead of sinking to the bottom.

Unbaked blondie batter spread in a parchment-lined pan with diced apples scattered across the surface

Bake at 325°F for 35 to 42 minutes. Do not pull them early. You are looking for the edges to pull away from the pan and a toothpick inserted in the center to emerge with moist, sticky crumbs.

Baked apple blondies fresh from the oven showing golden surfaces and browned edges in a metal pan

Let the pan cool completely on a wire rack. Brown the remaining butter using the exact same visual cues as before. Whisk in the pure maple syrup, sifted powdered sugar, and cinnamon off the heat.

Pour the warm glaze quickly over the cooled blondies. Spread it evenly from edge to edge. Sprinkle generously with flaky sea salt while the icing is still wet so the crystals adhere firmly to the top.

Sliced squares of glazed apple blondies inside a lined baking pan finished with flaky sea salt

Let the glaze set at room temperature for at least 15 minutes before lifting the parchment overhang to slice the bars.

Slicing and Serving the Bars

These slice cleanest with a sharp chef’s knife wiped down between cuts. Lift the entire block out using the parchment overhang. Cut straight down rather than sawing through the dense crumb so the glaze stays intact.

Two pieces of glazed apple blondies sitting inside a parchment-lined baking pan

Storing and Freezing

  • Keep sliced bars in an airtight container at room temperature for up to 3 days.
  • Refrigerate the squares for up to 5 days if your kitchen runs warm.
  • To freeze, wrap individual slices tightly in plastic wrap and store them in a freezer bag for up to two months. Omit the flaky salt until serving because it will dissolve in the freezer.

Common Apple Blondie Questions

Do I have to peel the apples?

Yes, peel the fruit before dicing. Apple skins turn tough and papery when baked inside a dense batter, which ruins the chewy texture of the bars.

Can I bake this in a glass dish instead of metal?

Metal is strongly recommended because it conducts heat efficiently. If you must use a glass pan, you will likely need to extend the baking time by 5 to 10 minutes to ensure the center sets.

Stacked pieces of glazed brown butter apple blondies on a light plate

These dense squares are the most reliable way I know to serve fresh fruit to a crowd without worrying about a soggy pie crust. Serve them completely cooled so the deep molasses and spice flavors have time to fully develop.

Print
clockclock iconcutlerycutlery iconflagflag iconfolderfolder iconinstagraminstagram iconpinterestpinterest iconfacebookfacebook iconprintprint iconsquaressquares iconheartheart iconheart solidheart solid icon
Stacked pieces of glazed brown butter apple blondies on a light plate

5 Stars 4 Stars 3 Stars 2 Stars 1 Star

No reviews

Salted Maple Brown Butter Apple Blondies

Recipe by Chloe Davis

Apples, brown butter, and warm spices were made for each other, but the salted maple glaze is what makes these blondies impossible to stop eating. By folding the fresh apples directly into a chewy, dark-brown-sugar batter, this version ensures perfect texture in every bite without any soggy centers.


  • Total Time2 hours 17 minutes
  • Yield24 bars (serves 24) 1x

Find it on your board when it's time to cook

Ingredients

Scale

Apple Blondie Batter

  • 3/4 cup (1 1/2 sticks / 170g) unsalted butter
  • 1 1/2 cups (300g) packed dark brown sugar
  • 2/3 cup (160g) smooth apple butter
  • 2 large eggs plus 1 large egg yolk, room temperature
  • 2 teaspoons vanilla extract
  • 2 cups (240g) all-purpose flour
  • 1 1/2 teaspoons ground cinnamon
  • 1 teaspoon kosher salt
  • 1 teaspoon baking powder
  • 1/2 teaspoon ground ginger or cardamom
  • 3 medium firm-tart apples (such as Granny Smith or Honeycrisp), peeled, cored, and diced into 1/4-inch cubes (about 3 cups), divided
  • 3/4 cup (85g) chopped pecans, toasted (optional)

Salted Maple Glaze

  • 1/4 cup (1/2 stick / 56g) unsalted butter
  • 1/4 cup (60ml) pure maple syrup
  • 1 cup (120g) powdered sugar, sifted
  • 1/2 teaspoon ground cinnamon
  • Flaky sea salt (such as Maldon), for finishing


Instructions

  1. Prep the pan and oven: Preheat your oven to 325°F. Line a 9×13-inch metal baking pan with parchment paper, leaving a bit of overhang on the sides for easy removal later.
  2. Brown the butter: Place the 3/4 cup of butter in a medium saucepan over medium heat. Allow it to melt, then bubble and foam. Swirl the pan occasionally until you see golden brown specks settle at the bottom and it smells distinctly nutty, about 5 to 7 minutes. Immediately pour the browned butter into a large mixing bowl to stop the cooking process. Let it cool for 10 minutes.
  3. Mix the wet ingredients: Whisk the dark brown sugar and apple butter into the cooled browned butter. Add the whole eggs, the egg yolk, and the vanilla extract, whisking vigorously until the mixture becomes completely smooth, glossy, and slightly lighter in color.
  4. Fold in the dry: Add the flour, the 1 1/2 teaspoons of cinnamon, kosher salt, baking powder, and ginger or cardamom to the bowl. Use a rubber spatula to gently fold the dry ingredients into the wet until just a few streaks of flour remain.
  5. Add the apples: Fold in about 2 1/2 cups of the diced apples and the toasted pecans (if using), reserving the remaining 1/2 cup of apples. Spread the thick batter evenly into your prepared baking pan, smoothing the top. Scatter the reserved apples evenly over the surface, pressing them in lightly.
  6. Bake: Bake for 35 to 42 minutes. You are looking for the edges to be golden and pull slightly away from the pan, and a toothpick inserted into the center to come out with moist, sticky crumbs (but no wet batter). Transfer the pan to a wire rack and let the blondies cool completely in the pan.
  7. Glaze and finish: Once the blondies are cool, make the glaze. Brown the remaining 1/4 cup of butter in a small saucepan over medium heat just as you did before. Remove from the heat and immediately whisk in the maple syrup, powdered sugar, and the 1/2 teaspoon of cinnamon until entirely smooth. Pour the warm glaze over the cooled blondies, using an offset spatula to spread it evenly.
  8. Salt and slice: While the glaze is still wet, sprinkle generously with flaky sea salt. Let the glaze set for at least 15 minutes at room temperature before using the parchment overhang to lift the blondies out and slice them into bars.
Find it on your board when it's time to cook

Notes

  • Why it works: Baking at 325°F instead of standard 350°F is the secret to perfect fruit-heavy blondies. The lower, slower heat gives the apples time to soften and release their moisture without drying out the edges or leaving a raw, doughy center.
  • Extra yolk for chew: Using dark brown sugar and adding one extra egg yolk creates a richer, denser crumb that perfectly mimics a classic fudgy brownie, offsetting the moisture of the apple butter.
  • Storage: Store the sliced bars in an airtight container at room temperature for up to 3 days, or in the refrigerator for up to 5 days.

Nutrition (per serving — estimates)

Calories: 235 | Total Carbs: 32g (Fiber: 1g, Sugar: 24g) | Fat: 11g (Saturated: 5g) | Protein: 2g

Nutritional values are approximate, based on standard reference data (USDA FoodData Central), and these estimates include the optional toasted pecans. Actual values vary by brand, exact measurements, and whether the pecans are omitted. For precision, use a tracker like MyFitnessPal or Cronometer.

  • Prep Time: 20 minutes
  • Cooling & Setting Time: 1 hour 15 minutes
  • Cook Time: 42 minutes
  • Category: Dessert
  • Method: Baking
  • Cuisine: American

Nutrition

  • Serving Size: 1 bar
  • Calories: 235
  • Sugar: 24g
  • Fat: 11g
  • Saturated Fat: 5g
  • Carbohydrates: 32g
  • Fiber: 1g
  • Protein: 2g

These baked apple cider doughnuts deliver that spiced orchard flavor without the heavy cleanup of a deep fryer. I rely on neutral oil and freshly grated apples to keep the interior crumb spongy and visibly moist beneath the warm glaze.

Close up of a glazed baked apple cider doughnut with creamy maple icing and chopped pecans on a light plate

Why This Cider Doughnut Batter Works

Skip the deep fryer. Keep the dairy butter out of the batter. Using a neutral cooking oil instead of dairy fat guarantees the interior remains exceptionally tender and won’t turn crumbly the next morning.

Fresh fruit provides the second layer of insurance. Grating a Granny Smith apple directly into the mix adds structural moisture without watering down the spices. We still reduce real cider for flavor, but the fresh apple shreds do the textural work.

How to Make Baked Apple Cider Doughnuts

Pour two cups of cider into a saucepan. Turn the heat to medium-high. You are looking for exactly ½ cup of dark, sticky syrup after about 18 to 22 minutes, because pulling it early leaves excess water that makes the batter dense.

Apple cider boiling down to a dark amber syrup in a small metal saucepan

Watch the bubbles closely; they will thicken significantly as the water evaporates.

Whisk the dry ingredients thoroughly to break up any brown sugar clumps. Whisk the cooled cider syrup with the oil, apple butter, eggs, and vanilla. Pour the wet mixture into the dry flour blend. Stop folding when you still see a few thin streaks of white flour in the bowl.

Grate the apple. Squeeze it gently. I always press the shreds into a paper towel to remove surface juice, preventing wet, gummy pockets in the finished crumb. Fold the fruit in briefly, pipe the batter into greased doughnut pans until three-quarters full, and bake at 375°F (190°C) for 10 to 12 minutes.

Puffed golden baked apple cider doughnuts sitting in a six-cavity metal pan

Melt the butter over medium heat. Swirl the pan continuously. Watch for the foaming to subside and the milk solids to toast, which takes about 3 to 4 minutes before you need to pull it off the hot burner.

Foaming golden brown butter inside a metal saucepan with a whisk

Whisk in the powdered sugar, maple syrup, and vanilla until smooth.

Dip each cooled ring. Sprinkle the toppings immediately. If you wait even a minute before garnishing, the warm maple icing will set and the toasted pecans will slide right off.

Baked apple cider doughnut covered in creamy maple glaze with chopped pecans and salt crystals

Doughnut Storage and Make-Ahead

  • Seal any leftovers inside a lidded container on the counter for up to three days.
  • I prefer to glaze only what I plan to serve that day, wrapping the plain baked rings tightly in plastic wrap so they stay soft until I need them.

Quick Doughnut FAQs

Can I use regular apple juice instead of cider?

No, standard apple juice lacks the acidity and concentrated spice profile needed for this recipe. Stick to unfiltered cider so the reduction step builds enough flavor.

Do I absolutely need a piping bag?

A standard zip-top plastic bag with one bottom corner snipped off does the job. Squeezing the sticky batter directly into the narrow pan cavities gives you far more control than trying to spoon it.

Serving Your Glazed Doughnuts

Serve these slightly warm from the final dip, or at room temperature alongside a strong cup of dark roast coffee to cut through the sweetness of the maple topping.

Stacked baked apple cider doughnuts on a light plate with chopped pecans and maple glaze

These spiced rings are best enjoyed on a crisp weekend morning when you have the time to savor that nutty, salted maple finish.

Print
clockclock iconcutlerycutlery iconflagflag iconfolderfolder iconinstagraminstagram iconpinterestpinterest iconfacebookfacebook iconprintprint iconsquaressquares iconheartheart iconheart solidheart solid icon
Close up of a glazed baked apple cider doughnut with creamy maple icing and chopped pecans on a light plate

5 Stars 4 Stars 3 Stars 2 Stars 1 Star

No reviews

Baked Apple Cider Doughnuts with Salted Maple Pecan Glaze

Recipe by Chloe Davis

These baked doughnuts deliver everything you love about a fall orchard trip, without the mess of deep frying. Upgrading to a browned-butter maple glaze crowned with toasted pecans and flaky sea salt gives them a gorgeous bakery-style finish, while substituting oil for butter in the batter guarantees a soft, moist crumb that won’t dry out the next day.


  • Total Time76 minutes
  • Yield12 doughnuts (serves 12) 1x

Find it on your board when it's time to cook

Ingredients

Scale

Apple Cider Doughnuts

  • 2 cups apple cider (reduces to ½ cup)
  • 2 cups (250g) all-purpose flour
  • ¾ cup (150g) light brown sugar, packed
  • 2 teaspoons baking powder
  • 1 ½ teaspoons ground cinnamon
  • ½ teaspoon ground cardamom (or nutmeg)
  • ½ teaspoon baking soda
  • ¾ teaspoon kosher salt
  • ¼ cup (60ml) neutral oil (such as canola or avocado)
  • ⅓ cup (80g) smooth apple butter
  • 2 large eggs, room temperature
  • 2 teaspoons vanilla extract
  • 1 medium Granny Smith apple, peeled and coarsely grated

Salted Maple Pecan Glaze

  • 4 tablespoons (56g) unsalted butter
  • 1 cup (120g) powdered sugar, sifted
  • ⅓ cup (80ml) pure maple syrup
  • 1 teaspoon vanilla extract
  • ⅓ cup (35g) finely chopped pecans, toasted
  • Flaky sea salt, for sprinkling


Instructions

  1. Reduce the cider: Pour the 2 cups of apple cider into a small saucepan over medium-high heat. Bring to a boil, then reduce the heat to maintain a steady simmer. Cook for 18 to 22 minutes, or until the liquid has reduced to exactly ½ cup. Pour into a heat-proof measuring cup and let cool to room temperature.
  2. Preheat and prep: Preheat your oven to 375°F (190°C). Thoroughly grease two 6-cup doughnut pans with nonstick baking spray.
  3. Mix the dry ingredients: In a large bowl, whisk together the flour, brown sugar, baking powder, cinnamon, cardamom, baking soda, and kosher salt. Break up any brown sugar clumps with your fingers.
  4. Mix the wet ingredients: In a medium bowl, whisk the cooled ½ cup of reduced cider, oil, apple butter, eggs, and vanilla extract until completely smooth.
  5. Combine the batter: Pour the wet ingredients into the dry ingredients and gently fold with a spatula until just a few flour streaks remain. Take your grated apple, squeeze it gently over a paper towel to remove excess juice, and fold the apple shreds into the batter. Do not overmix.
  6. Bake: Transfer the batter to a large zip-top bag, snip off the corner, and pipe it evenly into the doughnut cavities, filling them about ¾ full. Bake for 10 to 12 minutes until the doughnuts are puffed, set, and spring back lightly when touched. Let them cool in the pans for 5 minutes before turning them out onto a wire rack to cool completely.
  7. Brown the butter: In a small saucepan over medium heat, melt the 4 tablespoons of butter. Swirl the pan continuously for 3 to 4 minutes until the butter foams, turns golden brown, and smells deeply nutty. Immediately remove from heat.
  8. Finish the glaze: Whisk the maple syrup, powdered sugar, and vanilla extract into the browned butter until perfectly smooth. Dip the top half of each cooled doughnut into the warm glaze. Immediately sprinkle the tops with the toasted pecans and a pinch of flaky sea salt before the glaze sets.
Find it on your board when it's time to cook

Notes

  • Why it works: Swapping the standard butter for a neutral oil in the batter is the secret to a much moister, tender baked doughnut that stays remarkably soft for days.
  • Grate, don’t chop: Grating the apple and lightly squeezing out the moisture ensures the fruit incorporates beautifully into the dough without creating soggy, wet pockets during baking.
  • Storage: These are phenomenal on day one, but if you have leftovers, store them in an airtight container at room temperature for up to 3 days.

Nutrition (per serving — estimates)

Calories: 336 | Total Carbs: 54g (Fiber: 1g, Sugar: 35g) | Fat: 12g (Saturated: 3g) | Protein: 3g

Nutritional values are approximate, based on standard reference data (USDA FoodData Central). Actual values vary by brand and exact measurements. For precision, use a tracker like MyFitnessPal or Cronometer.

  • Prep Time: 25 minutes
  • Cooling Time: 15 minutes
  • Cook Time: 36 minutes
  • Category: Breakfast, Dessert
  • Method: Baking
  • Cuisine: American

Nutrition

  • Serving Size: 1 doughnut
  • Calories: 336
  • Sugar: 35g
  • Fat: 12g
  • Saturated Fat: 3g
  • Carbohydrates: 54g
  • Fiber: 1g
  • Protein: 3g

A deeply simmered meat sauce is the secret to these roasted garlic spaghetti squash lasagna boats. Roasting the shells face-down evaporates excess moisture, giving you tender, steam-free strands that hold their shape under the heavy ricotta and crispy panko.

Four roasted garlic spaghetti squash lasagna boats topped with melted cheese and golden panko on a light platter

Why These Lasagna Boats Never Turn Out Watery

Stuffed squash often turns into a soupy mess. We fix the texture. Roasting the halves face-down drives off the natural water that microwaving traps inside.

I rely on an egg in the ricotta. The egg is crucial. It acts as a binder that holds the dairy together so the cheese won’t separate and pool in the bottom of the hot shells.

Simmering the sausage ragù is critical. You must reduce it. Cooking the crushed tomatoes for 20 minutes ensures the sauce is exceptionally thick and the layers stay distinct.

Building Your Spaghetti Squash Lasagna Boats

Dry out the squash. Rub the halves with oil. Season them heavily. Roasting them cut-side down for 35 to 40 minutes at 400°F alongside a foil packet of garlic softens the flesh while venting the moisture.

Golden roasted spaghetti squash halves on a baking sheet beside a foil-wrapped garlic head

Concentrate the ragù. Brown the sausage and onions. Break the meat apart. Stir in the tomato paste until it darkens, then simmer the crushed tomatoes for 15 to 20 minutes until the sauce holds a trail behind your spoon.

Thick Italian sausage meat sauce simmering in a black skillet with visible diced onions

Squeeze the garlic. Unwrap the foil carefully. The steam is sharp. Squeeze the soft roasted garlic cloves directly into the thickened meat sauce off the heat, stirring well so the sweet garlic melts into the savory sausage.

Layer the fillings. Flip the warm shells face-up. Pull the strands away. I use a standard dinner fork to loosen the squash while keeping it inside the shell, creating a structured nest for the ricotta, meat sauce, and mozzarella.

Spaghetti squash halves on a baking tray stuffed with ricotta, meat sauce, and shredded mozzarella cheese

Bake for crunch. Toss the panko and Parmesan. Sprinkle it evenly. Bake uncovered for 12 to 15 minutes, pulling them exactly when the cheese bubbles vigorously and the breadcrumbs turn a deep, even golden brown.

Baked spaghetti squash lasagna boats on a white plate with melted cheese and golden panko crumbs

Planning Your Lasagna Boats Ahead

  • Pre-cook the components: Roast the squash and mash the garlic. Simmer the meat sauce. Do this up to 2 days in advance to break the prep work into manageable steps.
  • Store smartly: Keep the cooked components separate. Use airtight containers. Storing the elements individually in the refrigerator prevents the delicate squash strands from turning mushy before baking.
  • Bake from cold: Assemble the chilled ingredients. Add extra baking time. Leaving the boats in the oven for an additional 5 to 10 minutes ensures the thick center heats through completely.

Common Spaghetti Squash Questions

Can I use ground beef instead of Italian sausage?

Yes, but you will need to add extra seasoning. Italian sausage brings built-in fennel, garlic, and salt, so if you swap in beef, increase the oregano and add a generous pinch of red pepper flakes.

Why is my spaghetti squash still hard after 40 minutes?

Squash sizes vary significantly. If the skin doesn’t yield to a firm poke, leave it in the oven for another 10 minutes until the strands pull away easily with a fork.

Let the boats cool slightly before serving so the layers set up beautifully. My favorite part of this dinner is dragging a fork through that crispy panko crust straight into the rich ricotta underneath.

Print
clockclock iconcutlerycutlery iconflagflag iconfolderfolder iconinstagraminstagram iconpinterestpinterest iconfacebookfacebook iconprintprint iconsquaressquares iconheartheart iconheart solidheart solid icon
Baked spaghetti squash lasagna boats on a white plate with melted cheese and golden panko crumbs

5 Stars 4 Stars 3 Stars 2 Stars 1 Star

No reviews

Roasted Garlic Spaghetti Squash Lasagna Boats with Crispy Panko

Recipe by Chloe Davis

We fixed the biggest problem with stuffed spaghetti squash—watery sauce—by roasting the squash first and simmering the ragù until deeply concentrated. Sweet, sticky roasted garlic gets folded directly into the rich Italian sausage sauce, while a crispy parmesan-panko crown adds the perfect crunch to contrast the creamy ricotta and tender squash strands.


  • Total Time1 hour 15 minutes
  • Yield4 boats (serves 4) 1x

Find it on your board when it's time to cook

Ingredients

Scale

The Squash & Meat Sauce

  • 2 medium spaghetti squash
  • 1 whole head garlic
  • 2 tablespoons extra-virgin olive oil (divided), plus more for drizzling
  • 1 pound (454g) ground sweet or spicy Italian sausage (casings removed)
  • 1 medium yellow onion, diced
  • 2 tablespoons tomato paste
  • 1 (28-ounce / 794g) can crushed tomatoes
  • 1 teaspoon dried oregano
  • Kosher salt and freshly ground black pepper

The Cheese Filling & Topping

  • 1/2 cup (120g) whole milk ricotta cheese
  • 1 large egg
  • 1/2 cup fresh basil, chopped
  • 2 cups (226g) shredded low-moisture mozzarella cheese (divided)
  • 1/3 cup (20g) panko breadcrumbs
  • 1/4 cup (25g) grated Parmesan cheese


Instructions

  1. Roast the squash and garlic: Preheat the oven to 400°F (200°C). Cut the spaghetti squash in half lengthwise and scoop out the seeds. Rub 1 tablespoon of olive oil over the cut sides and season generously with salt and pepper. Place face-down on a rimmed baking sheet. Slice the very top off the head of garlic to expose the cloves, place on a small square of foil, drizzle with a few drops of oil, and wrap tightly. Place the foil packet on the baking sheet with the squash. Roast for 35–40 minutes, until the squash yields to a firm poke and the garlic is soft.
  2. Simmer the meat sauce: While the squash roasts, heat the remaining 1 tablespoon of olive oil in a large skillet over medium-high heat. Add the sausage and onion, browning the meat and breaking it into small crumbles for 6–8 minutes. Stir in the tomato paste and cook for 1 minute until darkened. Pour in the crushed tomatoes and oregano. Reduce the heat to medium-low and simmer uncovered for 15–20 minutes until the sauce is very thick and deeply colored.
  3. Mix the ricotta layer: In a small bowl, whisk together the ricotta cheese, egg, chopped basil, and 1/2 cup of the mozzarella cheese. Season with a pinch of salt and pepper.
  4. Finish the sauce: Once the garlic is done roasting, carefully unwrap the foil and squeeze the softened cloves directly into the thickened meat sauce. Stir well to incorporate the garlic, then remove the skillet from the heat.
  5. Assemble the boats: Flip the roasted squash halves face-up. Using a fork, gently pull the squash strands away from the edges to loosen them, leaving them inside the shells. Dollop the ricotta mixture evenly over the warm squash strands in each boat. Spoon the thick meat sauce heavily over the ricotta, then top with the remaining 1 1/2 cups of mozzarella cheese.
  6. Top and bake: In a small bowl, toss the panko breadcrumbs and Parmesan cheese with a tiny drizzle of olive oil so the crumbs are lightly moistened. Sprinkle this mixture evenly over the mozzarella. Bake uncovered for 12–15 minutes, or until the cheese is bubbling and the panko crown is golden brown and crispy. Let rest for 5 minutes before serving.
Find it on your board when it's time to cook

Notes

  • Why it works: Microwaving spaghetti squash traps its natural water, leading to a soupy final dish. Roasting the squash halves face-down evaporates excess moisture, while swapping a standard milk-thinned cheese layer for an egg-bound ricotta prevents the filling from separating in the oven.
  • Make-ahead: You can roast the squash, mash the garlic, and simmer the meat sauce up to 2 days in advance. Store them separately in the refrigerator, then assemble and bake (adding about 5–10 extra minutes to the final oven time to heat through).

Nutrition (per serving — estimates)

Calories: 790 | Total Carbs: 42g (Fiber: 10g, Sugar: 16g) | Fat: 50g (Saturated: 22g) | Protein: 42g

Nutritional values are approximate, based on standard reference data (USDA FoodData Central). Actual values vary by brand and exact measurements. For precision, use a tracker like MyFitnessPal or Cronometer.

  • Prep Time: 20 minutes
  • Cook Time: 55 minutes
  • Category: Main Course
  • Method: Roasting
  • Cuisine: Italian-American

Nutrition

  • Serving Size: 1 stuffed boat half
  • Calories: 790
  • Sugar: 16g
  • Fat: 50g
  • Saturated Fat: 22g
  • Carbohydrates: 42g
  • Fiber: 10g
  • Protein: 42g

This Honeycrisp apple and feta salad delivers massive autumn flavor with a loud, shattering crunch on every forkful. I separate the baking and stovetop prep so the meat crisps cleanly and the glazed pecans never burn.

Honeycrisp apple and feta salad ready to serve in a wide bowl with avocado, pomegranate, and crunchy nuts

Separating the Glazed Nuts and Prosciutto

We want maximum texture. We do not want a messy, fused baking sheet. By moving the pecans and pumpkin seeds to the stovetop, you control the glaze completely. The oven handles the meat alone. It renders the fat until the prosciutto turns glass-brittle. You get the salty snap and the sweet crunch without the two steaming each other into a sticky pile.

Building the Honeycrisp Apple and Feta Salad

Render the prosciutto. Lay the slices completely flat. Do not overlap them. Bake at 400°F for exactly 10 to 12 minutes until the fat shrinks and the meat turns deeply colored. Move them to a paper towel immediately. Let the slices cool completely. They will shatter easily under your fingers once the fat sets.

Crispy browned prosciutto slices resting in a dark cooking pan

Toast, then glaze. Start the nuts in a dry skillet. Toast them for 2 to 3 minutes. Wait for the nutty aroma before dropping the heat and adding the maple syrup, cinnamon, and cayenne. Stir constantly for 1 to 2 minutes. Sugars transition from caramelized to burnt in seconds. Slide the nuts onto parchment the moment the syrup clings without pooling.

Candied pecans and pumpkin seeds cooling on parchment paper

Spread the nuts quickly before the maple glaze hardens.

Shake the dressing. Grab a mason jar. Measure the ingredients straight into it. I always shake the jar for 15 seconds rather than whisking, because the tight seal forces the oil and vinegar into a creamy, stable emulsion.

Creamy brown apple butter vinaigrette emulsified inside a glass jar

Layer the greens. Use a wide, shallow bowl. Avoid deep salad spinners. A wide surface area stops the delicate arugula and spring mix from crushing under the weight of the heavier ingredients. Scatter the sliced apples, diced avocado, and bright pomegranate arils evenly across the surface.

Sliced apples, avocado, and pomegranate arils layered over mixed greens

Dress just before eating. Drizzle half the jar over the greens. Toss gently to coat the leaves. Scatter the crumbled feta, broken prosciutto pieces, and glazed nuts over the very top so they retain their intense crunch.

Dressed Honeycrisp apple salad on a wide serving platter garnished with feta and nuts

Prep and Storage Guidelines

  • You can crisp the meat and candy the nuts up to three days ahead. Store them in airtight containers at room temperature.
  • Keep the shaken vinaigrette in the refrigerator, but let it sit on the counter for ten minutes and shake it hard before pouring.
  • Do not slice the apples early. Keep the avocado whole. They will oxidize and turn brown if prepped in advance.

Apple and Feta Salad FAQs

Can I use a different apple variety?

Yes, as long as it is firm and crisp. Pink Lady or Fuji apples provide the same tight snap and sweet-tart balance that holds up against the salty feta.

Can I substitute the prosciutto?

Thick-cut bacon works well in place of the prosciutto. Bake it until the fat is fully rendered, then drain and chop it before scattering over the greens.

I bring this salad out the moment the weather turns cold. The crisp prosciutto and glazed nuts always disappear fast. Serve it immediately while the greens are still perky, and pass the extra dressing around the table.

Print
clockclock iconcutlerycutlery iconflagflag iconfolderfolder iconinstagraminstagram iconpinterestpinterest iconfacebookfacebook iconprintprint iconsquaressquares iconheartheart iconheart solidheart solid icon
Dressed Honeycrisp apple salad on a wide serving platter garnished with feta and nuts

5 Stars 4 Stars 3 Stars 2 Stars 1 Star

No reviews

Honeycrisp Apple and Feta Salad with Apple Butter Vinaigrette

Recipe by Chloe Davis

This crisp, vibrant autumn salad pairs sweet Honeycrisp apples and salty feta with an intensely flavorful apple butter vinaigrette. By crisping the prosciutto in the oven and candying the spicy maple nuts on the stovetop, you get the perfect savory crunch in every bite without any sticky sheet-pan messes.


  • Total Time27 minutes
  • Yield1 large salad (serves 6) 1x

Find it on your board when it's time to cook

Ingredients

Scale

Candied Nuts & Prosciutto

  • 4 oz (115g) thinly sliced prosciutto
  • 1/2 cup (55g) raw pecan halves
  • 1/4 cup (35g) raw pumpkin seeds (pepitas)
  • 1 1/2 tablespoons maple syrup
  • 1/2 teaspoon ground cinnamon
  • 1/4 teaspoon cayenne pepper
  • Pinch of flaky sea salt

Apple Butter Vinaigrette

The Salad

  • 8 cups (about 8 oz / 225g) mixed greens (half baby arugula, half spring mix)
  • 2 Honeycrisp apples, cored and thinly sliced
  • 1 large avocado, pitted and diced
  • 1/2 cup (85g) pomegranate arils
  • 4 oz (115g) feta cheese, crumbled


Instructions

  1. Crisp the prosciutto: Preheat the oven to 400°F (200°C). Line a rimmed baking sheet with parchment paper. Lay the prosciutto slices flat in a single, even layer. Bake for 10 to 12 minutes, or until the fat renders and the meat feels crisp. Transfer the slices to a paper towel-lined plate to drain (they will shatter easily once completely cool). Crumble into bite-sized pieces.
  2. Candy the nuts: While the prosciutto bakes, heat a medium nonstick skillet over medium heat. Add the pecans and pumpkin seeds, toasting them dry for 2 to 3 minutes until fragrant. Reduce the heat to medium-low. Drizzle in the maple syrup, cinnamon, and cayenne pepper. Stir constantly for 1 to 2 minutes until the nuts are heavily glazed and sticky. Transfer to a piece of parchment paper, sprinkle with flaky sea salt, and let cool completely.
  3. Mix the vinaigrette: In a mason jar with a tight-fitting lid, combine the olive oil, apple cider vinegar, apple butter, Dijon mustard, minced shallot, maple syrup, kosher salt, and black pepper. Shake vigorously for about 15 seconds until fully emulsified and creamy.
  4. Assemble the salad: In a large, wide serving bowl, build a fluffy bed of the mixed greens. Top evenly with the sliced apples, diced avocado, and pomegranate arils.
  5. Toss and serve: Just before serving, drizzle half of the vinaigrette over the salad and toss gently to coat the greens. Scatter the crumbled feta, broken crispy prosciutto, and glazed nuts over the top. Serve immediately, passing the remaining dressing on the side.
Find it on your board when it's time to cook

Notes

  • Why it works: Separating the prosciutto (oven) from the maple-glazed nuts (stovetop) prevents the meat from steaming in the syrup runoff, ensuring perfectly shattered prosciutto and evenly coated, unburnt nuts in less time.
  • Make-ahead strategy: You can crisp the prosciutto, candy the nuts, and mix the dressing up to 3 days in advance (store the garnishes at room temperature and the dressing in the fridge). Wait to slice the apples and avocado until just before serving so they stay bright and crisp.

Nutrition (per serving — estimates)

Calories: 440 | Total Carbs: 25g (Fiber: 6g, Sugar: 15g) | Fat: 33g (Saturated: 7g) | Protein: 11g

Nutritional values are approximate, based on standard reference data (USDA FoodData Central). Actual values vary by brand and exact measurements. For precision, use a tracker like MyFitnessPal or Cronometer.

  • Prep Time: 15 minutes
  • Cook Time: 12 minutes
  • Category: Salad
  • Method: Baking and Stovetop
  • Cuisine: American

Nutrition

  • Serving Size: 1/6 of recipe
  • Calories: 440
  • Sugar: 15g
  • Fat: 33g
  • Saturated Fat: 7g
  • Carbohydrates: 25g
  • Fiber: 6g
  • Protein: 11g

This Smoky Apple Cider Margarita balances crisp autumn fruit with mezcal, finishing with a sharp, fiery sting on your lips from the spiced rim. I skip heavy syrups and use a dash of orange bitters to keep the drink bright rather than cloying.

A rocks glass holding an amber cocktail and ice, edged with a red chili rim and garnished with apple slices and rosemary

Why the Orange Bitters Matter

Most fall cocktails lean too sweet. This one stays grounded. Dialing back the cider and adding a single dash of orange bitters prevents the drink from tasting like spiked fruit juice, bridging the gap between the heavy smoke of the mezcal and the natural sugar of the apples.

Mixing the Smoky Apple Cider Margarita

Prep your glass first. Wet the edge with maple syrup. The thick syrup holds the chili-lime seasoning, cinnamon, and flaky sea salt much better than a standard citrus wedge, ensuring the spices stay on the glass rather than slipping into the drink.

I always taste the apple cider before pouring. Brands vary widely in sweetness. Knowing your cider’s sugar content upfront tells you exactly how the final balance will lean, giving you the chance to hold back a drop of the maple syrup if needed.

Fill your shaker halfway with ice. Pour in the liquid ingredients. Seal the tin tightly and shake vigorously for 15 to 20 seconds, watching for the outside of the metal to become heavily frosted to guarantee the drink is properly chilled and diluted.

An open metal cocktail shaker filled with ice and a pale amber liquid showing a light layer of foam on top

Fill your rimmed glass with fresh ice. Grab a metal strainer. Pour the cocktail over the new ice cubes to keep the drink cold without watering it down with the broken shards from the shaker.

Pouring an amber cocktail through a metal strainer into a rocks glass filled with fresh ice and edged with a spiced rim

Fan the thin apple slices. Tuck them gently against the ice. For the aromatic finish, carefully pass a lighter flame over the fresh rosemary sprig for 3 to 5 seconds until it lightly smokes, and you must extinguish the flame completely and ensure there are no glowing embers before dropping it into your glass.

Serving the Margarita

Serve the cocktail immediately. The chilled amber liquid warms up quickly. The combination of the lightly smoked rosemary and the chili-lime rim gives the drink a strong aromatic presence that fades if left sitting for too long.

A finished amber margarita with a chili-spiced rim, fresh apple slices, and a rosemary sprig tucked into the ice

Prepping a Pitcher Ahead of Time

  • To serve eight, combine 3 cups cider, 2 cups mezcal, 3/4 cup lime juice, 1/2 cup orange liqueur, 4 tablespoons maple syrup, and 8 dashes of bitters in a large pitcher.
  • Keep the mixed pitcher covered in the refrigerator for up to 24 hours.
  • Stir the liquid well right before pouring, and always wait to rim the glasses and add the ice until you are ready to serve.

Smoky Apple Cider Margarita FAQs

Can I use reposado tequila instead of mezcal?

Yes, you can easily make this substitution. Reposado tequila provides a smoother, less earthy base if you prefer to avoid the heavy smoke of mezcal.

What can I use instead of orange bitters?

Angostura bitters work in a pinch. They bring more baking spice notes rather than citrus, but they still successfully bridge the gap between the spirits and the fruit juice.

I mix this specific cocktail for guests when the autumn evenings finally turn sharp and cold. The lingering smoke and the bite of the chili rim warm you up immediately from the inside out.

Print
clockclock iconcutlerycutlery iconflagflag iconfolderfolder iconinstagraminstagram iconpinterestpinterest iconfacebookfacebook iconprintprint iconsquaressquares iconheartheart iconheart solidheart solid icon
A rocks glass holding an amber cocktail and ice, edged with a red chili rim and garnished with apple slices and rosemary

5 Stars 4 Stars 3 Stars 2 Stars 1 Star

No reviews

Smoky Apple Cider Margarita with Tajín-Cinnamon Rim

Recipe by Chloe Davis

This fall cocktail balances the sweet, crisp notes of apple cider with the earthy smoke of mezcal, all set off by a fiery, sweet-and-salty Tajín rim. Adding a dash of orange bitters and a proper pour of fresh lime juice keeps the drink bright and complex rather than overly sweet.


  • Total Time5 minutes
  • Yield1 drink (serves 1) 1x

Find it on your board when it's time to cook

Ingredients

Scale

Spiced Rim

  • 1 tablespoon Tajín (chili-lime seasoning)
  • 1 tablespoon cinnamon sugar
  • 1/2 teaspoon flaky sea salt
  • 1 teaspoon maple syrup (for rimming)

The Cocktail

  • 3 ounces (90 ml) unfiltered apple cider
  • 2 ounces (60 ml) mezcal (or reposado tequila for less smoke)
  • 3/4 ounce (22 ml) fresh lime juice
  • 1/2 ounce (15 ml) orange liqueur (such as Cointreau or Triple Sec)
  • 1/4 ounce (7 ml) maple syrup
  • 1 dash orange bitters

Garnish

  • 1 fresh rosemary sprig
  • Thin apple slices


Instructions

  1. Prep the glass: Pour the 1 teaspoon of maple syrup onto a small plate. On a separate small plate, whisk together the Tajín, cinnamon sugar, and flaky sea salt. Dip the rim of a rocks glass first into the maple syrup, then into the spiced sugar mixture to coat evenly. Set aside.
  2. Shake the cocktail: Fill a cocktail shaker halfway with ice. Add the apple cider, mezcal, fresh lime juice, orange liqueur, the remaining 1/4 ounce of maple syrup, and orange bitters. Seal the shaker and shake vigorously for 15 to 20 seconds, until the outside of the shaker is heavily frosted.
  3. Strain and serve: Fill the rimmed glass with fresh ice. Strain the cocktail over the ice.
  4. Garnish and smoke: Fan the apple slices and tuck them into the drink. For an aromatic finish, carefully pass a lighter flame over the rosemary sprig for 3 to 5 seconds until it lightly smokes. Extinguish the flame completely and ensure there are no glowing embers before dropping it into the glass.
Find it on your board when it's time to cook

Notes

  • Why it works: Dialing back the cider slightly and adding a dash of orange bitters prevents the cocktail from tasting like spiked fruit juice. The bitters bridge the gap between the heavy smoke of the mezcal and the sweet apples.
  • Pitcher variation: To serve eight, mix 3 cups cider, 2 cups mezcal, 3/4 cup lime juice, 1/2 cup orange liqueur, 4 tablespoons maple syrup, and 8 dashes of bitters in a large pitcher. Keep refrigerated and stir well before pouring over ice.

Nutrition (per serving — estimates)

Calories: 265 | Total Carbs: 25g (Fiber: 1g, Sugar: 21g) | Fat: 0g (Saturated: 0g) | Protein: 0g

Note: The total calorie count includes approximately 165 calories from alcohol, which are not reflected in the carbohydrate, fat, or protein values.

Nutritional values are approximate, based on standard reference data (USDA FoodData Central). Actual values vary by brand and exact measurements. For precision, use a tracker like MyFitnessPal or Cronometer.

  • Prep Time: 5 minutes
  • Cook Time: 0 minutes
  • Category: Drinks
  • Method: Shaken
  • Cuisine: American

Nutrition

  • Serving Size: 1 cocktail
  • Calories: 265
  • Sugar: 21g
  • Fat: 0g
  • Saturated Fat: 0g
  • Carbohydrates: 25g
  • Fiber: 1g
  • Protein: 0g

These sweet chili chicken meal prep bowls deliver deep savory heat and crisp vegetables without a mountain of dishes. Using boneless thighs guarantees the meat stays tender in the microwave, while a thick, glossy sauce clings to every single bite.

Glass bowl filled with sweet chili chicken, pineapple chunks, broccoli florets, and coconut rice

The Strategy Behind the Skillet

White meat turns chalky after a day in the refrigerator. Dark meat solves this problem entirely. By utilizing thighs, the protein remains tender through the reheating process. You also build the entire dish in a single heavy pan. Dropping the vegetables in right after the sear lifts the browned bits off the metal, infusing the vegetables with flavor before the sauce even hits them.

Building the Sweet Chili Chicken

Start the coconut rice. Rinse the grains thoroughly. Watch for the water to run completely clear. This crucial step washes away the surface starch that causes clumping in the container. Bring the liquid to a rapid boil, drop the heat to the lowest setting, and let it simmer tightly covered.

Sear the chicken aggressively. Drop the diced meat into hot avocado oil. I leave the pieces completely alone for three full minutes to establish a solid crust. Stirring too early rips the meat, leaves it pale, and prevents the pan from developing a rich fond. Turn the pieces until they reach an internal temperature of 165°F (74°C).

Diced chicken browning in a wide skillet

Letting the meat sear undisturbed creates the crust.

Steam the broccoli. Toss the florets straight into the pan. Pour in the reserved pineapple juice. Trapping the steam with a tight lid for three minutes gives you vibrant green vegetables that still carry a sharp snap.

Browned chicken and green broccoli florets cooking together in a skillet

Reduce the glaze. Pull the lid. Drop the heat. Toss everything continuously for two minutes as the chili sauce, soy sauce, and drained fruit bubble and reduce into a tight glaze. Pull the pan off the burner the moment the liquid heavily coats the back of a spoon.

Chicken, pineapple, and broccoli coated in a thick glossy sauce in a black skillet

Portion the bowls. Divide the warm rice across four glass containers. Spoon the sticky meat and vegetables right over the top.

Two glass meal prep containers filled with coconut rice, chicken, and broccoli

 Browned chicken and green broccoli florets cooking together in a bowl

Storing and Reheating

  • Cool the food completely before sealing. Leave the lids resting loosely on top of the containers for an hour to let the steam escape, which prevents the rice from turning mushy.
  • Refrigerate within two hours. These hold their quality in the fridge for up to four days.
  • Reheat gently. Loosen the lid and microwave for 90 seconds to two minutes, checking the center for heat.

Four glass meal prep containers lined up with sweet chili chicken, broccoli, and white coconut rice

Common Meal Prep Questions

Can I freeze these sweet chili chicken bowls?

The cooked meat freezes well, but the vegetables and rice will turn extremely soft when thawed. For the best texture, keep these stored in the refrigerator instead.

Can I swap the chicken thighs for breasts?

You can, but you need to watch the pan closely. White meat cooks faster and dries out quickly, so pull it from the heat the second it reaches 165°F (74°C).

Sweet chili chicken arranged over coconut rice with broccoli, pineapple, sesame, and scallions in a glass bowl

I rely on this routine on Sunday afternoons. The prep requires very little active attention. The kitchen fills with a sharp, sweet aroma as the glaze reduces, and having lunch completely sorted for the week removes a heavy mental burden.

Print
clockclock iconcutlerycutlery iconflagflag iconfolderfolder iconinstagraminstagram iconpinterestpinterest iconfacebookfacebook iconprintprint iconsquaressquares iconheartheart iconheart solidheart solid icon
Sweet chili chicken arranged over coconut rice with broccoli, pineapple, sesame, and scallions in a glass bowl

5 Stars 4 Stars 3 Stars 2 Stars 1 Star

No reviews

One-Pan Sweet Chili Chicken Meal Prep Bowls

Recipe by Chloe Davis

Cooking the broccoli and chicken in the same skillet cuts your dishwashing in half while letting the vegetables absorb all those wonderful pan juices. Paired with fluffy, fragrant coconut rice and finished with a satisfying sesame-scallion crunch, these bowls hold up beautifully in the fridge all week without drying out.


  • Total Time40 minutes
  • Yield4 bowls (serves 4) 1x

Find it on your board when it's time to cook

Ingredients

Scale

Coconut Rice

  • 1 cup (185g) jasmine rice, rinsed well until water runs clear
  • 1 cup (240ml) light coconut milk
  • 1/2 cup (120ml) water
  • 1/2 tsp kosher salt

Sweet Chili Chicken & Broccoli

  • 1.5 lbs (680g) boneless, skinless chicken thighs, cut into 1-inch pieces
  • 1 tbsp avocado oil or neutral cooking oil
  • 1 large broccoli crown (about 12 oz / 340g), cut into bite-sized florets
  • 1 can (8 oz / 227g) pineapple chunks in 100% juice, lightly drained (reserve 2 tablespoons of the juice)
  • 3/4 cup (180ml) Thai sweet chili sauce
  • 1 tbsp soy sauce
  • 2 scallions, thinly sliced
  • 1 tbsp toasted sesame seeds


Instructions

  1. Simmer the coconut rice: In a medium saucepan, combine the rinsed jasmine rice, coconut milk, water, and kosher salt. Bring to a boil over medium-high heat. Once boiling, reduce the heat to the lowest setting, cover tightly, and simmer for 15 minutes. Remove from the heat and let it rest, covered, for 10 minutes before fluffing with a fork.
  2. Sear the chicken: While the rice cooks, heat the avocado oil in a large, deep skillet over medium-high heat. Add the diced chicken thighs in a single layer and let them cook undisturbed for 3 minutes to develop a nice crust. Stir and continue to cook for another 3 to 4 minutes, until browned on all sides and cooked through to an internal temperature of 165°F (74°C).
  3. Steam-fry the broccoli: Add the broccoli florets and the 2 tablespoons of reserved pineapple juice directly to the skillet with the chicken. Immediately cover the pan with a tight-fitting lid and let it steam for 3 minutes, until the broccoli is bright green and crisp-tender.
  4. Glaze the pan: Uncover the skillet and reduce the heat to medium. Pour in the sweet chili sauce, soy sauce, and the drained pineapple chunks. Toss everything constantly for 2 minutes until the sauce bubbles, thickens slightly, and evenly coats the chicken and vegetables. Remove from the heat.
  5. Assemble the meal prep bowls: Divide the warm coconut rice evenly among 4 airtight containers. Spoon the sweet chili chicken and broccoli mixture over the rice. Garnish each portion evenly with the sliced scallions and toasted sesame seeds.
Find it on your board when it's time to cook

Notes

  • Why it works: Swapping standard chicken breasts for chicken thighs ensures the meat stays incredibly juicy and tender even after a few days in the fridge and a trip through the microwave. Steam-frying the broccoli in the same pan right after searing the chicken picks up all the savory fond from the bottom of the skillet.
  • Storage & Reheating: Portion the food into shallow containers and refrigerate within 2 hours of cooking to ensure food safety. Leave the lids loose until the food has completely cooled, then seal tightly. Store in the refrigerator for up to 4 days. To serve, reheat a single container loosely covered in the microwave for 90 seconds to 2 minutes, or until steaming hot.

Nutrition (per serving — estimates)

Calories: 580 | Total Carbs: 70g (Fiber: 4g, Sugar: 28g) | Fat: 16g (Saturated: 6g) | Protein: 38g

Nutritional values are approximate, based on standard reference data (USDA FoodData Central). Actual values vary by brand and exact measurements. For precision, use a tracker like MyFitnessPal or Cronometer.

  • Prep Time: 15 minutes
  • Cook Time: 25 minutes
  • Category: Meal Prep
  • Method: Stovetop
  • Cuisine: American Asian

Nutrition

  • Serving Size: 1 assembled bowl
  • Calories: 580
  • Sugar: 28g
  • Fat: 16g
  • Saturated Fat: 6g
  • Carbohydrates: 70g
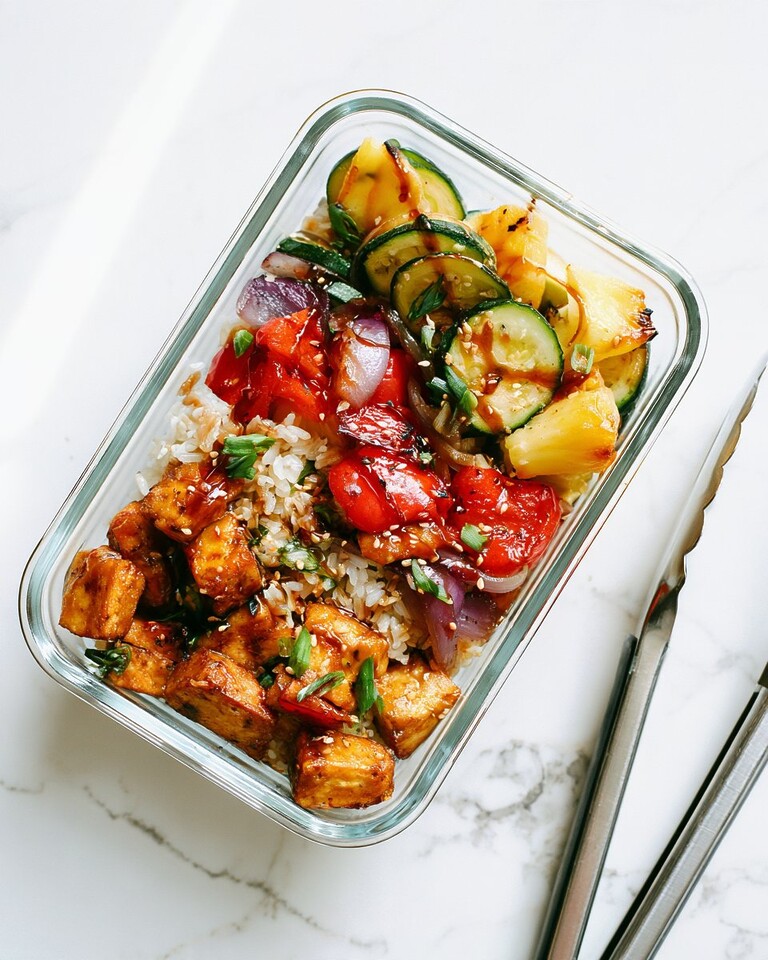
  • Fiber: 4g
  • Protein: 38g