Author

Chloe Davis

Browsing

This slow cooker garlic butter loaded steak and potatoes delivers a rich weeknight dinner without a broken sauce. You get tender bites of beef and creamy potatoes coated in a silky gravy, topped with melted cheddar and crisp bacon.

Slow cooker garlic butter loaded steak and potatoes in a bowl topped with melted cheddar cheese, crumbled bacon, and sliced green onions

The Secret to a Silky Slow Cooker Gravy

Slow cookers easily ruin dairy. Simmering milk or cream for hours leaves a split, curdled mess. You bypass that entirely by braising the beef and potatoes in a straightforward beef broth base. Stirring the sour cream into those hot, savory juices right before serving creates a smooth, stable sauce that coats the back of a spoon.

How to Build the Loaded Steak and Potatoes

Sear the beef first. Heat the olive oil and butter over medium-high heat until the butter foams. Add the steak cubes in an even layer. I leave them completely untouched for two solid minutes to guarantee a dark brown crust on the outside, even though the center stays raw. Stir in the minced garlic just until you smell it, then pull the pan off the heat.

Cubed steak seared with minced garlic in a black skillet

Combine and slow cook. Scrape every drop of the garlic butter and pan juices into a 6-quart slow cooker. Add the halved baby Yukon Gold potatoes, beef broth, Worcestershire sauce, salt, and pepper. Toss it all together. Cook on LOW for 5 to 6 hours or HIGH for 3 to 4 hours. The potatoes should pierce with zero resistance.

Seared steak and halved baby potatoes in a slow cooker insert coated in a savory brown broth

Stir in the cream. This is the crucial step. Turn the slow cooker off or to the Warm setting. Stir the sour cream directly into the hot cooking liquid until the color turns an even, creamy brown. If you add it while the heat is still actively simmering, the sauce will break into greasy pools.

Melt the cheese. Scatter the shredded cheddar and cooked bacon evenly across the surface. Put the lid back on for 10 to 15 minutes. The residual heat trapped inside is plenty to melt the cheese completely.

Melted cheddar cheese and crumbled bacon covering steak and potatoes inside a slow cooker

Garnish and serve. Pull the lid off. Scatter the sliced green onions over the melted cheese and scoop immediately.

Melted cheddar, bacon, and green onions over steak and potatoes on a white plate

Serving the Loaded Steak and Potatoes

Scoop right from the slow cooker insert to keep the cheese pull intact. The rich gravy pools at the bottom of the bowl, so I always drag a piece of crusty bread through it at the end.

Large bowl of slow cooker steak and potatoes with a rich creamy gravy and melted cheese

Storing and Reheating Leftovers

  • Store leftovers in a sealed container in the fridge for up to three days.
  • Reheat single portions in the microwave on 50 percent power to prevent the sour cream sauce from splitting.
  • Do not freeze this dish. The waxy potatoes turn mealy and the sour cream gravy separates as it thaws.

Common Questions About Slow Cooker Steak

Can I use russet potatoes instead?

Avoid peeled russets for this method. They break down and turn mealy during a long braise, whereas waxy baby Yukon Gold potatoes hold their shape without crumbling.

Can I skip searing the steak?

Technically yes, but you sacrifice significant flavor. Searing the beef in butter creates a caramelized crust that forms the savory foundation for the gravy.

This hits the table tasting exactly like a loaded baked potato with steakhouse bites on the side, just with a fraction of the active effort. My favorite part is how the bacon stays slightly crisp on top of that melted cheddar layer.

Print
clockclock iconcutlerycutlery iconflagflag iconfolderfolder iconinstagraminstagram iconpinterestpinterest iconfacebookfacebook iconprintprint iconsquaressquares iconheartheart iconheart solidheart solid icon
Melted cheddar, bacon, and green onions over steak and potatoes on a white plate

5 Stars 4 Stars 3 Stars 2 Stars 1 Star

No reviews

Slow Cooker Garlic Butter Loaded Steak and Potatoes

Recipe by Chloe Davis

This hands-off dinner delivers tender steak bites and soft potatoes coated in a rich, savory gravy, all crowned with melted cheddar and crisp bacon. Searing the beef in garlic butter builds an incredible flavor base, while stirring the sour cream in at the very end ensures a perfectly silky finish rather than a broken sauce.


  • Total Time6 hours 35 minutes
  • Yield6 servings 1x
  • DietGluten Free

Find it on your board when it's time to cook

Ingredients

Scale

The Base

  • 1 1/2 lbs (680 g) sirloin or flank steak, cut into 1-inch cubes
  • 1 tbsp olive oil
  • 2 tbsp unsalted butter
  • 4 cloves garlic, minced
  • 1 1/2 lbs (680 g) baby Yukon Gold potatoes, halved (or quartered if large)
  • 1/2 cup (120 ml) low-sodium gluten-free beef broth
  • 1 tbsp gluten-free Worcestershire sauce
  • 1 tsp kosher salt
  • 1/2 tsp freshly cracked black pepper

The Loaded Finish

  • 1/2 cup (115 g) full-fat sour cream
  • 1 1/2 cups (170 g) freshly shredded sharp cheddar cheese
  • 4 slices thick-cut bacon, cooked and crumbled
  • 3 green onions, thinly sliced


Instructions

  1. Sear the steak: In a large skillet, heat the olive oil and butter over medium-high heat. Add the cubed steak in an even layer and sear for 2 to 3 minutes, just until a brown crust forms on the outside. Stir in the minced garlic during the last 30 seconds of cooking. (The steak does not need to be cooked all the way through.)
  2. Combine in the slow cooker: Transfer the steak, garlic, and all the rich pan juices into a 6-quart slow cooker. Add the halved potatoes, the gluten-free beef broth, gluten-free Worcestershire sauce, salt, and black pepper. Toss everything together so the potatoes and beef are well coated in the savory liquid.
  3. Slow cook: Cover and cook on LOW for 5 to 6 hours or on HIGH for 3 to 4 hours. The dish is done when the potatoes can be easily pierced with a fork and the beef is tender.
  4. Make it creamy: Turn the slow cooker off or to the “Warm” setting. Stir the sour cream directly into the crockpot, mixing it with the savory cooking juices until it creates a smooth, creamy sauce.
  5. Melt the cheese: Sprinkle the shredded cheddar and crumbled bacon evenly over the top of the potato and steak mixture. Place the lid back on for 10 to 15 minutes to trap the heat and melt the cheese completely.
  6. Garnish and serve: Remove the lid, scatter the sliced green onions over the melted cheese, and serve immediately.
Find it on your board when it's time to cook

Notes

  • Why it works: Slow cookers can cause dairy to curdle and split if left simmering for hours. By using beef broth as the braising liquid and stirring the sour cream in at the very end, you get all the tangy richness of a loaded baked potato without a greasy, broken sauce.
  • Potato pick: Baby Yukon Gold potatoes are ideal for this method because their waxy, buttery texture holds its shape beautifully over long cooking times, avoiding the mealy breakdown that can happen with peeled russets.

Nutrition (per serving — estimates)

Calories: 512 | Total Carbs: 21g (Fiber: 3g, Sugar: 2g) | Fat: 32g (Saturated: 15g) | Protein: 35g

Nutritional values are approximate, based on standard reference data (USDA FoodData Central). Actual values vary by brand and exact measurements. For precision, use a tracker like MyFitnessPal or Cronometer.

  • Prep Time: 15 minutes
  • Cook Time: 6 hours 20 minutes
  • Category: Dinner
  • Method: Slow Cooker
  • Cuisine: American

Nutrition

  • Serving Size: 1 bowl
  • Calories: 512
  • Sugar: 2g
  • Fat: 32g
  • Saturated Fat: 15g
  • Carbohydrates: 21g
  • Fiber: 3g
  • Protein: 35g

Pack four days of lunches with these Greek chicken rice bowls using a smart double-duty vinaigrette. Half the lemon dressing tenderizes the meat for a sizzling, caramelized crust, while the rest coats the crisp vegetables for a bright side salad.

Greek chicken rice bowl in a glass container with cherry tomatoes, cucumber, and feta salad

The Secret to Lasting Meal Prep

The grains stay intact. The vegetables stay crisp. By swapping softer starches for sturdy jasmine rice and keeping the wet produce isolated, these bowls survive the fridge all week. The real efficiency comes from the lemon-oregano vinaigrette. You mix it once. You use it twice. Half goes on the raw poultry, and the rest dresses the cucumber and feta so they gently pickle over time.

Building Your Greek Chicken Rice Bowls

Cook the Savory Grains

Rinse the grains well. Bring the broth to a boil. Simmering the jasmine rice in low-sodium chicken broth instead of water builds a savory foundation from the bottom up. Cover tightly and keep the heat on your lowest setting for exactly 15 minutes, then let it rest off the heat for 5 minutes before fluffing.

Mix the Double-Duty Marinade

Whisk the olive oil, lemon juice, red wine vinegar, garlic, and oregano together. Pour exactly half over the thin-sliced poultry. Set the rest aside. You only need 15 to 20 minutes of resting time at room temperature for the meat to absorb the bright acidity.

Sear the Poultry

Heat your skillet. Pull the meat. I always let the excess liquid drip off before the poultry hits the pan so the edges sear rather than steam. Cook for 3 to 4 minutes per side until the center reaches 165°F, then let it rest on a cutting board before slicing into strips.

Golden brown chicken cutlets searing in a black skillet

Toss the Fresh Salad

Chop the cucumbers. Halve the tomatoes. Tossing them with the Kalamata olives, crumbled feta cheese, and reserved vinaigrette right away gives the raw vegetables time to absorb the dressing.

Chopped cucumbers, tomatoes, olives, and feta cheese mixed in a black bowl

Assemble the Containers

Divide the warm grains evenly. Top with the sliced meat. Allow the hot components to cool completely before sealing to prevent condensation from turning the dish soggy.

Sliced chicken and rice next to a colorful vegetable salad in a glass container

Packing and Storage Tactics

Four glass containers filled with rice, chicken, and side salads on a marble counter

Keeping the Texture Intact

  • I pack the dressed vegetables in tiny glass cups inside the main container to keep the crisp produce completely isolated from the grains.
  • Store the assembled portions in the refrigerator for up to 4 days.
  • When ready to eat, remove the cold salad portion, microwave the hot components until warm, then pour the fresh vegetables over the top.

Common Prep Questions

Can I freeze these meal prep bowls?

The cooked grains and poultry freeze well for up to three months, but the fresh cucumber and tomato salad will become watery and mushy if frozen.

Do I have to use thin-sliced cutlets?

Standard thick breasts work, but you will need to slice them horizontally yourself or increase the cooking time significantly to reach a safe internal temperature.

Save this method for your Sunday routine, and the contrast of hot savory grains against cold marinated vegetables makes weekday lunches something to actually anticipate.

Print
clockclock iconcutlerycutlery iconflagflag iconfolderfolder iconinstagraminstagram iconpinterestpinterest iconfacebookfacebook iconprintprint iconsquaressquares iconheartheart iconheart solidheart solid icon
Sliced chicken and rice next to a colorful vegetable salad in a glass container

5 Stars 4 Stars 3 Stars 2 Stars 1 Star

No reviews

Greek Chicken Rice Bowls with 2-in-1 Lemon-Oregano Dressing

Recipe by Chloe Davis

The secret to these meal prep bowls is a punchy lemon-oregano vinaigrette that does double duty: half marinates the chicken, while the rest gets tossed with crisp cucumbers, tomatoes, and feta for a bright, built-in side salad. By swapping instant grain for sturdy jasmine rice, these bowls reheat beautifully all week long without turning to mush.


  • Total Time35 minutes
  • Yield4 bowls (serves 4) 1x

Find it on your board when it's time to cook

Ingredients

Scale

Lemon-Oregano Vinaigrette (Marinade & Dressing)

  • 1/3 cup extra-virgin olive oil
  • 1/4 cup fresh lemon juice (from about 12 lemons)
  • 2 tablespoons red wine vinegar
  • 4 large garlic cloves, minced
  • 1 tablespoon dried oregano
  • 1 teaspoon kosher salt
  • 1/2 teaspoon black pepper

Chicken & Rice

Greek Veggie Salad


Instructions

  1. Mix the vinaigrette: In a liquid measuring cup or small bowl, whisk together the olive oil, lemon juice, red wine vinegar, garlic, oregano, salt, and pepper until well combined.
  2. Marinate the chicken: Place the chicken cutlets in a large bowl or zip-top bag. Pour exactly half of the vinaigrette over the chicken, tossing to coat. Set aside at room temperature for 15 to 20 minutes. Reserve the remaining vinaigrette for the salad.
  3. Cook the rice: While the chicken marinates, bring the chicken broth to a boil in a medium saucepan. Stir in the rinsed jasmine rice. Reduce the heat to the lowest setting, cover tightly, and simmer for 15 minutes. Remove from heat and let rest, covered, for 5 minutes. Fluff with a fork.
  4. Sear the chicken: Heat a large skillet over medium-high heat. Working in batches if necessary, add the chicken (allowing excess marinade to drip off) and cook for 3 to 4 minutes per side. The chicken should be deeply golden brown and reach an internal temperature of 165°F. Transfer to a cutting board to rest, then slice into strips.
  5. Toss the veggie salad: In a large mixing bowl, combine the cherry tomatoes, cucumber, red bell pepper, Kalamata olives, and feta cheese. Drizzle with the reserved vinaigrette and toss gently to coat.
  6. Assemble and store: Divide the cooked rice and sliced chicken evenly among 4 meal prep containers. Allow them to cool completely. To keep the rice from getting soggy, pack the tossed veggie salad into 4 separate small containers (or use compartmentalized prep containers). Store in the refrigerator for up to 4 days. When ready to eat, microwave the chicken and rice until warm, then top with the cold, marinated veggie salad.
Find it on your board when it's time to cook

Notes

  • Why it works: Splitting the dressing means the chicken gets deeply seasoned without needing hours to marinate, and the vegetables gently pickle in the fridge, staying bright and punchy all week long.
  • Meal prep storage: Keeping the wet veggie salad separate from the rice is crucial for texture. If your containers don’t have compartments, simply use small zip-top bags or mini food-storage cups for the salad portion.

Nutrition (per serving — estimates)

Calories: 580 | Total Carbs: 43g (Fiber: 4g, Sugar: 5g) | Fat: 26g (Saturated: 5g) | Protein: 43g

Nutritional values are approximate, based on standard reference data (USDA FoodData Central). Actual values vary by brand and exact measurements. For precision, use a tracker like MyFitnessPal or Cronometer.

  • Prep Time: 15 minutes
  • Cook Time: 20 minutes
  • Category: Meal Prep
  • Method: Stovetop
  • Cuisine: Greek-Inspired

Nutrition

  • Serving Size: 1 bowl
  • Calories: 580
  • Sugar: 5g
  • Fat: 26g
  • Saturated Fat: 5g
  • Carbohydrates: 43g
  • Fiber: 4g
  • Protein: 43g

Skip the stovetop reduction entirely. Honey-sriracha chicken meal prep bowls rely on residual heat, where the hot roasted meat hits the raw glaze and instantly thickens it into a glossy, concentrated sticky coating that clings to every piece.

Overhead view of three rectangular glass containers filled with glazed honey-sriracha chicken, brown rice, and roasted broccoli

The One-Pan Glazing Method

Traditional glazed chicken requires frying the meat. You then simmer the sauce in a separate skillet. This version relies on residual heat instead. Dust the chicken with cornstarch and roast it at 400°F to create a textured surface. When you toss those steaming-hot pieces directly into the cold soy and honey mixture, the heat activates the starches to thicken the glaze instantly. My early tests with wet batters left half the coating cemented to the baking pan. I use this dry dusting method now because it saves twenty minutes of scrubbing and still delivers that lacquered finish.

Roasting and Coating the Chicken

Prep the pan. Use heavy-duty aluminum foil. You need a physical barrier between the sticky chicken juices and the metal pan, or the cleanup will ruin the convenience of the meal.

Raw cubed chicken dusted with cornstarch on one half of a lined baking sheet with fresh broccoli florets on the other

Coat the ingredients. Toss the chicken pieces thoroughly. You want the cornstarch to hydrate fully in the one tablespoon of avocado oil to form a proper crust, while the four cups of broccoli simply need oil and salt.

Roast at 400°F. Put the sheet in the oven. You are looking for the broccoli to become tender with lightly browned edges, and the chicken to reach an internal temperature of 165°F (74°C). I pull the pan right at 16 minutes, the exact moment the florets look toasted.

Stainless steel mixing bowl filled with hot chicken pieces heavily coated in a glossy honey and sriracha sauce

Mix and toss. Whisk the honey, sriracha, soy sauce, rice vinegar, sesame oil, and grated garlic in a bowl while the food roasts. Move the chicken immediately. You must transfer the hot meat into the glaze the second it leaves the oven, tossing vigorously so the heat thickens the sauce. If you let the meat cool on the pan first, the glaze will stay thin and pool at the bottom of the bowl.

Assembling the Bowls

Close-up of a glass meal prep container showing sticky honey-sriracha chicken topped with sesame seeds next to roasted broccoli and brown rice

Divide the warm brown rice among four shallow containers. Scoop the roasted broccoli in next. Portion out the glazed chicken, scrape every drop of the remaining sauce over the meat, and finish with sliced scallions and toasted sesame seeds.

Storing the Meal Prep Bowls

  • Keep the food in shallow, airtight containers in the refrigerator for up to 4 days.
  • Do not seal the lids immediately. Let the steam subside completely first so the condensation does not turn the roasted broccoli soggy.
  • Reheat loosely covered in the microwave for 90 seconds to 2 minutes, stopping halfway to stir the rice.

Questions About the One-Pan Method

Can I use chicken thighs instead of breasts?

Yes, boneless skinless chicken thighs work well here and are harder to overcook. Keep the exact same oven temperature and roasting time, checking for an internal temperature of 165°F.

What if the glaze stays thin?

The chicken likely cooled down too much before you tossed it. You can rescue the sauce by pouring it into a small saucepan and simmering it on the stove for two minutes until it reduces.

Three glass rectangular containers filled with the final honey-sriracha chicken, broccoli, and brown rice

I always arrange these bowls with the chicken slightly overlapping the rice so the grains absorb the extra glaze. You get a sharp, satisfying bite of chili and garlic every time you sit down for lunch.

Print
clockclock iconcutlerycutlery iconflagflag iconfolderfolder iconinstagraminstagram iconpinterestpinterest iconfacebookfacebook iconprintprint iconsquaressquares iconheartheart iconheart solidheart solid icon
Close-up of a glass meal prep container showing sticky honey-sriracha chicken topped with sesame seeds next to roasted broccoli and brown rice

5 Stars 4 Stars 3 Stars 2 Stars 1 Star

No reviews

Sticky Honey-Sriracha Chicken Meal Prep Bowls

Recipe by Chloe Davis

A true one-pan method meets a deeply savory, no-cook glaze in these streamlined meal prep bowls. By roasting the chicken and broccoli side-by-side and tossing the hot chicken directly into a garlic-spiked sauce, the residual heat thickens the honey and sriracha into a glossy coating with half the typical cleanup.


  • Total Time31 minutes
  • Yield4 bowls (serves 4) 1x

Find it on your board when it's time to cook

Ingredients

Scale

Chicken & Broccoli

  • 1 ½ pounds (680g) boneless, skinless chicken breasts, cut into 1-inch pieces
  • 4 cups (about 340g) broccoli florets, cut into bite-sized pieces
  • 2 tablespoons (30ml) avocado oil or olive oil, divided
  • 1 ½ tablespoons (12g) cornstarch
  • 1 teaspoon (6g) kosher salt, divided
  • ½ teaspoon (1g) freshly ground black pepper

Sticky Honey-Sriracha Glaze

  • 3 tablespoons (63g) honey
  • 2 ½ tablespoons (42g) sriracha
  • 2 tablespoons (30ml) low-sodium soy sauce
  • 1 tablespoon (15ml) rice vinegar
  • 1 teaspoon (5ml) toasted sesame oil
  • 2 cloves garlic, finely grated or minced

For the Bowls

  • 3 cups (585g) cooked brown rice, warmed
  • 3 scallions, thinly sliced
  • 1 tablespoon (9g) toasted sesame seeds


Instructions

  1. Preheat and prep: Preheat your oven to 400°F (200°C). Line a large, rimmed baking sheet with parchment paper or heavy-duty aluminum foil for easy cleanup.
  2. Coat the chicken and broccoli: Place the chicken pieces on one half of the prepared baking sheet. Drizzle with 1 tablespoon of the avocado oil, sprinkle with the cornstarch, ½ teaspoon of the kosher salt, and the black pepper. Toss well until the chicken is evenly coated and no dry white spots remain. On the other half of the pan, toss the broccoli florets with the remaining 1 tablespoon of avocado oil and the remaining ½ teaspoon of kosher salt. Spread both the chicken and broccoli into an even, single layer.
  3. Roast: Bake for 15 to 18 minutes, tossing everything halfway through, until the broccoli is tender and lightly browned at the edges, and the chicken is fully cooked through with an internal temperature of 165°F (74°C).
  4. Mix the glaze: While the sheet pan is in the oven, whisk together the honey, sriracha, low-sodium soy sauce, rice vinegar, toasted sesame oil, and grated garlic in a medium mixing bowl.
  5. Glaze the chicken: As soon as the pan comes out of the oven, use tongs to transfer the hot chicken directly into the bowl with the glaze. Toss vigorously. The heat from the chicken will slightly reduce and thicken the sauce into a sticky coating.
  6. Assemble the bowls: Divide the warm brown rice evenly among four shallow meal prep containers. Add a scoop of roasted broccoli to each, then portion out the glazed chicken. Drizzle any remaining sauce from the bowl over the chicken. Finish each portion with a generous scatter of sliced scallions and toasted sesame seeds.
Find it on your board when it's time to cook

Notes

  • Why it works: Skipping the traditional egg white coating and dusting the chicken with just oil and cornstarch prevents it from cementing to the sheet pan, while tossing the freshly roasted meat in the sauce creates a perfect glaze without needing to reduce anything on the stovetop. The addition of soy sauce and garlic anchors the sweetness of the honey with real savory depth.
  • Make-ahead and storage: Divide the food into shallow containers and refrigerate promptly (within a maximum of 2 hours after cooking) to ensure food safety. Leave the lids slightly cracked until the steam subsides, then seal tightly. Store in the refrigerator for up to 4 days. To reheat, microwave loosely covered for 90 seconds to 2 minutes, or until warmed through.

Nutrition (per serving — estimates)

Calories: 535 | Total Carbs: 58g (Fiber: 5g, Sugar: 15g) | Fat: 14g (Saturated: 2g) | Protein: 44g

Nutritional values are approximate, based on standard reference data (USDA FoodData Central). Actual values vary by brand and exact measurements. For precision, use a tracker like MyFitnessPal or Cronometer.

  • Prep Time: 15 minutes
  • Cook Time: 16 minutes
  • Category: Meal Prep
  • Method: Roasting
  • Cuisine: American

Nutrition

  • Serving Size: 1 bowl
  • Calories: 535
  • Sugar: 15g
  • Fat: 14g
  • Saturated Fat: 2g
  • Carbohydrates: 58g
  • Fiber: 5g
  • Protein: 44g

These Greek chicken pasta salad meal prep bowls use one smart technique to stay crisp and satisfying all week. Macerating the red onion first removes the harsh burn, leaving a bright, tangy crunch that balances the roasted chicken and feta.

Glass meal prep bowl filled with Greek chicken pasta salad topped with roasted chicken and cherry tomatoes

Why These Bowls Last Four Days

The dressing starts backward. You soak the onions first. This brief acid bath softens the raw allium bite before the oil ever hits the bowl.

English cucumbers work best. They have thinner skins. Their lower water content prevents the entire meal from turning into a soggy mess by day three.

Building the Chicken and Pasta Salad

Soak the onions. Squeeze the lemon juice directly over the sliced red onions. Let them sit for 10 minutes. This pulls out the aggressive bite while turning the onions a vibrant pink before you whisk in the oil, garlic, and herbs.

Thinly sliced red onions soaking in lemon juice inside a metal mixing bowl

The red onions will turn a faint pink color as they sit in the lemon juice.

Roast the chicken. Toss the meat with exactly 2 tablespoons of the prepared vinaigrette. Spread it on a parchment-lined sheet pan. Bake at 400°F (200°C) for 18 to 22 minutes, pulling it when an instant-read thermometer hits 165°F (74°C).

Golden roasted chicken pieces spread across a parchment-lined metal baking sheet

Rinse the pasta. Boil your rotini in heavily salted water until al dente. Drain it immediately. Run it under cold water to strip the surface starch, or the pasta will fuse into a solid block overnight. I always give the colander a few aggressive shakes after rinsing because clinging water will dilute your vinaigrette.

Toss it together. Pour the drained pasta, cooked chicken, and chopped vegetables into the large bowl. Toss everything thoroughly. The remaining onion vinaigrette should evenly coat the cucumber, bell pepper, cherry tomatoes, olives, and feta.

Large white mixing bowl containing cooked pasta, vegetables, and chicken tossed in vinaigrette

Portion for the week. Divide the finished pasta salad evenly among four airtight containers. Seal them tightly before refrigerating.

Single clear glass container holding a portion of Greek chicken pasta salad

Holding the Texture for Four Days

  • Keep the sealed containers in the refrigerator for up to 4 days.
  • I prefer leaving my lunch on the counter for a quarter hour before eating. This allows the chilled olive oil enough time to thin out and dress the ingredients properly.

Three glass meal prep containers lined up, each filled with colorful pasta salad

Make-Ahead Pasta Salad Questions

Can I use a different type of cucumber?

Yes, but you need to scoop out the seeds first. Standard slicing cucumbers hold too much water and will make the dressing soggy by the second day.

Why do I only use 2 tablespoons of dressing on the chicken?

That specific amount coats the meat for roasting without leaving excess liquid on the sheet pan. The rest of the vinaigrette needs to stay in the bowl to dress the pasta.

These sturdy bowls ensure you won’t be dreading your desk lunch by Wednesday. Grab a container on your way out the door and give it a quick shake before opening.

Print
clockclock iconcutlerycutlery iconflagflag iconfolderfolder iconinstagraminstagram iconpinterestpinterest iconfacebookfacebook iconprintprint iconsquaressquares iconheartheart iconheart solidheart solid icon
Three glass meal prep containers lined up, each filled with colorful pasta salad

5 Stars 4 Stars 3 Stars 2 Stars 1 Star

No reviews

Greek Chicken Pasta Salad Meal Prep Bowls

Recipe by Chloe Davis

These grab-and-go bowls rely on a simple chef’s trick: macerating red onions in fresh lemon juice to soften their sharp bite before building the dressing. Tossed with sturdy pasta, roasted chicken, and crisp vegetables, it’s a vibrant, satisfying lunch that holds up brilliantly in the fridge and actually tastes better on day three.


  • Total Time40 minutes
  • Yield4 bowls (serves 4) 1x

Find it on your board when it's time to cook

Ingredients

Scale

Lemon-Herb Vinaigrette & Marinade

  • 1 large lemon, juiced (about 3 tbsp / 45 ml) and zested
  • 1/4 cup (40 g) thinly sliced red onion
  • 1/3 cup (80 ml) extra-virgin olive oil
  • 2 large cloves garlic, grated or finely minced
  • 1 tsp dried oregano
  • 1/2 tsp kosher salt
  • 1/4 tsp freshly cracked black pepper

Chicken & Pasta Salad

  • 1 lb (450 g) boneless, skinless chicken breasts or thighs
  • 8 oz (225 g) dried sturdy pasta (such as rotini, penne, or farfalle)
  • 1 small English cucumber, quartered lengthwise and chopped
  • 1 medium red bell pepper, cored and chopped
  • 1 cup (150 g) cherry tomatoes, halved
  • 1/3 cup (45 g) pitted Kalamata olives, halved
  • 1/2 cup (75 g) crumbled feta cheese
  • 1/4 cup (15 g) chopped fresh flat-leaf parsley


Instructions

  1. Quick-pickle the onions: In a large mixing bowl, combine the lemon juice and sliced red onion. Let sit for 10 minutes to soften the onion’s bite. Whisk in the lemon zest, olive oil, garlic, oregano, kosher salt, and black pepper until fully combined.
  2. Marinate and bake the chicken: Preheat your oven to 400°F (200°C) and line a baking sheet with parchment paper. Transfer exactly 2 tablespoons of your prepared vinaigrette to a medium bowl, add the chicken, and toss to coat. Arrange the chicken on the baking sheet and roast for 18 to 22 minutes, or until cooked through and an instant-read thermometer inserted into the thickest part reads 165°F (74°C). Let rest for 5 minutes, then chop into bite-sized pieces.
  3. Boil the pasta: While the chicken roasts, cook the pasta in a large pot of heavily salted boiling water according to the package directions until al dente. Drain into a colander and briefly rinse under cold running water to stop the cooking process and remove excess surface starch (this keeps the pasta from clumping in the fridge). Drain very well.
  4. Assemble the salad: To the large bowl containing the remaining vinaigrette and onions, add the well-drained pasta, chopped chicken, cucumber, bell pepper, cherry tomatoes, Kalamata olives, feta, and parsley. Toss thoroughly until everything is evenly coated in the dressing.
  5. Portion for meal prep: Divide the pasta salad evenly among 4 airtight meal prep containers. Seal and refrigerate.
Find it on your board when it's time to cook

Notes

  • Why it works: English cucumbers have thinner skins, fewer seeds, and significantly less water than standard slicing cucumbers, preventing the pasta salad from turning watery or soggy as it sits in the fridge all week.
  • Storage & Serving: These bowls will keep in airtight containers in the refrigerator for up to 4 days. Serve chilled or allow the container to sit at room temperature for 15 minutes before eating to let the olive oil loosen up.

Nutrition (per serving — estimates)

Calories: 580 | Total Carbs: 49g (Fiber: 4g, Sugar: 5g) | Fat: 27g (Saturated: 5g) | Protein: 33g | Sodium: 440mg
Nutritional values are approximate, based on standard reference data (USDA FoodData Central). Actual values vary by brand and exact measurements. For precision, use a tracker like MyFitnessPal or Cronometer.

  • Prep Time: 20 minutes
  • Cook Time: 20 minutes
  • Category: Meal Prep
  • Method: Baked
  • Cuisine: Mediterranean-Inspired American

Nutrition

  • Serving Size: 1 meal prep bowl
  • Calories: 580
  • Sugar: 5g
  • Sodium: 440mg
  • Fat: 27g
  • Saturated Fat: 5g
  • Carbohydrates: 49g
  • Fiber: 4g
  • Protein: 33g

Grab your cast-iron skillet to make these skillet-crisped chicken street tacos right on the stove. I rely on a two-step cooking method to lock the juices inside while the diced edges sizzle and snap in the hot pan drippings.

Skillet-crisped chicken street tacos on a light plate topped with diced white onion, cilantro, and crumbled cotija cheese

The Two-Step Skillet Sear

Dicing raw chicken before cooking crowds the pan. The meat steams. By searing the thighs whole first, you build a dark crust while the center stays tender. Once the thickest part hits 165°F (74°C), you pull the chicken, chop it into ½-inch pieces, and toss it right back into the residual oil and juices. Those freshly cut edges hit the hot iron and crisp up instantly.

How to Make Skillet-Crisped Chicken Street Tacos

Coat the chicken. Toss the whole thighs with 1 tablespoon of the oil and your spices. The oil helps the rub stick. It also jumpstarts the browning the second the meat hits the pan.

Sear undisturbed. Heat your cast-iron skillet over medium-high heat until the remaining 1 tablespoon of oil shimmers. Lay the thighs flat and cook undisturbed for 5 to 6 minutes. You will hear a loud, aggressive crackle. When the edges turn opaque, flip and cook another 4 to 5 minutes until the center reaches 165°F (74°C). I always pull the chicken to a cutting board right at that exact temperature because leaving it in the pan while you grab your knife leads to overcooked tacos.

Chopped chicken crisping in a black cast-iron skillet with golden-red edges

The hot pan drippings fry the freshly cut edges in under two minutes.

Chop and recrisp. Cut the rested meat into bite-sized ½-inch pieces. Toss them back into the hot drippings over medium-high heat for 1 to 2 minutes until the edges turn a crispy golden-red. Squeeze half a lime over the pan and shut off the heat.

Warm the tortillas. A cold corn tortilla shatters. Warm them in a separate dry skillet for 15 to 20 seconds per side. Look for small charred brown spots, then wrap them in a clean kitchen towel to hold in the steam.

Assemble. Double-stack the tortillas to build 8 tacos. Divide the chicken evenly and top with the diced white onion, cilantro, and crumbled cotija cheese.

Serving the Tacos

Serve these right away while the tortillas are pliable and the chicken is hot. I prefer to set up a small topping station on the counter so people can build their own plates. Keep the remaining lime wedges on the side so everyone can finish their tacos with fresh juice.

Three skillet-crisped chicken street tacos in double-stacked corn tortillas with onion, cilantro, and lime wedges

Leftovers and Make-Ahead Prep

  • Store the cooked, chopped chicken in an airtight container in the fridge for up to 3 days.
  • Keep the tortillas and toppings stored separately until you are ready to eat.
  • Reheat the meat in a hot skillet for one minute to revive the crust. A microwave will turn the chicken rubbery.

Skillet-Crisped Chicken Taco FAQs

Can I use chicken breasts instead of thighs?

You can, but they dry out much faster than thighs. If you use breasts, pull them exactly at 165°F (74°C) and reduce the final crisping step to just 30 seconds so they do not become chalky.

Why do I need to double-stack the tortillas?

Two thin street tortillas provide necessary structural integrity. A single layer will easily tear under the weight of the warm juices and toppings.

These crispy chicken tacos move fast once the skillet is hot, so chop your onions and cilantro before the raw meat even hits the pan. Bookmark this page so you have the exact spice measurements ready for your next taco night.

Print
clockclock iconcutlerycutlery iconflagflag iconfolderfolder iconinstagraminstagram iconpinterestpinterest iconfacebookfacebook iconprintprint iconsquaressquares iconheartheart iconheart solidheart solid icon
Skillet-crisped chicken street tacos on a light plate topped with diced white onion, cilantro, and crumbled cotija cheese

5 Stars 4 Stars 3 Stars 2 Stars 1 Star

No reviews

Skillet-Crisped Chicken Street Tacos

Recipe by Chloe Davis

Capturing the magic of a late-night taqueria, these tacos rely on a smart skillet method: searing the chicken thighs whole for a deeply browned crust, then tossing the chopped meat back into the hot pan drippings for irresistibly crispy edges. Served on warm, double-stacked corn tortillas and finished with sharp white onion and fresh cilantro.


  • Total Time35 minutes
  • Yield8 tacos (serves 4) 1x

Find it on your board when it's time to cook

Ingredients

Scale

Chicken

  • 1 ½ lbs (680g) boneless, skinless chicken thighs (left whole)
  • 2 tbsp (30ml) neutral oil (such as canola or vegetable), divided
  • 1 ½ tsp chili powder
  • 1 tsp ground cumin
  • 1 tsp kosher salt
  • ½ tsp garlic powder
  • ½ tsp black pepper

For Assembly

  • 16 street-sized (4-inch) yellow corn tortillas
  • ½ cup finely diced white onion
  • ½ cup roughly chopped fresh cilantro
  • ⅓ cup (40g) crumbled cotija cheese
  • 2 fresh limes, cut into wedges


Instructions

  1. Season the chicken: In a medium bowl, toss the whole chicken thighs with 1 tablespoon of the oil, chili powder, cumin, kosher salt, garlic powder, and black pepper until evenly coated.
  2. Sear the thighs: Heat the remaining 1 tablespoon of oil in a large cast-iron skillet over medium-high heat until shimmering. Add the chicken in a single layer. Cook undisturbed for 5 to 6 minutes to develop a dark, crusty sear. Flip and cook for another 4 to 5 minutes, or until the thickest part reaches an internal temperature of 165°F (74°C). Transfer the chicken to a cutting board, leaving the drippings in the skillet.
  3. Chop and crisp: Chop the rested chicken into bite-sized ½-inch pieces. Ensure the skillet is over medium-high heat, then return the chopped meat to the pan. Toss in the hot drippings for 1 to 2 minutes until the edges crisp up. Turn off the heat, squeeze the juice of half a lime over the chicken, and toss to coat thoroughly.
  4. Warm the tortillas: Toast the tortillas in a separate dry skillet or directly over a low gas flame for 15 to 20 seconds per side, until they are pliable and show small charred brown spots. Keep them wrapped in a clean kitchen towel to hold in the steam.
  5. Assemble: Double-stack the tortillas to build 8 tacos. Divide the warm, crisped chicken evenly among them. Top generously with the diced onion, cilantro, and crumbled cotija cheese. Serve immediately with the remaining lime wedges on the side.
Find it on your board when it's time to cook

Notes

  • Why it works: Cooking the thighs whole rather than pre-dicing them prevents the meat from crowding the pan and steaming. You get a superior crust on the outside while keeping the inside perfectly juicy.
  • The double-stack: Using two thin street tortillas per taco isn’t just for tradition; it provides structural integrity so the rich, juicy chicken drippings don’t tear through the base.

Nutrition (per serving — estimates)

Calories: 440 | Total Carbs: 35g (Fiber: 5g, Sugar: 2g) | Fat: 17g (Saturated: 4g) | Protein: 37g

Nutritional values are approximate, based on standard reference data (USDA FoodData Central). Actual values vary by brand and exact measurements. For precision, use a tracker like MyFitnessPal or Cronometer.

  • Prep Time: 10 minutes
  • Cook Time: 25 minutes
  • Category: Main Course
  • Method: Pan-Seared
  • Cuisine: Mexican

Nutrition

  • Serving Size: 2 assembled tacos
  • Calories: 440
  • Sugar: 2g
  • Fat: 17g
  • Saturated Fat: 4g
  • Carbohydrates: 35g
  • Fiber: 5g
  • Protein: 37g

This Dubai chocolate pistachio cake layers moist cocoa sponge with an impossibly crunchy, thick green pistachio center. Baking two separate layers gives the heavy filling the exact structural support it needs to slice cleanly.

Sliced Dubai chocolate pistachio cake covered in dark chocolate ganache and chopped pistachios

Structural Support for Heavy Filling

Baking one thick cake and cutting it horizontally is a nightmare with a filling this dense. You will tear the crumb. Using two 8-inch rounds instead creates a sturdy foundation for the heavy white chocolate and pistachio butter mixture. I always hold back half a cup of the toasted pastry. This saves the texture. Crowning the finished dessert with those reserved strands gives the top the exact same bakery-style crunch as the center.

Building the Dubai Chocolate Pistachio Cake

Bake the cocoa sponge. Whisk the dry ingredients together. Fold in the wet mixture just until smooth. Pour the batter evenly into your two lined 8-inch pans and pull them at 22 to 25 minutes when a toothpick leaves the center completely clean.

Toast the pastry strands. Melt the butter in a large skillet over medium heat. Add the chopped kataifi. Keep tossing the pastry constantly for 10 to 15 minutes until it reaches a deep golden brown.

Toasted golden kataifi pastry strands in a black skillet with a silicone spoon

The pastry continues to brown in the hot pan, so transfer it to a bowl quickly.

Coat the crunch. Melt the chopped white chocolate in the microwave in short bursts. Pour it over the toasted kataifi. Fold in the pistachio butter and salt until every single strand is completely coated in the thick green mixture.

Thick green pistachio filling mixed with golden kataifi strands in a glass bowl

Mind the filling temperature. Do not refrigerate the pistachio mixture to speed up the thickening. The cocoa butter solidifies rapidly in the cold. It will turn into a stiff block that tears your delicate sponge crumb when you try to spread it.

Whip the ganache. Melt the bittersweet chocolate and let it sit. It must cool down. Wait until it drops to 85 to 90 degrees Fahrenheit so it feels barely warm but remains fully fluid. Whip the heavy cream and espresso powder to medium peaks. I always stir one large scoop of the whipped cream into the cooled melted chocolate first. This lightens the heavy base. Rapidly mixing that initial scoop prevents the dark chocolate from seizing into hard clumps before you fold in the rest.

Thick dark whipped chocolate ganache in a white bowl with a mixer whisk

Stack and contain. Pipe a thick 1-inch border of ganache around the perimeter of the bottom cake layer. This dam is mandatory. It stops the heavy center from blowing out the sides when you press the top sponge down.

A slice of Dubai chocolate pistachio cake on a light plate showing the green crunchy center

Leftovers and Reheating

  • Keep the assembled cake in an airtight container in the fridge for up to 3 days.
  • The ganache contains heavy cream and requires chilling for food safety.
  • Let your slices sit at room temperature for 30 minutes before eating so the cold, solid center softens enough to bite through cleanly.

Another slice of the pistachio kataifi chocolate cake on a light plate

Common Cake Questions

Can I assemble this a day ahead?

You can, but the pastry softens slightly as it sits against the cake crumb. Build it the day you plan to serve it for the sharpest texture.

Where do I find kataifi?

Check the frozen section of Middle Eastern grocery stores or specialty baking shops. Thaw it completely before chopping so the strands separate easily.

I prefer to assemble this dessert just hours before serving. The contrast between the soft sponge and the crisp pastry is sharpest then. Crown the top with your reserved crunchy strands and flaky sea salt right before slicing.

Print
clockclock iconcutlerycutlery iconflagflag iconfolderfolder iconinstagraminstagram iconpinterestpinterest iconfacebookfacebook iconprintprint iconsquaressquares iconheartheart iconheart solidheart solid icon
Another slice of the pistachio kataifi chocolate cake on a light plate

5 Stars 4 Stars 3 Stars 2 Stars 1 Star

No reviews

Dubai Chocolate Pistachio Cake with Toasted Kataifi Crown

Recipe by Chloe Davis

Inspired by the viral stuffed chocolate bars, this cake layers moist, warmly spiced chocolate sponge with an impossibly crunchy, sweet pistachio-kataifi filling. To avoid the structural nightmare of a single massive cake layer, we bake this in two layers and finish it with a light whipped dark chocolate ganache. Saving a handful of the buttery, toasted kataifi to crown the top with flaky sea salt gives it an unforgettable bakery-style finish.


  • Total Time2 hours 15 minutes
  • Yield1 cake (serves 12) 1x

Find it on your board when it's time to cook

Ingredients

Scale

Moist Chocolate Cake

  • 1 ½ cups (180 g) all-purpose flour
  • 1 cup (200 g) granulated sugar
  • ½ cup (43 g) Dutch-process cocoa powder
  • 1 teaspoon baking powder
  • 1 teaspoon baking soda
  • ½ teaspoon ground cinnamon
  • ½ teaspoon kosher salt
  • 1 cup (240 ml) buttermilk, room temperature
  • ½ cup (120 ml) neutral oil (such as canola or avocado)
  • 1 large egg, room temperature
  • 1 teaspoon vanilla extract

Pistachio-Kataifi Filling

  • 8 oz (225 g) raw kataifi pastry, thawed
  • 6 tablespoons (85 g) unsalted butter
  • 1 cup (240 g) 100% pistachio butter or paste
  • 6 oz (170 g) high-quality white chocolate, finely chopped
  • ¼ teaspoon kosher salt

Whipped Dark Chocolate Ganache

Garnish

  • Reserved ½ cup toasted kataifi (from the filling steps)
  • ¼ cup shelled pistachios, finely chopped
  • Flaky sea salt (such as Maldon)


Instructions

  1. Bake the cake layers: Preheat your oven to 350°F (175°C). Grease two 8-inch round cake pans and line the bottoms with parchment paper. In a large bowl, whisk together the flour, sugar, cocoa powder, baking powder, baking soda, cinnamon, and kosher salt. In a separate bowl, whisk the buttermilk, oil, egg, and vanilla until smooth. Pour the wet ingredients into the dry, stirring just until combined. Divide the batter evenly between the prepared pans. Bake for 22–25 minutes, or until a toothpick inserted into the center comes out clean. Let cool in the pans for 10 minutes, then turn out onto wire racks to cool completely.
  2. Toast the kataifi: Using a sharp knife, roughly chop the thawed kataifi pastry into small, ½-inch pieces, using your fingers to separate any clumped strands. Melt the butter in a large skillet or pot over medium heat. Add the chopped kataifi and toss constantly for 10–15 minutes until it turns a deep, even golden brown. Do not walk away, as it can burn quickly. Once toasted, remove from the heat. Crucial step: Scoop out ½ cup of the toasted kataifi and set it aside for garnishing the top of the cake later. Transfer the rest to a large mixing bowl to cool slightly.
  3. Mix the filling: Melt the chopped white chocolate in the microwave in 20-second bursts, stirring in between until smooth. Pour the melted white chocolate over the large batch of toasted kataifi. Add the pistachio butter and kosher salt, folding everything together until the pastry is completely coated. Let the mixture sit at room temperature to thicken slightly while you prepare the frosting.
  4. Prepare the whipped ganache: Melt the dark chocolate in the microwave or over a double boiler until smooth. Let it cool until barely warm but still completely fluid (around 85–90°F / 30–32°C); if it cools completely to room temperature, it may harden and clump when mixed with the cold cream. In a large bowl, use a hand mixer to whip the cold heavy cream, vanilla, and espresso powder until medium peaks form. To prevent the chocolate from seizing, rapidly stir one large scoop of the whipped cream into the cooled melted chocolate to lighten it. Then, quickly and gently fold the chocolate mixture into the remaining whipped cream with a rubber spatula until smooth, thick, and uniform.
  5. Assemble the cake: Place one cooled cake layer on a serving platter. Transfer about 1 cup of the whipped ganache to a piping bag (or a zip-top bag with the corner snipped). Pipe a thick, 1-inch tall border or “dam” of ganache around the outer edge of the cake layer. Spoon the thickened pistachio-kataifi filling into the center, spreading it into an even layer right up to the ganache border.
  6. Frost and garnish: Place the second cake layer on top, pressing down gently to secure it. Use the remaining whipped ganache to frost the top and sides of the cake. To finish, crown the top of the cake with the reserved ½ cup of toasted kataifi, a sprinkle of chopped green pistachios, and a generous pinch of flaky sea salt.
Find it on your board when it's time to cook

Notes

  • Why it works: Baking this recipe as two separate 8-inch layers instead of one thick cake provides much-needed structural support for the dense, heavy filling, and eliminates the stressful process of trying to slice a delicate cake horizontally.
  • Temperature warning: Do not refrigerate the pistachio filling to speed up the thickening process. The cocoa butter in the white chocolate will solidify rapidly, turning the mixture into a stiff block that will tear your cake when you try to spread it.
  • Storage & prep: Because the frosting is made with heavy cream, the assembled cake must be refrigerated if not served within 2 hours. Store leftovers in an airtight container in the fridge for up to 3 days, letting slices sit at room temperature for 30 minutes before eating so the filling softens. For the ultimate crunch, assemble the cake the day you plan to serve it.

Nutrition (per serving — estimates)

Calories: 767 | Total Carbs: 68g (Fiber: 6g, Sugar: 37g) | Fat: 51g (Saturated: 23g) | Protein: 9g

Nutritional values are approximate, based on standard reference data (USDA FoodData Central). Actual values vary by brand and exact measurements. For precision, use a tracker like MyFitnessPal or Cronometer.

  • Prep Time: 35 minutes
  • Cooling Time: 1 hour
  • Cook Time: 40 minutes
  • Category: Dessert
  • Method: Baking
  • Cuisine: Middle Eastern-Inspired American

Nutrition

  • Serving Size: 1 slice
  • Calories: 767
  • Sugar: 37g
  • Fat: 51g
  • Saturated Fat: 23g
  • Carbohydrates: 68g
  • Fiber: 6g
  • Protein: 9g

This Million Dollar Lasagna relies on a quick food processor trick to replace watery curds with a velvety center that slices with remarkably clean edges. I prefer assembling the layers in a ceramic dish a full day ahead.

A slice of baked lasagna on a white plate showing distinct layers and a golden cheese topping

The Fix for Watery Casseroles

Traditional baked pasta often leaks moisture in the oven. Whipping the whole-milk cottage cheese smooths out the raw curds completely. The resulting mixture acts as a sturdy, rich anchor that keeps every tier intact when portioned.

Building the Million Dollar Lasagna

Simmer the meat sauce. Heat the olive oil over medium-high. Brown the Italian sausage with the diced onion until no pink remains. Drain away the excess grease before pouring in the marinara and crushed tomatoes. Let this mixture simmer on low for 10 minutes to meld, watching for a thick, deep red consistency.

Thick red meat sauce with browned sausage simmering in a black skillet

Blend the center layer. Combine the cottage cheese, softened cream cheese, sour cream, egg, and parmesan. Run the food processor for 30 to 60 seconds. I always pause halfway to scrape down the sides, ensuring no stubborn curds hide near the bottom blade. The mixture is ready when it looks completely smooth and silky.

Smooth and creamy whipped cheese filling inside a food processor bowl

Assemble the pan. Coat a 9×13-inch dish with nonstick spray. Spread a cup of meat sauce across the bottom. Lay down four boiled noodles, slightly overlapping them. Spread half of your whipped cheese over the pasta, followed by a cup of mozzarella and more meat sauce. Repeat this sequence, finishing with a final layer of noodles, sauce, and the last two cups of mozzarella.

Layering lasagna noodles, meat sauce, and cheese in a rectangular ceramic baking dish

Bake to a bubble. Cover the dish loosely with foil sprayed with nonstick cooking spray so it doesn’t peel off your cheese later. Bake at 400°F (200°C) for 30 minutes. Pull the foil off. Bake for another 15 minutes. The edges should be bubbling vigorously and the center must register 165°F (74°C). If you built this ahead of time in a glass dish rather than metal or ceramic, let it sit at room temperature for 30 to 45 minutes before baking to prevent thermal shock.

Fully baked lasagna in a rectangular dish with a blistered and melted golden mozzarella surface

Slicing Clean Portions

Pull the pan from the oven. Leave it completely alone. Resting the casserole for 15 to 20 minutes allows the bubbling sauce to settle and the whipped center to firm up. Skip this step, and the filling will slide right out of the pasta sheets when you lift the spatula.

Lifting a square slice of lasagna with a metal spatula showing intact creamy layers

Make-Ahead and Leftovers

  • Make-ahead: Assemble the entire dish, cover tightly, and refrigerate for up to 2 days. Add 10 to 15 minutes to your covered baking time if going straight from the fridge to the oven in a metal or ceramic pan.
  • Leftovers: Store wrapped slices in the fridge for up to 4 days. Reheat individual portions in the microwave on medium power to keep the pasta soft.

Million Dollar Lasagna FAQs

Can I broil the top for a darker crust?

Yes, but only if you are using a metal or broiler-safe ceramic pan. Never use the broiler over a glass baking dish like Pyrex, which can shatter under intense direct heat.

Why do I need to rinse the boiled noodles?

Rinsing them gently with cool water halts the cooking process immediately. It also washes away the surface starch that causes the sheets to glue themselves together while you build the layers.

I rely on this specific assembly order whenever I need a dependable centerpiece to feed a crowd. Respect the resting time on the counter, and you will serve neat, structurally sound squares every time.

Print
clockclock iconcutlerycutlery iconflagflag iconfolderfolder iconinstagraminstagram iconpinterestpinterest iconfacebookfacebook iconprintprint iconsquaressquares iconheartheart iconheart solidheart solid icon
A slice of baked lasagna on a white plate showing distinct layers and a golden cheese topping

5 Stars 4 Stars 3 Stars 2 Stars 1 Star

No reviews

Million Dollar Lasagna with a Whipped Cheese Center

Recipe by Chloe Davis

The secret to this upgraded classic is a quick trip through the food processor for the cheese filling, turning it into a ridiculously smooth, velvety layer that tastes like a million bucks. A hearty sausage-and-crushed-tomato sauce and a bubbling, golden mozzarella crown make this the ultimate crowd-pleaser.


  • Total Time1 hour 25 minutes to 1 hour 30 minutes
  • Yield1 lasagna (serves 10) 1x

Find it on your board when it's time to cook

Ingredients

Scale

Meat Sauce

  • 1 Tbsp olive oil (15 ml)
  • 1 lb bulk Italian sausage, mild or spicy (450 g)
  • ½ medium yellow onion, diced
  • 3 cloves garlic, minced
  • 1 (24-oz) jar high-quality marinara sauce (680 g)
  • 1 (14.5-oz) can crushed tomatoes (411 g)
  • 2 tsp Italian seasoning
  • ¼ tsp crushed red pepper flakes (optional)

Whipped Cheese Layer

  • 1 (24-oz) container whole-milk cottage cheese (680 g)
  • 1 (8-oz) block cream cheese, room temperature (226 g)
  • ¼ cup full-fat sour cream (60 g)
  • 1 large egg
  • ½ cup grated parmesan cheese (45 g)
  • ¼ tsp freshly ground black pepper

Pasta & Assembly

  • 12 standard lasagna noodles
  • Kosher salt, for pasta water
  • Nonstick cooking spray, for the baking dish and foil
  • 16 oz whole-milk mozzarella cheese, freshly shredded and divided (450 g / about 4 cups)
  • 2 Tbsp chopped fresh parsley or basil, for garnish


Instructions

  1. Prep the pasta & oven: Preheat your oven to 400°F (200°C). Boil the lasagna noodles in heavily salted water until just al dente (usually 1 to 2 minutes less than the package directions). Drain, rinse gently with cool water to prevent sticking, and lay them flat in a single layer on parchment paper.
  2. Build the meat sauce: In a large skillet over medium-high heat, warm the olive oil. Add the Italian sausage and diced onion. Cook for 6 to 8 minutes, breaking the meat apart with a wooden spoon, until browned and cooked through. Stir in the garlic and cook for 1 minute until fragrant. Drain off any excess grease. Pour in the marinara sauce, crushed tomatoes, Italian seasoning, and red pepper flakes. Let the sauce simmer on low for 10 minutes to meld the flavors, then remove from heat.
  3. Whip the cheese filling: In a food processor (or using a standard blender or immersion blender), combine the cottage cheese, softened cream cheese, sour cream, egg, parmesan, and black pepper. Blend for 30 to 60 seconds until completely smooth and silky.
  4. Assemble the base layers: Lightly coat a 9×13-inch baking dish (use metal or ceramic if planning to make ahead and bake from cold) with nonstick cooking spray. Spread 1 cup of the meat sauce evenly across the bottom. Lay 4 noodles slightly overlapping over the sauce. Spread half of the whipped cheese filling evenly over the noodles. Sprinkle with 1 cup of the shredded mozzarella. Top with 1½ cups of the meat sauce.
  5. Finish layering: Add another 4 noodles, the remaining whipped cheese filling, 1 cup of mozzarella, and 1½ cups of meat sauce. Top with the final 4 noodles, the remaining meat sauce, and the last 2 cups of mozzarella cheese.
  6. Bake: Tent the baking dish loosely with aluminum foil (spray the underside of the foil with nonstick cooking spray so it doesn’t stick to the cheese). Bake for 30 minutes. Remove the foil and bake for another 15 minutes, or until the sauce is bubbling vigorously around the edges and an instant-read thermometer inserted into the center registers 165°F (74°C). If using a metal or broiler-safe ceramic baking dish (do not use the broiler with glass dishes like Pyrex), you can switch the oven to broil for the final 2 to 3 minutes for a blistered, golden crust, watching closely so it doesn’t burn.
  7. Rest and serve: Let the lasagna rest for 15 to 20 minutes before slicing—this is crucial for the layers to set up for clean slices. Garnish with fresh parsley or basil and serve.
Find it on your board when it's time to cook

Notes

  • Why it works: Whipping the cottage cheese with the cream cheese eliminates the grainy curd texture that causes some casseroles to separate or weep. It creates a stable, luxurious center layer that holds its shape beautifully when sliced.
  • Make-ahead tip: Assemble the entire lasagna, cover tightly with foil, and refrigerate for up to 2 days before baking. Add 10 to 15 minutes to the covered baking time if the dish is going straight from the fridge to the oven. Safety note: If using a glass baking dish, let it sit at room temperature for 30 to 45 minutes before baking to prevent the glass from shattering due to thermal shock, or use a metal or freezer-to-oven ceramic dish instead.

Nutrition (per serving — estimates)

Calories: 608 | Total Carbs: 38g (Fiber: 3g, Sugar: 9g) | Fat: 36g (Saturated: 19g) | Protein: 33g

Nutritional values are approximate, based on standard reference data (USDA FoodData Central). Actual values vary by brand and exact measurements. For precision, use a tracker like MyFitnessPal or Cronometer.

  • Prep Time: 25 minutes
  • Resting Time: 15 to 20 minutes
  • Cook Time: 45 minutes
  • Category: Main Course
  • Method: Baked
  • Cuisine: Italian-American

Nutrition

  • Serving Size: 1 slice
  • Calories: 608
  • Sugar: 9g
  • Fat: 36g
  • Saturated Fat: 19g
  • Carbohydrates: 38g
  • Fiber: 3g
  • Protein: 33g

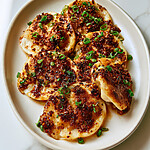
These upside-down parmesan polenta bites turn a plain store-bought tube into a savory appetizer with a shattered, lacy cheese crust. The viral baking trick fuses the cornmeal directly to the cheese layer so you get maximum crunch without flipping a single round.

Crispy upside-down parmesan polenta bites served on a white plate with golden lacy cheese edges

Why the Upside-Down Baking Method Works

Baking the rounds right over the grated cheese creates a continuous skirt of melted fat and dairy. It hardens into a crisp wafer. You skip the messy workflow of dredging slices in cheese and trying to flip them with a spatula halfway through the cook time.

Choosing the Right Parmesan for the Crust

Skip the pre-shredded bags from the dairy aisle. Those shreds are coated in cellulose and anti-caking dust. They will scorch in the oven instead of melting into a unified base, so you need to grate a solid block yourself on the powdery holes of a box grater.

How to Bake Parmesan Polenta Bites

Line a heavy rimmed baking sheet with parchment paper. Do not use foil. The melted dairy will bond to the metal and tear the crust when you try to lift it.

Cut the polenta into half-inch rounds. Pat both sides completely dry with paper towels. I press down firmly with the towel until the surface feels tacky rather than slick because moisture removal is the single most important step for a crisp finish.

Spread the grated parmesan evenly across the parchment. Sprinkle it with black pepper and the crushed red pepper flakes. You want a consistent base layer so every round gets an equal amount of that salty crust.

Grated parmesan cheese spread in an even layer on a parchment-lined baking sheet

Brush both sides of the dried rounds with olive oil. Place them directly onto the cheese layer. Press down on each one firmly so the bottom makes full contact with the dairy to ensure the cornmeal actually fuses to the fat.

Sliced polenta rounds arranged on top of the grated cheese layer before baking

Bake at 425°F for 22 to 25 minutes. Do not open the oven to flip them. Watch for the cheese bubbling and spreading out from under the cornmeal until the edges turn a deep golden amber.

Baked polenta rounds on a sheet pan with brown and crispy melted cheese edges

Pull the pan out of the oven. Leave it alone for 3 to 5 minutes. The cheese skirt needs this resting window to harden from a molten state into a brittle crust.

Lifting a baked polenta bite off the parchment paper with a metal spatula to show the thin crisp cheese crust

Slide a thin metal spatula under the rounds. Lift them off the parchment paper. A gentle prying motion snaps the shared crust so each piece separates cleanly from the rest.

Storing and Reheating the Bites

  • Keep leftover rounds in an airtight container in the fridge for up to three days. Reheat them on a parchment-lined baking sheet in a 350°F oven for about eight minutes. The microwave will turn the lacy crust soft and rubbery.

Common Questions About Parmesan Polenta Bites

Can I make these with freshly cooked homemade polenta?

No, homemade porridge is too soft and wet to hold its shape on the baking sheet. You need the firm structure of a chilled, pre-cooked tube for the rounds to fuse with the cheese.

Why didn’t my cheese get crispy?

Excess moisture likely steamed the cheese instead of roasting it. Make sure you pat the slices completely dry and avoid pre-shredded cheese coated in anti-caking powder.

I like serving these straight from the oven. The edges are still brittle and warm. They hold up beautifully next to a bowl of marinara for dipping, giving you a satisfying crunch with every bite.

Print
clockclock iconcutlerycutlery iconflagflag iconfolderfolder iconinstagraminstagram iconpinterestpinterest iconfacebookfacebook iconprintprint iconsquaressquares iconheartheart iconheart solidheart solid icon
Lifting a baked polenta bite off the parchment paper with a metal spatula to show the thin crisp cheese crust

5 Stars 4 Stars 3 Stars 2 Stars 1 Star

No reviews

Crispy Upside-Down Parmesan Polenta Bites

Recipe by Chloe Davis

The viral upside-down cheese trick is the ultimate upgrade for store-bought tube polenta. By baking the rounds directly on top of a layer of grated parmesan, the cheese fuses to the cornmeal to create a lacy, shattered-glass frico crust that packs an incredible savory crunch.


  • Total Time35 minutes
  • Yield12 rounds (serves 4) 1x

Find it on your board when it's time to cook

Ingredients

Scale

Polenta & Crust

  • 1 (18-oz / 510g) tube pre-cooked polenta (plain or garlic flavor)
  • ¾ cup (65g) finely grated Parmesan cheese
  • 2 tablespoons (30ml) olive oil
  • ½ teaspoon freshly cracked black pepper
  • ¼ teaspoon crushed red pepper flakes (optional)
  • Flaky sea salt, for finishing


Instructions

  1. Prep the oven and pan: Preheat your oven to 425°F (220°C). Line a heavy-duty, rimmed baking sheet with parchment paper. Do not use aluminum foil, or the melted cheese will stick and tear.
  2. Slice and dry: Cut the polenta tube into ½-inch thick rounds (you should get about 12 slices). Using paper towels, carefully pat both sides of each round completely dry. Removing surface moisture is the absolute key to achieving a crispy texture.
  3. Oil the rounds: Using a pastry brush, lightly coat both sides of the dried polenta rounds with the olive oil.
  4. Build the parmesan base: Scatter the grated Parmesan cheese in an even layer across the parchment paper, roughly covering the area where the polenta will sit. Sprinkle the black pepper and red pepper flakes evenly over the cheese.
  5. Press and bake: Arrange the oiled polenta rounds on top of the cheese layer. Press down firmly on each round so the cheese adheres directly to the bottom. Bake on the middle rack for 22 to 25 minutes, without flipping, until the cheese has bubbled, spread, and turned a deep, golden amber around the edges of the polenta.
  6. Cool and snap: Remove the pan from the oven and let it rest undisturbed for 3 to 5 minutes. As it cools, the cheese will harden into a crispy skirt. Use a thin metal spatula to lift the rounds off the parchment, sprinkle lightly with flaky sea salt, and serve warm.
Find it on your board when it's time to cook

Notes

  • Why it works: Baking the polenta directly on top of the cheese creates a continuous “frico” (cheese crisp) layer that fuses into the cornmeal, giving you maximum crunch and flavor without the awkward workflow of flipping cheese-coated rounds halfway through.
  • Cheese selection: Skip the pre-shredded parmesan in bags—it is coated in anti-caking agents that prevent it from melting properly. Use a solid block of parmesan and grate it yourself on the powdery-fine holes of a box grater, or buy high-quality pre-grated cheese from the deli section.

Nutrition (per serving — estimates)

Calories: 240 | Total Carbs: 24g (Fiber: 2g, Sugar: 0g) | Fat: 12g (Saturated: 4g) | Protein: 9g

Nutritional values are approximate, based on standard reference data (USDA FoodData Central). Actual values vary by brand and exact measurements. For precision, use a tracker like MyFitnessPal or Cronometer.

  • Prep Time: 5 minutes
  • Cooling Time: 5 minutes
  • Cook Time: 25 minutes
  • Category: Appetizer
  • Method: Baking
  • Cuisine: Italian-American

Nutrition

  • Serving Size: 3 rounds
  • Calories: 240
  • Sugar: 0g
  • Fat: 12g
  • Saturated Fat: 4g
  • Carbohydrates: 24g
  • Fiber: 2g
  • Protein: 9g

These browned butter salted honey cookies rely on a fast post-bake scoot to build thick bakery-style edges. The warm centers pull apart with a heavy, dense stretch that balances the deep toasted nuttiness of the butter.

Browned butter salted honey cookies arranged on a light plate with golden crinkled surfaces and scattered flaky salt

The Ratio for Chewy Centers

Most recipes call for a standard half-cup of butter. This one starts with nine tablespoons. The browning process evaporates water, so that extra tablespoon replaces the lost moisture to keep the dry-to-liquid ratio balanced. Shifting the sugar blend heavily toward brown sugar brings extra molasses. This amplifies the floral honey notes and creates a much softer texture.

Building the Browned Butter Salted Honey Cookies

Watch the butter foam. Swirl the pan continuously. Keep it over medium heat until the bubbling subsides and dark toasted specks finally appear at the bottom. Pour it immediately into a heatproof bowl, scraping every bit of brown from the metal, and let it cool for 10 minutes so it will not scramble the egg.

Dark amber browned butter with tiny dark brown specks in a metal saucepan

Whisk the wet ingredients vigorously. Dissolve the sugar crystals completely. I look for the mixture to turn fully glossy and smooth once the egg and vanilla go in, letting me know it has emulsified.

Glossy amber mixture of browned butter and honey in a glass bowl with a whisk

Fold the dry ingredients gently. Watch the flour streaks. Use a rubber spatula to fold just until the final streak of white vanishes into the dough.

Thick, smooth cookie dough in a glass bowl with a silicone spatula

Chill for 45 minutes. Do not skip this window. The flour needs time to hydrate and the butter must firm up to prevent the cookies from pooling into flat puddles in the oven. While it rests, heat the oven to 375°F and line two sheets with parchment.

Space the dough wide. Leave three inches between mounds. Use a 3-tablespoon scoop to drop the chilled dough onto the parchment so they have plenty of room to spread.

Rounds of cookie dough spaced evenly on a parchment-lined baking sheet

Look for puffed centers. Pull the pan early. Bake for 9 to 11 minutes until the rims turn golden while the middles stay remarkably soft and underbaked.

Trap the hot dough. Swirl the cutter rapidly. This quick circular motion bumps the edges inward and forces the dough into a thick, tight circle. Hit them generously with flaky sea salt while the surface is still tacky.

Baked golden cookies with crinkled edges and flaky sea salt resting on a baking sheet

The rapid circular scoot builds those thick edges while the dough is still hot.

A broken cookie on a metal tray showing a dense, fudgy brown center

Storing and Freezing Unbaked Dough

  • Keep baked cookies in an airtight container at room temperature for up to three days. The honey retains moisture naturally, keeping them soft.
  • Freeze the unbaked, scooped dough balls in a freezer bag for up to two months. Bake them directly from frozen, adding one or two extra minutes to the oven time.

Common Cookie Questions

Can I use regular table salt instead of kosher salt?

Cut the measurement in half if you use table salt in the dough. Diamond Crystal kosher salt is less dense, so using the full three-quarters of a teaspoon of table salt will make the dough far too salty.

Why did my cookies spread too much?

The butter was likely too hot when mixed, or the dough did not chill for the full 45 minutes. Always measure the flour by spooning and leveling rather than scooping directly from the bag.

I prefer these alongside a cup of black coffee to cut through the rich molasses notes. Let the pan cool for five minutes before moving them to a wire rack, so those soft, underbaked centers have time to set.

Print
clockclock iconcutlerycutlery iconflagflag iconfolderfolder iconinstagraminstagram iconpinterestpinterest iconfacebookfacebook iconprintprint iconsquaressquares iconheartheart iconheart solidheart solid icon
Browned butter salted honey cookies arranged on a light plate with golden crinkled surfaces and scattered flaky salt

5 Stars 4 Stars 3 Stars 2 Stars 1 Star

No reviews

Browned Butter Salted Honey Cookies

Recipe by Chloe Davis

The trick to bakery-perfect honey cookies is browning the butter first—its deep, toasted nuttiness perfectly balances the floral sweetness of the honey. Paired with a quick “scoot” from a round cookie cutter right out of the oven, these bake up thick, perfectly circular, and impossibly chewy, with a generous crown of flaky sea salt.


  • Total Time1 hour 25 minutes
  • Yield14 cookies (serves 14) 1x

Find it on your board when it's time to cook

Ingredients

Scale

Wet Ingredients & Sugars

  • 9 tbsp unsalted butter (127g)
  • ¾ cup light brown sugar, packed (160g)
  • ¼ cup granulated sugar (50g)
  • ¼ cup honey, preferably clover or wildflower (85g)
  • 1 large egg, room temperature
  • 1 ½ tsp pure vanilla extract (7ml)

Dry Ingredients & Garnish

  • 1 ¾ cups all-purpose flour, spooned and leveled (210g)
  • ¾ tsp kosher salt (preferably Diamond Crystal)
  • ½ tsp ground cinnamon
  • ½ tsp baking soda
  • Flaky sea salt, for finishing


Instructions

  1. Brown the butter: Place the butter in a medium saucepan over medium heat. Cook, swirling the pan constantly, until the butter foams, subsides, and eventually develops toasted brown specks at the bottom (about 5 to 7 minutes). Immediately pour the browned butter—scraping all the dark bits from the pan—into a large heatproof mixing bowl. Let it cool for 10 minutes.
  2. Whisk the wet ingredients: To the warm browned butter, add the light brown sugar, granulated sugar, and honey. Whisk vigorously for about 1 minute until well combined and smooth. Add the egg and vanilla extract, whisking until the mixture turns glossy and fully emulsified.
  3. Fold in the dry: Sprinkle the flour, kosher salt, ground cinnamon, and baking soda evenly over the wet mixture. Using a rubber spatula, gently fold the dough until the last streak of flour disappears. The dough will be very soft.
  4. Chill the dough: Cover the bowl tightly with plastic wrap and refrigerate for exactly 45 minutes. This allows the flour to hydrate and the butter to firm up, preventing the cookies from spreading too thin. While the dough chills, preheat your oven to 375°F (190°C) and line two large baking sheets with parchment paper.
  5. Scoop and bake: Using a large 3-tablespoon cookie scoop (about 48g per portion), portion the chilled dough onto the prepared baking sheets, leaving about 3 inches of space between each mound. Bake for 9 to 11 minutes, or until the edges are golden and set but the centers still look puffed and slightly underbaked.
  6. Scoot and finish: Remove from the oven. Immediately place a large, round biscuit cutter (or an upside-down mug) over one hot cookie so the cookie is fully enclosed. Swirl the cutter in a rapid circular motion for a few seconds to bump the edges inward, creating a thick, perfectly round cookie. Repeat with the remaining cookies. Generously sprinkle the tops with flaky sea salt while they are still hot and tacky. Let cool on the pan for 5 minutes before transferring to a wire rack.
Find it on your board when it's time to cook

Notes

  • Why it works: Starting with 9 tablespoons of butter instead of a standard half-cup (8 tablespoons) accounts for the moisture lost as steam during the browning process. This ensures you get all the toasted flavor without throwing off the delicate liquid-to-dry ratio that keeps the centers perfectly chewy.
  • Sugar ratio: Shifting the balance to rely more heavily on brown sugar rather than an equal split with granulated sugar introduces extra molasses, which amplifies the honey’s natural flavor and creates a much fudgier, softer texture.

Nutrition (per serving — estimates)

Calories: 213 | Total Carbs: 31g (Fiber: 1g, Sugar: 20g) | Fat: 9g (Saturated: 6g) | Protein: 2g

Nutritional values are approximate, based on standard reference data (USDA FoodData Central). Actual values vary by brand and exact measurements. For precision, use a tracker like MyFitnessPal or Cronometer.

  • Prep Time: 25 minutes
  • Chilling Time: 45 minutes
  • Cook Time: 10 minutes
  • Category: Dessert
  • Method: Baking
  • Cuisine: American

Nutrition

  • Serving Size: 1 cookie
  • Calories: 213
  • Sugar: 20g
  • Fat: 9g
  • Saturated Fat: 6g
  • Carbohydrates: 31g
  • Fiber: 1g
  • Protein: 2g

This parmesan-crusted pepperoni pizza sourdough manages heavy fillings without leaking grease or collapsing in the middle. I drop the water content below my standard loaves so the structure easily absorbs rendered meat fats while baking a crackling, deeply browned garlic crust.

Slices of pepperoni pizza sourdough bread in a deep dish showing an airy crumb and melted cheese pockets

Why This Pizza Sourdough Holds Its Shape

Shredded cheese is a sourdough killer. It dissolves completely into the surrounding flour. That blocks gluten development and leaves you with a heavy, wet center that never fully bakes.

  • Cubed mozzarella: Cutting block cheese into half-inch chunks isolates the moisture. You get distinct pockets of melted cheese while the rest of the bread rises normally.
  • Lower hydration: Pepperoni releases fat in the oven. Dropping the water to 330 grams gives the bread enough structural backbone to absorb that oil without flattening out.
  • Dried meats: I always pat the pepperoni dry with a paper towel before laminating. This simple step stops excess grease from turning the dough slippery when you try to roll it up.

Steps to Laminate and Bake the Pepperoni Sourdough

Mix the dough. Whisk the warm water and active starter until milky. Add the bread flour and mix until no dry spots remain. Rest it under a damp towel for 45 minutes so the flour hydrates fully before you start working the gluten.

Build early structure. Sprinkle the sea salt over the top. Dimple it in with wet hands. Knead gently in the bowl for two to three minutes to kickstart the strength, then cover it for a 30-minute rest.

Laminate the inclusions. Mist your counter lightly. Stretch the dough outward from the center. You want a large, semi-translucent rectangle that feels thin but hasn’t torn. Scatter the cheese cubes, quartered pepperoni, oregano, and red pepper flakes evenly. Fold the left third over the center, bring the right third over that, and roll it tightly from the bottom into a cylinder.

: Sourdough stretched into a rectangle on a marble counter and topped with cubed mozzarella and pepperoni

Manage the bulk fermentation. Lift the dough from the middle. Let the ends tuck under itself. Perform three sets of these coil folds spaced 45 minutes apart. After the last fold, leave it covered at room temperature until it feels airy, jiggles slightly when you shake the bowl, and has grown by about 40 to 50 percent.

Shape and coat the crust. Turn the dough onto a bare counter. Use a bench scraper to form a tight round or oval. Be careful not to tear the surface tension over the cheese cubes, or they will leak out during baking. Mist the top with water and gently roll it through the parmesan and garlic powder mixture on a small plate. Transfer it seam-side up to a rice flour-dusted basket, cover tightly, and refrigerate for 12 to 18 hours.

Bake in a Dutch oven. Preheat your cast-iron pot with the lid on at 475°F (245°C) for an hour. Turn the cold dough onto parchment paper. Score a single, deliberate slash slightly off-center with a sharp razor. Transfer it to the hot pot, cover, and bake for 20 minutes to trap the steam and force the rise.

Finish the parmesan crust. Remove the lid. Drop the oven to 450°F (230°C). Bake for another 20 to 25 minutes. Watch the color closely here. Pull it when the crust is deeply browned and the internal temperature hits 205°F (96°C).

A freshly baked sourdough loaf inside a cast-iron Dutch oven with a dark golden parmesan crust

Cooling and Serving the Baked Loaf

Hot bread is still baking inside. Cutting in too early ruins it. You must let this loaf cool on a wire rack for at least two to three hours before slicing, or the molten cheese and steam will collapse the crumb into a gummy paste.

Two slices of pepperoni pizza sourdough on a ceramic plate highlighting the toasted crust

Storing and Reheating Leftover Pizza Bread

  • Keep uncut pizza bread at room temperature in a paper bag for up to two days.
  • Once sliced, store the pieces in an airtight container in the refrigerator for up to four days to prevent the meat and cheese from spoiling.
  • To reheat, toast individual slices in a skillet over medium heat for two minutes per side. This revives the cheese without drying out the crumb.
  • Freeze baked, cooled slices wrapped tightly in foil and placed in a zip-top bag for up to two months. Thaw overnight in the fridge before toasting.

Common Questions About Pizza Sourdough

Can I use shredded mozzarella instead of block cheese?

No, shredded cheese melts completely into the dough and prevents it from baking through. You need to use a low-moisture block cut into half-inch cubes to create distinct pockets.

Why did my dough tear when I tried to shape it?

Tearing usually happens if you pull the dough too tightly over the rigid cheese cubes. Apply gentle pressure with your bench scraper and stop shaping as soon as the skin feels taut.

I prefer to serve these slices slightly warm alongside a bowl of marinara for dipping. It highlights the savory crunch of the crust and brings the pizza flavors forward.

Print
clockclock iconcutlerycutlery iconflagflag iconfolderfolder iconinstagraminstagram iconpinterestpinterest iconfacebookfacebook iconprintprint iconsquaressquares iconheartheart iconheart solidheart solid icon
Two slices of pepperoni pizza sourdough on a ceramic plate highlighting the toasted crust

5 Stars 4 Stars 3 Stars 2 Stars 1 Star

No reviews

Parmesan-Crusted Pepperoni Pizza Sourdough

Recipe by Chloe Davis

A savory, crackling parmesan-garlic crust gives way to a chewy crumb studded with gooey mozzarella pockets, spicy pepperoni, and aromatic oregano. By slightly lowering the dough’s hydration compared to standard sourdoughs, this loaf gains the structural strength to handle heavy mix-ins without weeping oil or turning gummy in the center.


  • Total Time19 to 28 hours
  • Yield1 loaf (serves 10) 1x

Find it on your board when it's time to cook

Ingredients

Scale

The Dough

  • 330g warm water, about 85°F (1 1/3 cups + 1 tbsp)
  • 90g active sourdough starter, bubbly and peaked (1/3 cup + 1 tbsp)
  • 450g bread flour (3 1/2 cups)
  • 8g fine sea salt (1 1/2 tsp)

The Pizza Fillings

  • 140g low-moisture block mozzarella cheese, cut into 1/2-inch cubes (5 oz)
  • 115g sliced pepperoni, quartered and patted dry (4 oz)
  • 1 tbsp dried oregano
  • 1/2 tsp crushed red pepper flakes (optional)

The Crust Finish


Instructions

  1. Mix the dough: In a large mixing bowl, whisk together the warm water and active sourdough starter until milky. Add the bread flour and mix by hand or with a dough whisk until all dry spots are absorbed. Cover with a damp towel and rest for 45 minutes.
  2. Add salt and build strength: Sprinkle the sea salt over the dough. Wet your hands and dimple the salt into the surface, then knead gently in the bowl for 2 to 3 minutes to build early structure. Cover and rest for 30 minutes.
  3. Laminate the inclusions: Lightly mist your countertop with water. Turn the dough out and gently stretch it from the center outward into a large, thin, semi-translucent rectangle. Evenly scatter the mozzarella cubes, quartered pepperoni, dried oregano, and red pepper flakes over the surface. Fold the left third of the dough over the center, fold the right third over that, and roll it up tightly from the bottom into a cylinder. Return to the bowl, cover, and rest for 45 minutes.
  4. Bulk fermentation: Perform 3 sets of coil folds (lifting the dough from the middle and letting the ends tuck under itself), spacing them 45 minutes apart. After the final fold, cover and let the dough rise at room temperature until it feels airy, jiggles slightly, and has grown by about 40 to 50 percent in volume. (Note: Total bulk fermentation time will vary based on your kitchen’s temperature).
  5. Shape and coat: Turn the dough out onto a bare counter. Using a bench scraper, gently shape it into a tight boule (round) or batard (oval), being careful not to tear the surface over the cheese cubes. On a small plate, mix the Parmesan cheese and garlic powder. Lightly mist the top of your shaped loaf with water and roll it gently through the Parmesan mixture.
  6. Cold retard: Dust a banneton basket with rice flour or semolina flour. Place the dough into the basket seam-side up. Cover tightly and refrigerate for 12 to 18 hours.
  7. Bake covered: Place a cast-iron Dutch oven (with the lid) into your oven and preheat to 475°F (245°C) for 1 hour. Turn the cold dough out onto a sheet of parchment paper. Score a single, deliberate slash slightly off-center using a bread lame or sharp razor. Carefully transfer the parchment and dough into the hot Dutch oven, cover with the lid, and bake for 20 minutes.
  8. Bake uncovered: Remove the lid and drop the oven temperature to 450°F (230°C). Continue baking for 20 to 25 minutes, or until the Parmesan crust is deeply browned and the internal temperature of the bread reaches 205°F (96°C).
  9. Cool completely: Transfer the loaf to a wire cooling rack. Allow it to cool for at least 2 to 3 hours before slicing to allow the crumb to set.
Find it on your board when it's time to cook

Notes

  • Why it works: Cubing the mozzarella instead of shredding it is the structural secret here. Shredded cheese melts entirely into the dough matrix as it bakes, which inhibits gluten and creates a dense, gummy loaf. Cubes stay localized, creating distinct pockets of melted cheese while allowing the surrounding bread to rise properly.
  • Hydration management: Pepperoni renders fat when baked. Because this dough is mixed at a slightly lower hydration (around 76% when accounting for the flour and water in the starter), it is sturdy enough to absorb that rendering oil without turning into a sloppy, flat mess. Always pat your pepperoni dry before laminating to help this process.

Nutrition (per serving — estimates)

Calories: 277 | Total Carbs: 36g (Fiber: 1g, Sugar: 1g) | Fat: 9g (Saturated: 4g) | Protein: 13g

Nutritional values are approximate, based on standard reference data (USDA FoodData Central). Actual values vary by brand and exact measurements. For precision, use a tracker like MyFitnessPal or Cronometer.

  • Prep Time: 30 minutes
  • Resting Time: 18 to 27 hours (varies by temperature)
  • Cook Time: 45 minutes
  • Category: Bread
  • Method: Baking
  • Cuisine: American

Nutrition

  • Serving Size: 1 slice
  • Calories: 277
  • Sugar: 1g
  • Fat: 9g
  • Saturated Fat: 4g
  • Carbohydrates: 36g
  • Fiber: 1g
  • Protein: 13g